Introduction and Disclaimer
September 12, 2025
I originally wrote the notes for this article over a year ago, to remind myself how to quickly spin up a Linux Container (LXC) in Proxmox. I have spoken to some people who were interested in this information so I thought it might be a good time to post it. I am not a Proxmox or linux expert so YMMV (Your Mileage May Vary) with this information. If you see something incorrect, or have suggestions to improve this post, drop me a line. It is possible some of the information or screenshots may have changed from the time I wrote the notes, to posting this article.
References and Shout-Outs
Check out Ben Heater’s blog for a treasure trove of information. He was the one who inspired me to create a HomeLab (Cyberrange) first with VMware, and then Proxmox. I also adapted some information from this blog post as well.
What is a Linux Container? (LXC)
A linux container (LXC) is a lightweight, isolated runtime environment that packages an application together with everything it needs to run—its code, libraries, dependencies, and configuration—while sharing the host operating system’s kernel. Containers achieve isolation through kernel‑level features such as cgroups (control groups) and namespaces, which limit a process’s view of system resources (CPU, memory, network, filesystem, etc.) and keep it separate from other containers.
What is the difference between a LXC and Virtual Machine?
A container is like a tightly packed suitcase that carries just the app and its belongings, riding on the host’s existing “car” (the kernel). A virtual machine is like a whole separate car with its own engine (kernel) and interior, which makes it heavier and slower to start but gives you complete independence from the host.
Why create a template?
Forgive me, but I’ve been playing around with lumo (Proton’s privacy focused LLM), and this is what it had to say:
A Proxmox LXC template gives you speed, consistency, storage efficiency, and operational simplicity. By investing a few minutes to build a solid template once, you reap huge time‑savings and reliability gains every time you launch—or re‑launch—a Linux container.
Let’s get started!
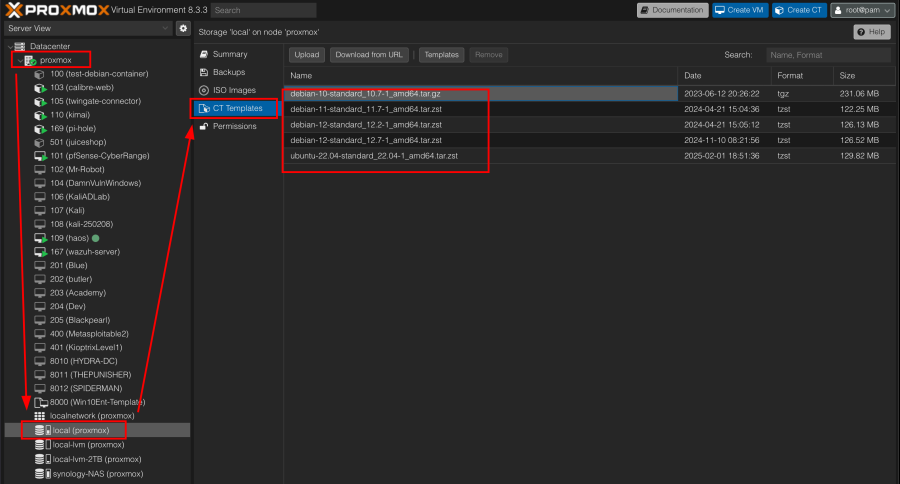
To get started deploying a container you first need to find out if you have a suitable template. In the Server View list select your host and then select the storage that you use to store your container templates. In my case it’s called local and I already have the Debian 12 container I want to deploy.

In this case, I only see a CT Template for Debian 10. At the time of this writing, I required Debian 11 or 12 to create a Juice Shop Docker container (that will be another post).
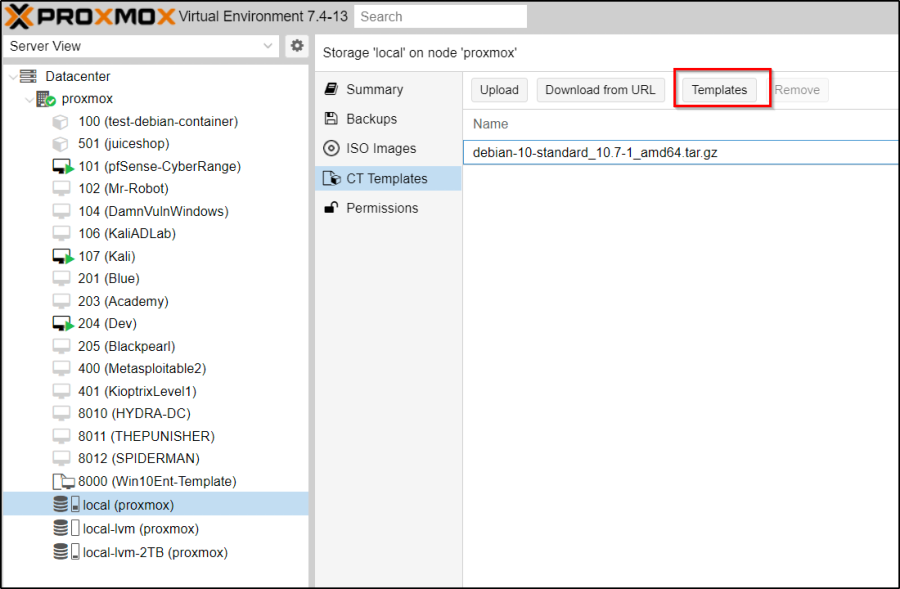
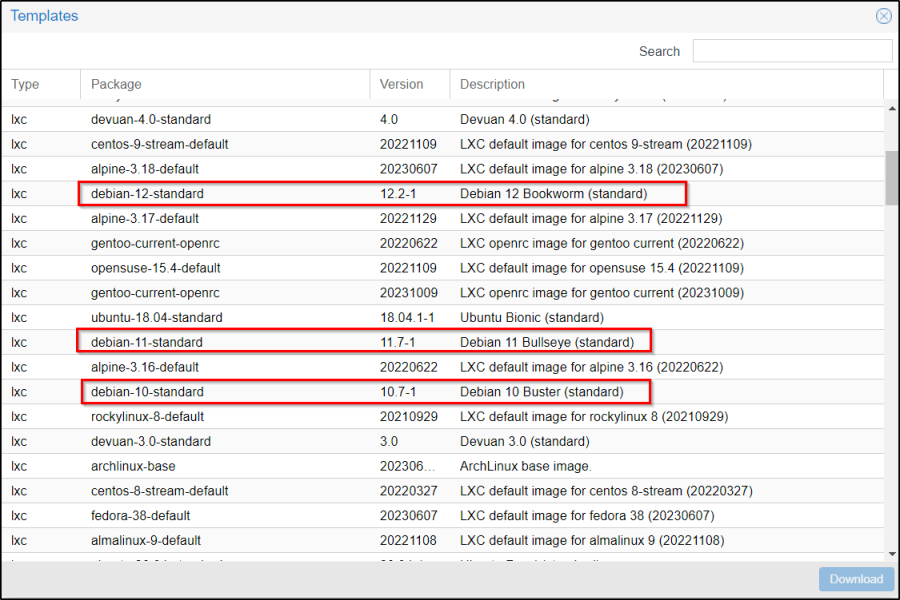
If you don’t already have a template the easiest way to get one is to click the Templates button and pick from the list.
There are maybe a hundred or so templates listed by default. The system templates are usually at the top and these usually represent reduced Linux distributions; all the big names are there. Further down you’ll find additional turnkey Linux containers, these are container preconfigured with certain applications already installed so a bit like a Docker container. Unlike a Docker container though these usually are aimed at solving a particular problem rather than providing a particular application.
Creating Containers
You can click the Create CT button in the top-right. Or, you can right-click the Proxmox node and click Create CT.

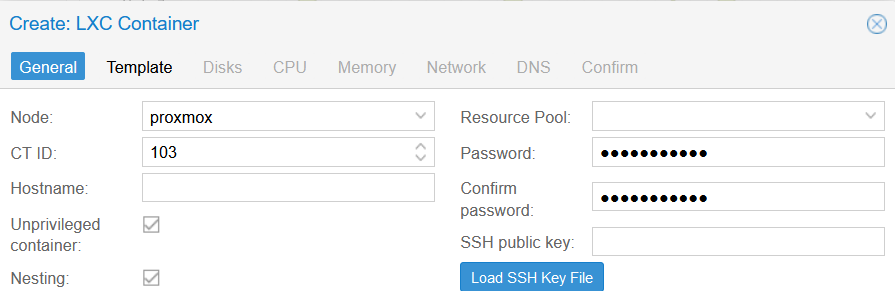
- Node: The target Proxmox node
- CT ID: The numerical container ID
- Hostname: The friendly name of the container
- Unprivileged Container: You should almost always use unprivileged containers
- Resource Pool: Ignore this
- Password: Use this password to login and SSH ** this is required ** Default HM or kali **
- SSH public key: You can paste your SSH public key (you can use along with password)
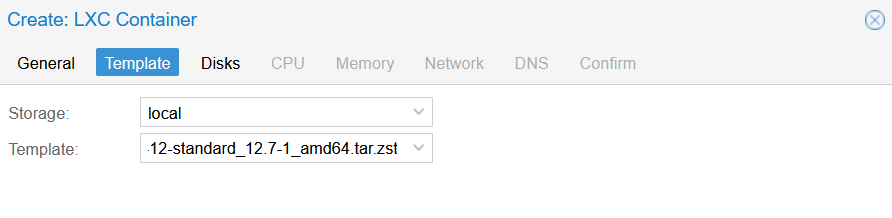
- Storage: Remember container templates are stored in local
- Template: Choose any of the templates you have already downloaded

- Specify the number of CPU cores. Typically 1 core will suffice.
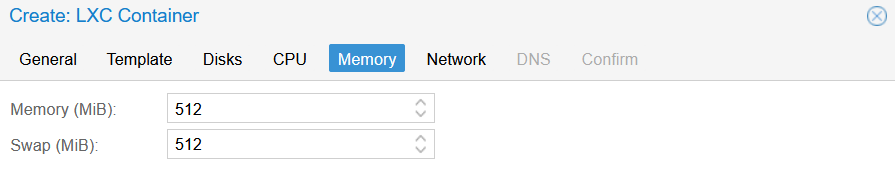
- Specify the Memory and Swap. Depending on the application, 512 – 1024 MiB will suffice.
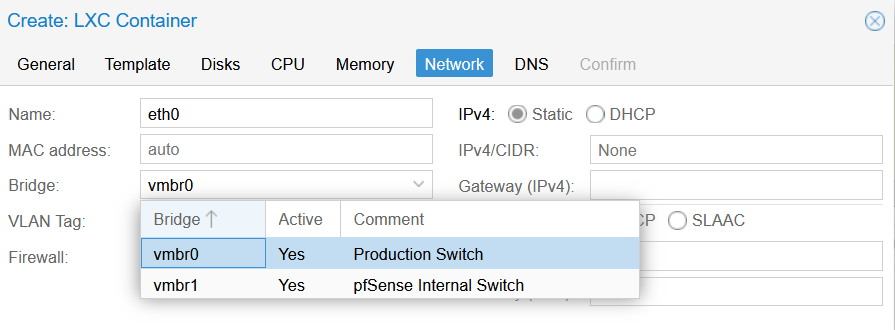
- Name: Name of the interface. eth0 is fine.
- MAC address: Leave at auto unless you want to specify otherwise
- Bridge: In my environment, use vmbr0 for accessibility within the internal and external network, and vmbr1 for accessibility within the cyber range where access is determined by pfSense
- VLAN Tag: This is used to determine the subnet within the Cyber Range (vmbr1)
- Rate limit (MB/s): You can ignore this
- Firewall: Uncheck this, unless you are using Proxmox’s internal firewall.
- IPv4: Set to DHCP
- IPv6: Set to Static and leave at None

- DNS domain: Leave empty unless desired otherwise
- DNS servers: Leave empty unless desired otherwise
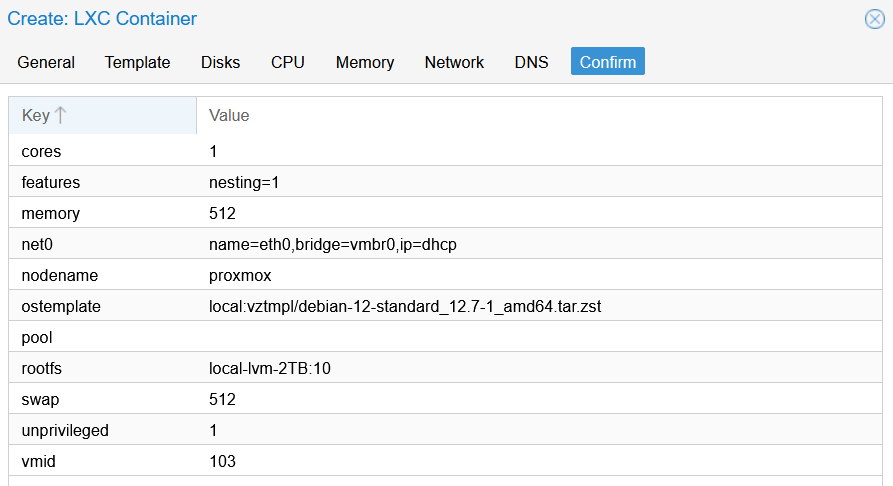
- Confirm settings and finish
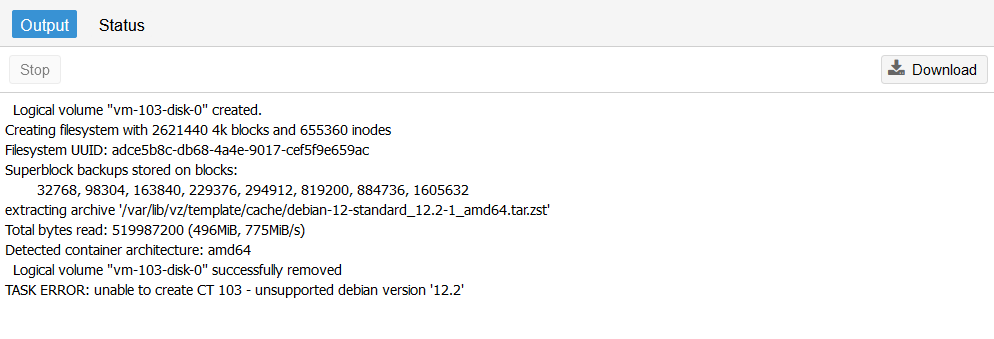 NOTE: If you are running an older version of Proxmox ie. 7.x, you might encounter an error with Debian 12 (see above). Upgrading from Proxmox 7.x to 8.x will solve that. Debian 10 and 11 work fine with Proxmox 7.x.
To review what Templates you have installed, go to your “local (proxmox)” partition (or elsewhere, depending on your configuration), and click on CT Templates. Enjoy!