Post Installation Tweaks
Although my intitial impression has been extremely positive, I was not happy with the built-in console (noVNC and SPICE), which might be suitable for quick access, but not a prolonged session.
Some tweaks in this section include:
- Remote access to your Kali VM
- Issue: Static Routing
- Adding a second SSD/HD to store VMs
NoVNC, Spice, Ugh
Now that you have your HomeLab set up with your Kali attack box, and a couple of isolated vulnerable VMs, let’s improve the user experience while accessing Kali.
Proxmox provides a couple of convenient options to access your VMs through a built-in Console. NoVNC is available by default, and SPICE is available if you install a driver and/or viewer, depending on your setup. SPICE is accessible through a separate viewer window, which is nice; however, I only had intermittent access to a shared clipboard, and file sharing never worked. Searching the forums was not particularly helpful. Lack of copy/paste functionality between my local machine and VM is hard stop for me.
Fortunately, 0xBEN mentioned an awesome (and free) Remote Desktop app called NoMachine. It works as a client-server model, requiring an application to be installed on each end. My initial limited experience has been excellent, with clear, fast access to my VMs, with a shared clipboard.
Here is how I got it going on my setup.
Basic Steps
- Test access to Kali VM
- Enable static routing
- Install NoMachine on Kali
- Install NoMachine on your local machine
- Optimize screen resolution
That’s it!
Test Access to Kali VM
I was not able to access my Kali VM (IP: 10.0.0.10) from my local machine. A ping would result in persistent timeouts. As I had suspected, this was a result of an issue with asymmetric routing, which 0xBEN writes about in his blog post. His post even includes a link to an excellent explanation of the phenomenon.
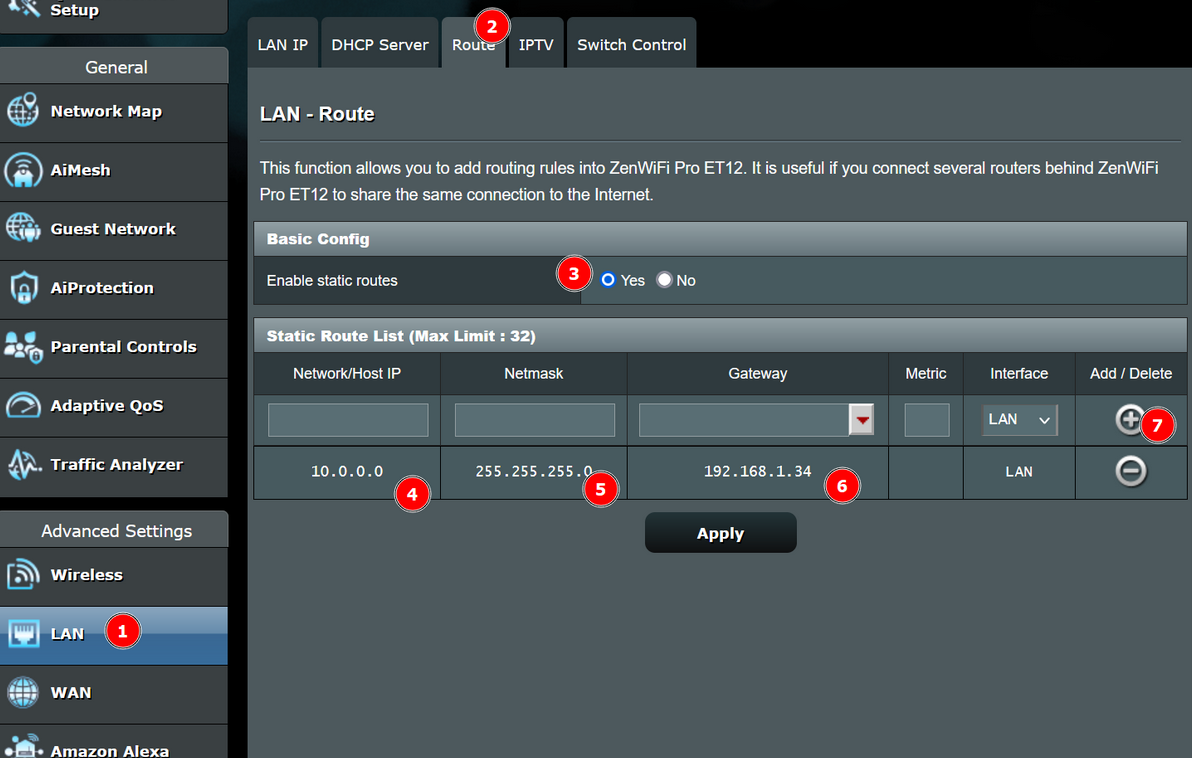
Enable Static Routing - ASUS Router
As 0xBEN pointed out, a static route is not required on the pfSense VM side since its routing tables are set correctly.
However, we need to inform the router on our home network of our desired static route to the LAN behind pfSense. I have an ASUS router, so this worked for me. This may be different for your setup. This is a link to ASUS' FAQ:
The Basic Steps:
- Log into the router
- Navigate to LAN | Route
- Enable Static Routes
- Enter your Static Route information
- Destination: 10.0.0.0/24
- Netmask of 24 = 255.255.255.0
- Gateway: pfSense QAN IP address
- My static IP: 192.168.1.34
- Hit Apply
- Destination: 10.0.0.0/24
- Ping your Kali VM
Install NoMachine on Kali VM
I found a useful how-to here.
My experience did not deviate from this post.
Install NoMachine on Local Machine
I downloaded and installed the application on my local Windows 11 machine. It exhibited some odd behaviours during the installation process, throwing up some odd errors (missing DLLs and other files) but I left it alone, rebooted, and it seemed to install successfully.
If you need any assistance, you can access their knowledge base here.
Initial Experience - The good, the bad, and the blurry.
It works as advertised - it is fast and it supports a shared clipboard out of the box. Excellent.
My only complaint was a blurry display, despite playing with different virtual graphics cards (VM Hardware settings), resolutions (VM and remote displays), and NoMachines different display options. This is a known issue and fortunately a forum post helped solve this.
This worked for me:
- Right-click the NoMachine User Interface (NoMachine app) shortcut on your desktop and select Properties
- NOTE: must right-click the shortcut on the desktop, not task bar
- Select the Compatibility tab
- Click “Change high DPI settings”
- Check the box “Override high DPI scaling behavior”
- Select “Application” from the combo under “Scaling performed by”
Lastly, a suggestion regarding the optimal display options in NoMachine - this is particularly important if you will access the Kali VM from different local machines:
Open the Display menu bar and verify that “Scale to window” is NOT selected, because that is generally the reason why you see some stretching.

You should select “Enable viewport mode” and choose in Display settings the same resolution of your client display, so when going fullscreen you’ll have a perfect 1:1 ratio.
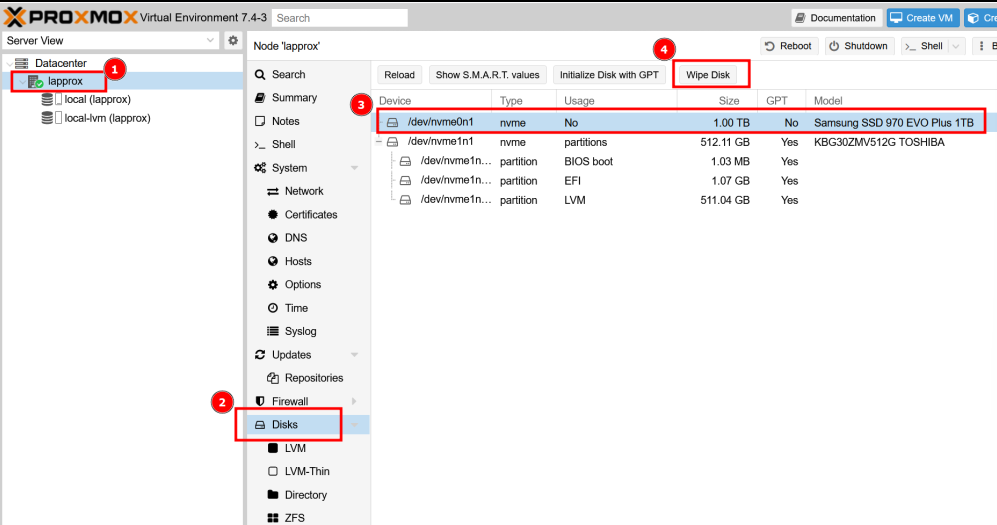
Adding A Second SSD
My initial installation used the 500 GB SSD. I want to use the 1 TB SSD to store VMs.
Wipe the 1 TB SSD
Create LVN-thin storage
- provides more features than a simple directory storage
- navigate to LVM-thin, then click ‘Create Thinpool’
- Then enter a name for your new pool and wait until the creation has finished
- Cannot have numbers or symbols
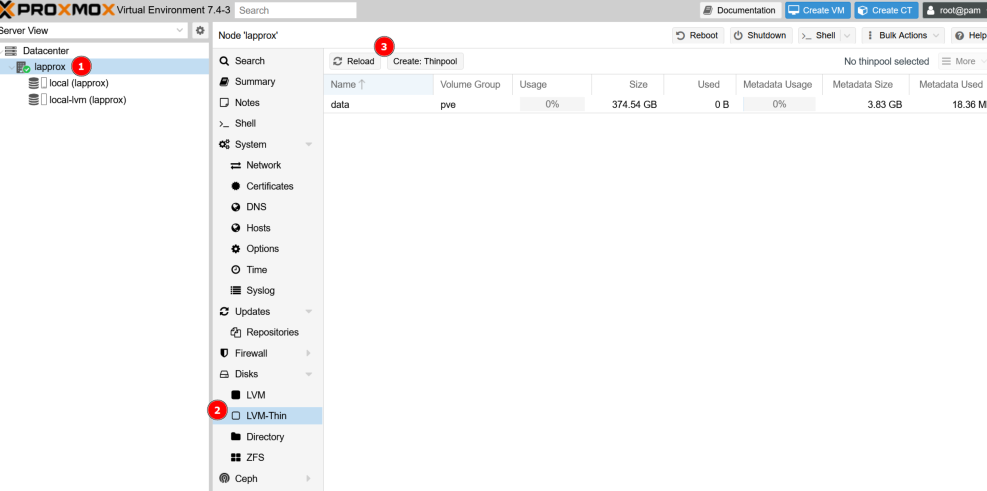
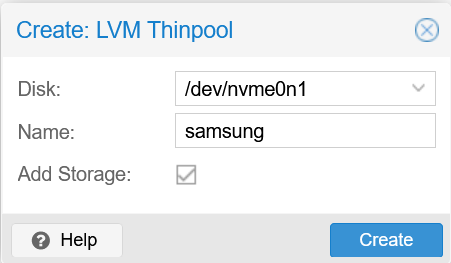
- it should now be added to the pool!

Happy Hacking!
Thanks again to 0xBEN for telling me about NoMachine - this is a game changer, and I hope this improves your user experience as well.