Install and Configure Windows Server 2019/2022
Before we can install the Domain Controller, the Network should have been properly staged, and it is recommended that the VirtIO Drivers have been downloaded (and uploaded to Proxmox) already.
This is a summary of the steps involved:
(In this Post)
- Create a VM in Proxmox
- Don’t Start the VM Yet - Verify the Boot Order
- Installing Windows Server 2019
- Take a Snapshot of the VM
- Configure Domain Services
- Installing the Domain Controller
- Configure Active Directory Domain Services
- Configure DNS Forwarders
- Add and Configure a DHCP Server
- Install Certification Services
(Subsequent Posts)
- Install and Configure Windows 10 Enterprise Clients
- Setting Up Users, Groups and Policies
- Joining Our Machines to the Domain
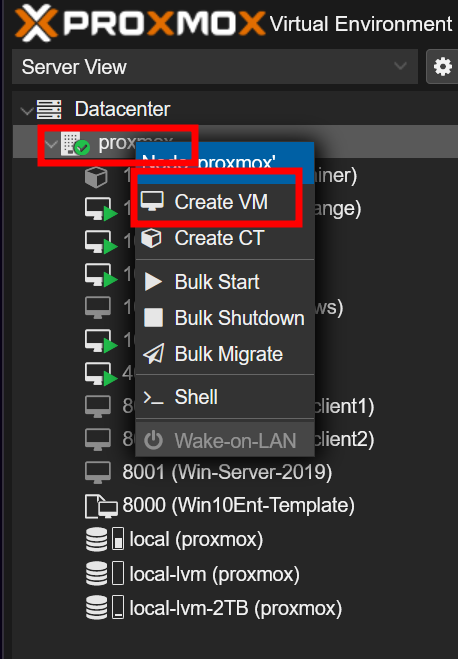
Create a VM in Proxmox
Right-Click proxmox > Create VM
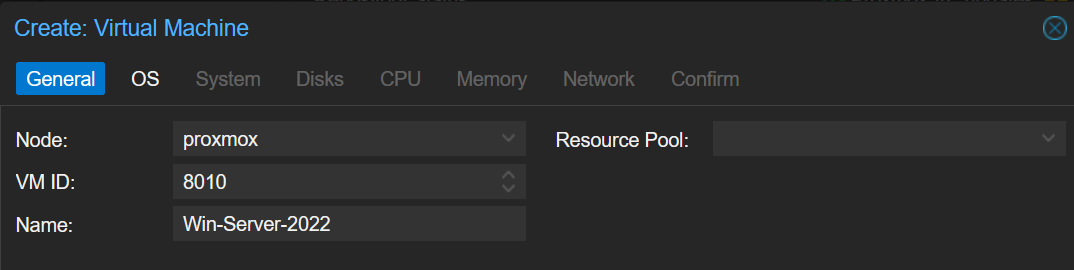
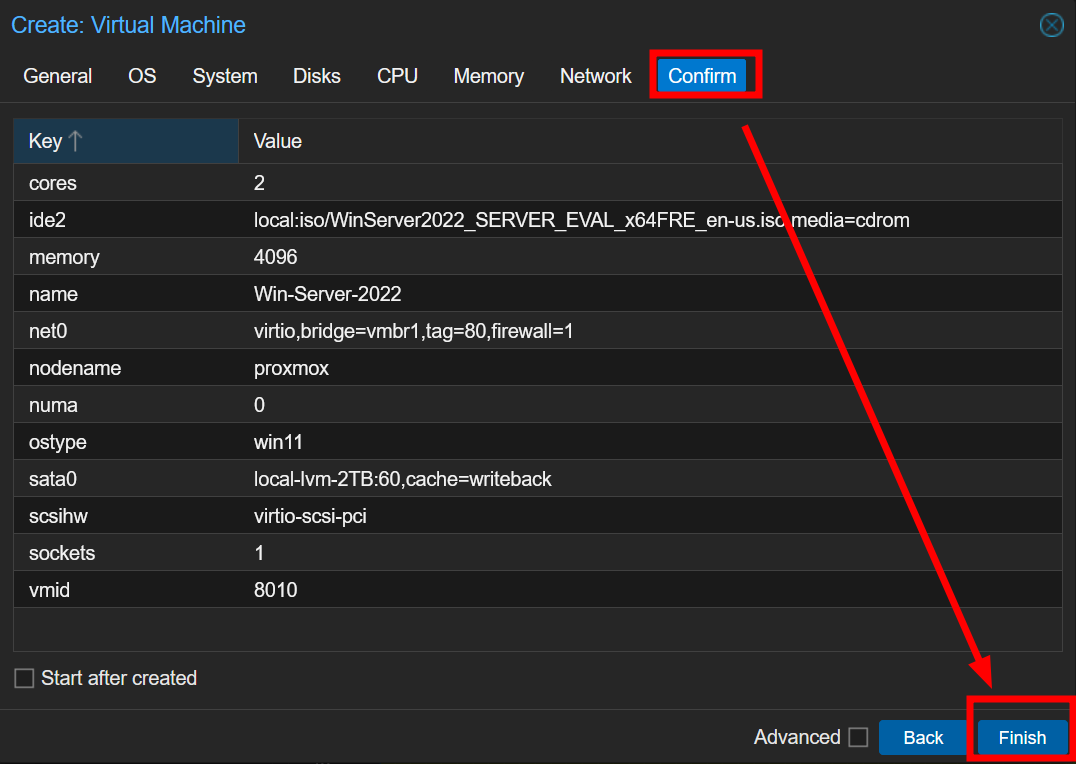
General
- Your VM number can be constomized to your local environment
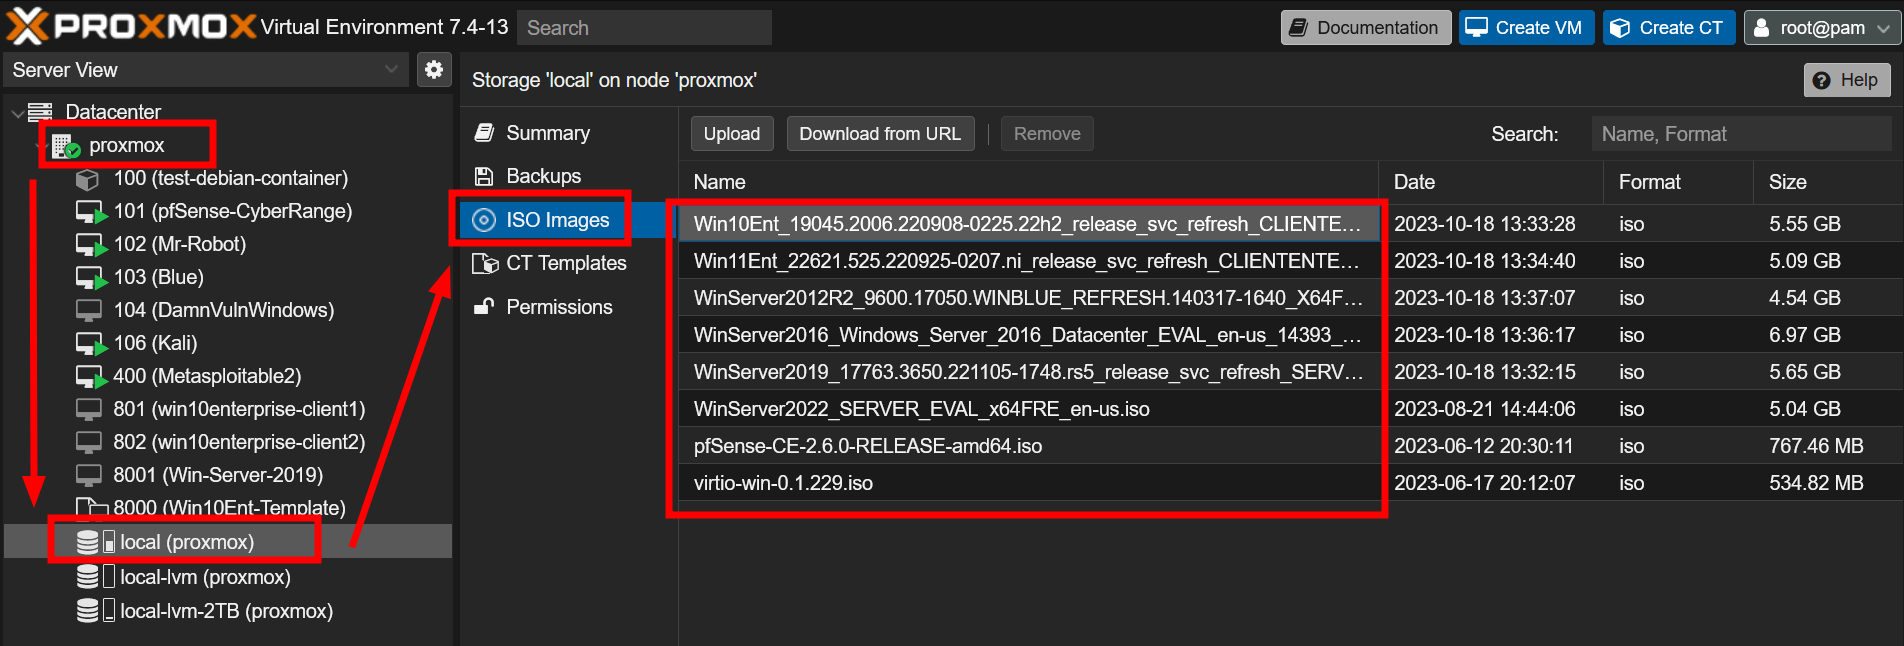
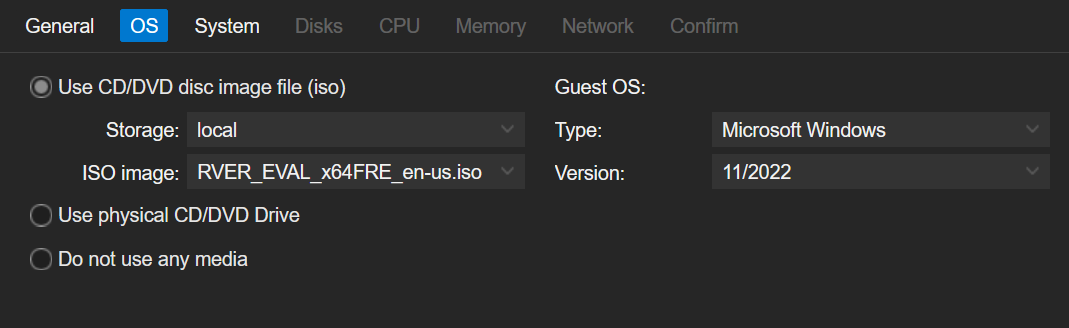
OS
- My storage location is called local, yours might be ISO or whatever you named it
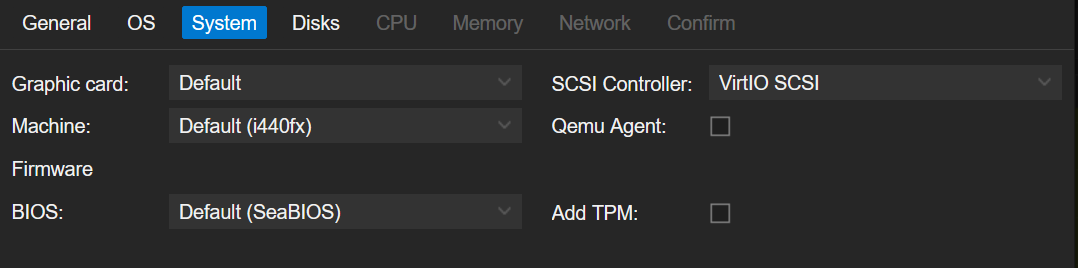
System
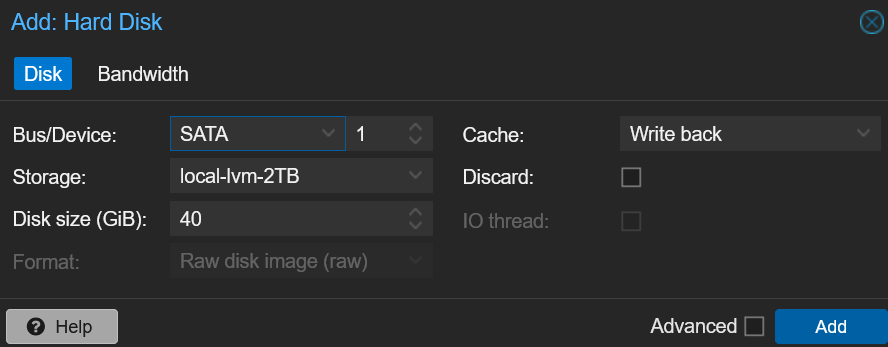
Disks
- I have run a Domain Controller with 40 gigs; TCM recommended 60 gigs
- My Virtual Machines are stored on local-lvm-2TB, your location may differ
CPU

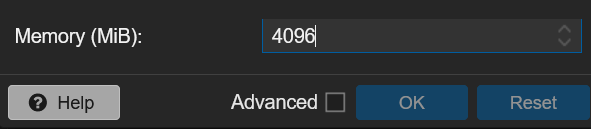
Memory
- TCM recommended starting with 8 gigs (8102 MB) while building out the DC, then decrease to 4 gigs if you have limited resources; I have run mine on 4 gigs (4096 MB) without issue
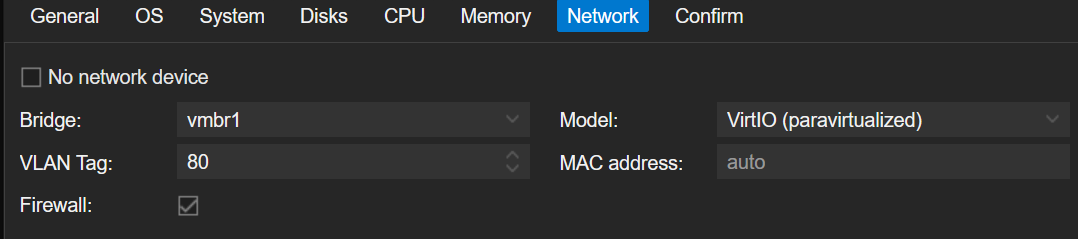
Network
- vmbr1 is the pfSense bridge/switch
- Our VLAN Tag is 80
Confirm > Finish
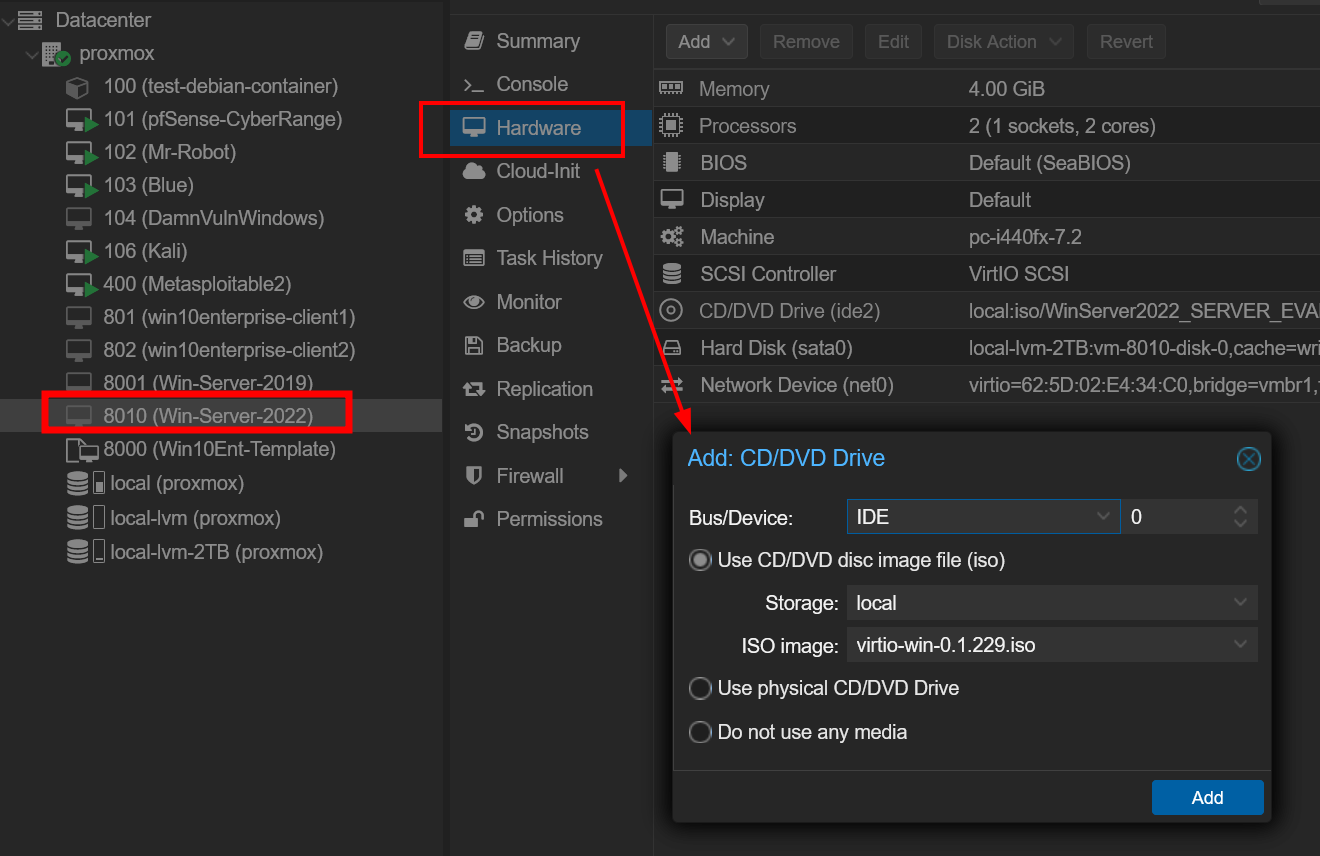
Drivers Disc
- Add another CD/DVD drive to your VM and load the VirtIO drivers disc
- In my case, my ISOs are stoed in my local storage
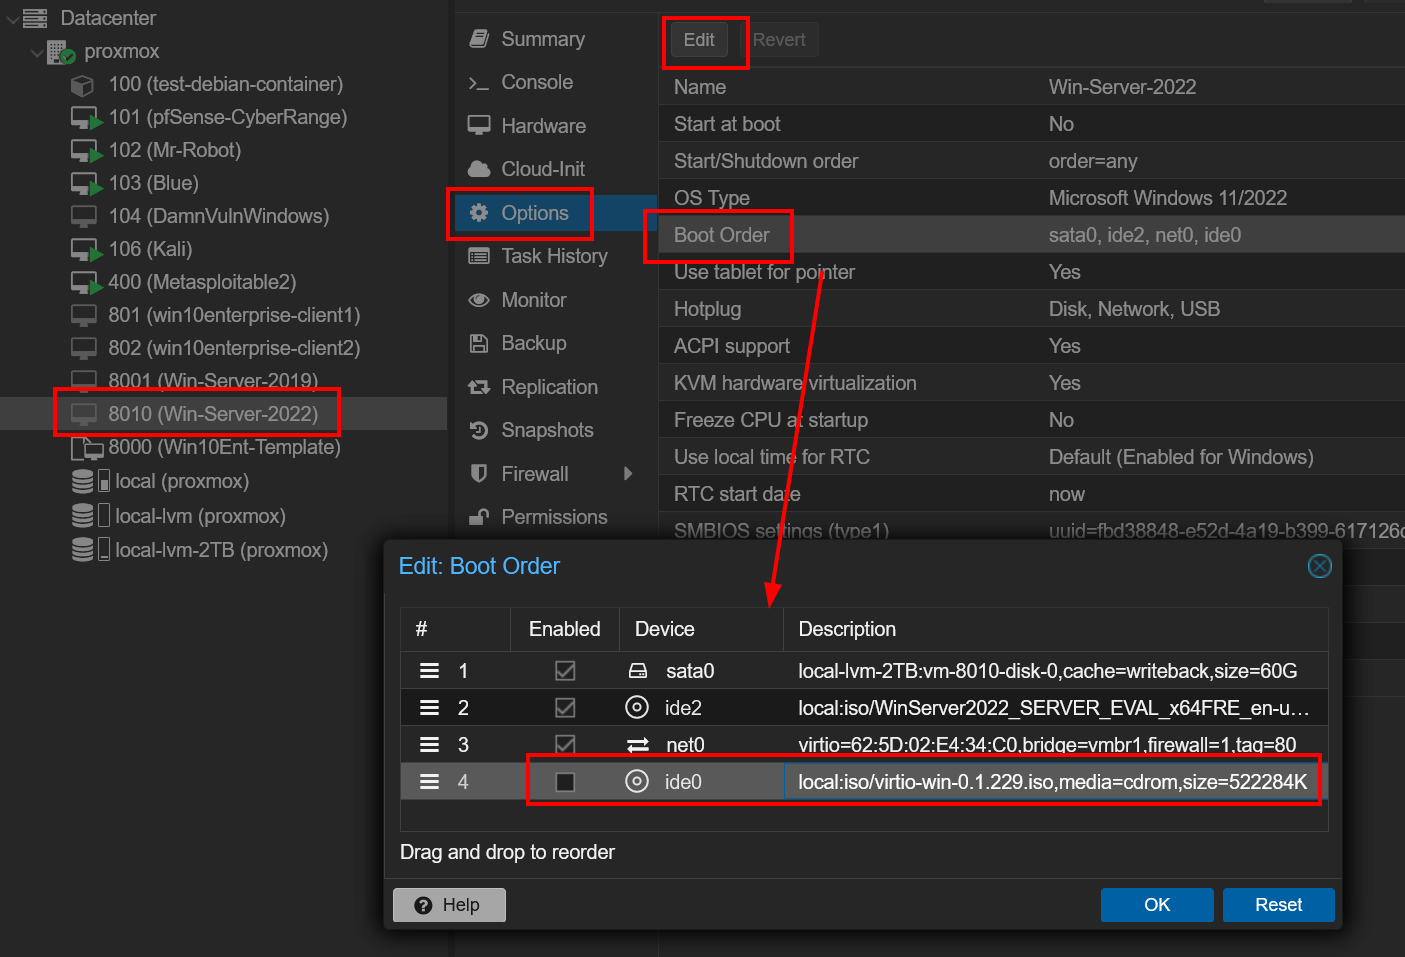
Don’t Start the VM Yet - Verify the Boot Order
- Ensure the VirtIO drivers disc is unchecked
- Note: if in VMware or VirtualBox, make sure the floppy drive is disabled before booting
- Win-Server-2022 > Options > Boot Order > Edit
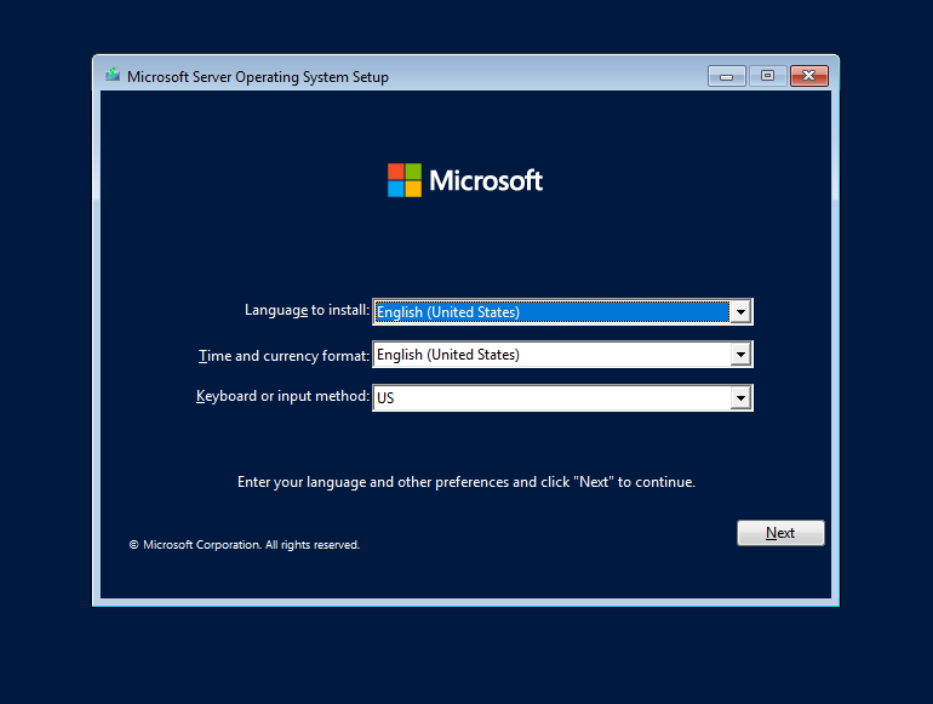
Installing Windows Server 2019
- Start the VM and go to the Console

Choose your language and click Next
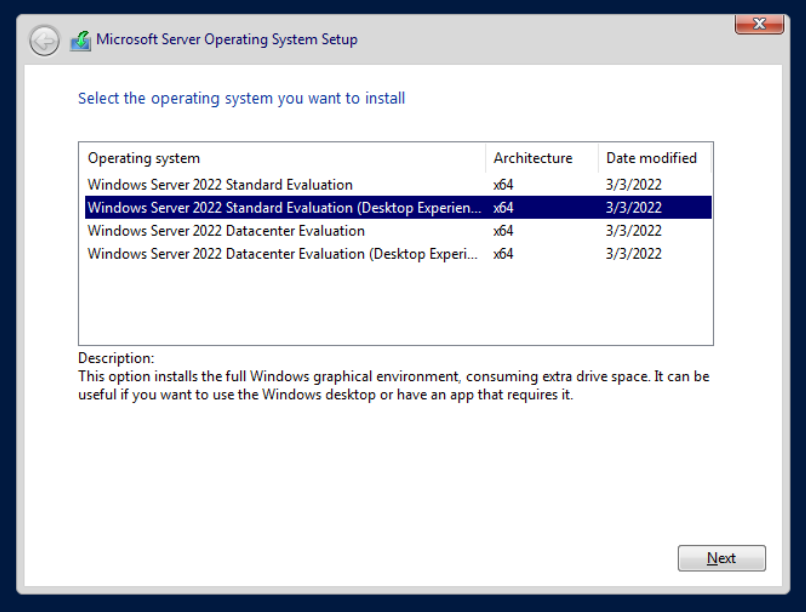
Choose Install Now and choose Windows Server 2022 Standard Evaluation (Desktop Experience)
Accept the terms and conditions.
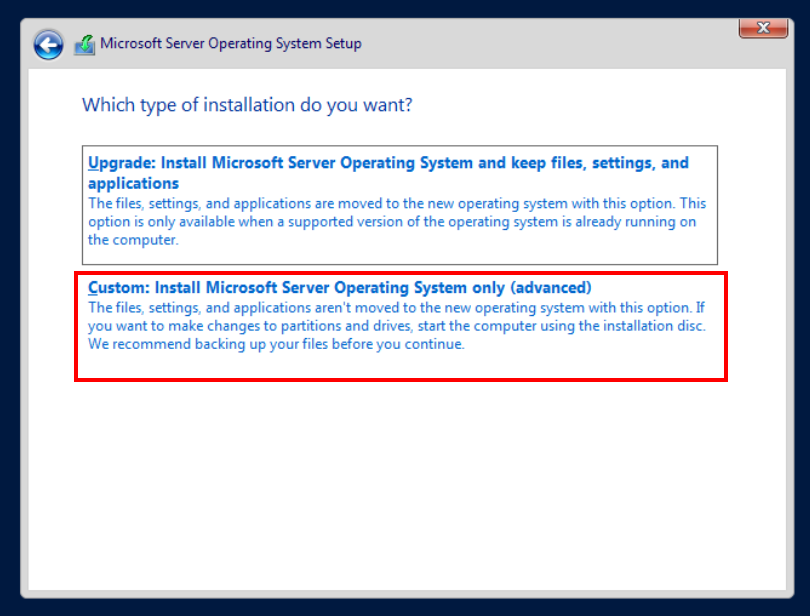
Choose Custom: Install Microsoft Server Operating System only (advanced)
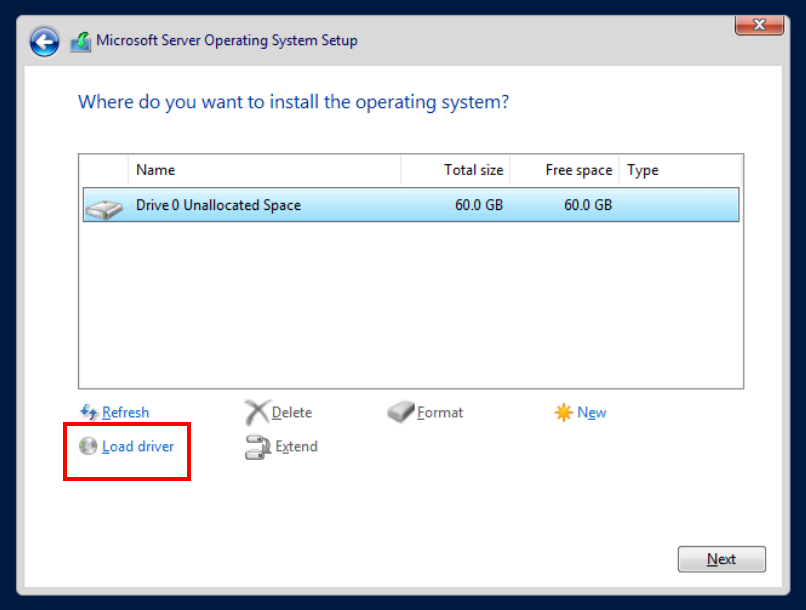
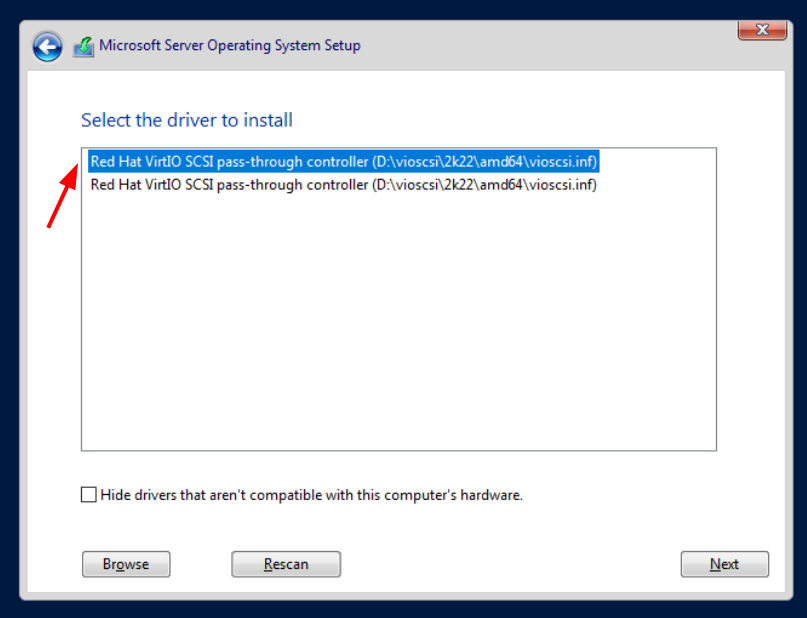
Load the SCSI Driver
-
Choose Load Driver
-
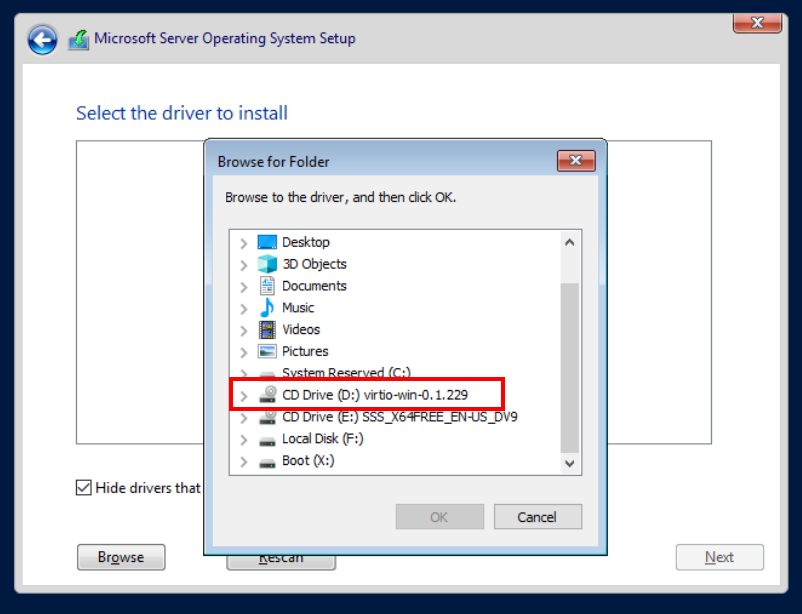
Click Browse, expand the virtio-win driver ISO
-
Navigate to vioscsi > 2k22 > amd64
-
Uncheck Hide drivers that aren’t compatible with this computer’s hardware otherwise you won’t see the RedHat drivers
-
Choose this driver (I see two copies of the same driver)
-
Click Next and wait for it to finish loading.
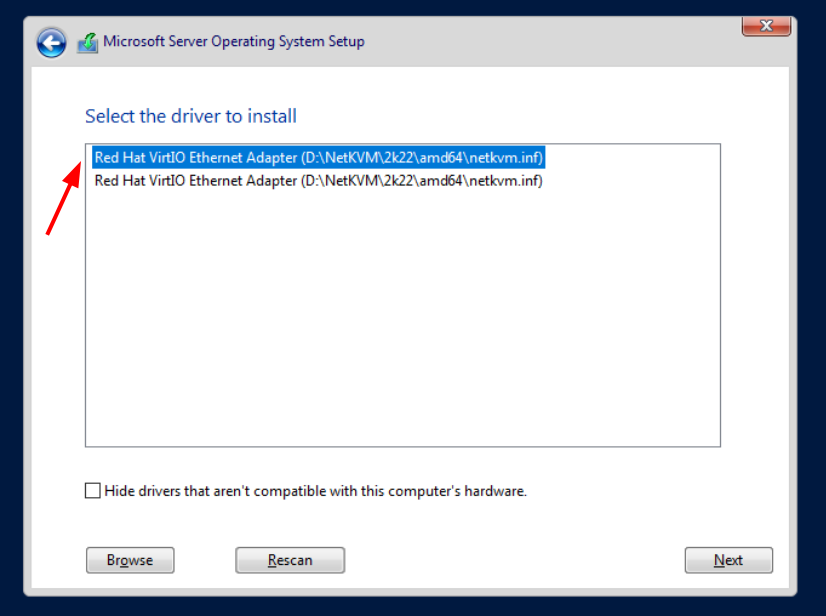
Load the Network Driver
- Choose Load Driver
- Click Browse, expand the virtio-win driver ISO
- Navigate to NetKVM > 2k22 > amd64
- Uncheck Hide drivers that aren’t compatible with this computer’s hardware otherwise you won’t see the RedHat drivers
- Choose this driver (I see two copies of the same driver)
- Click Next and wait for it to finish loading.
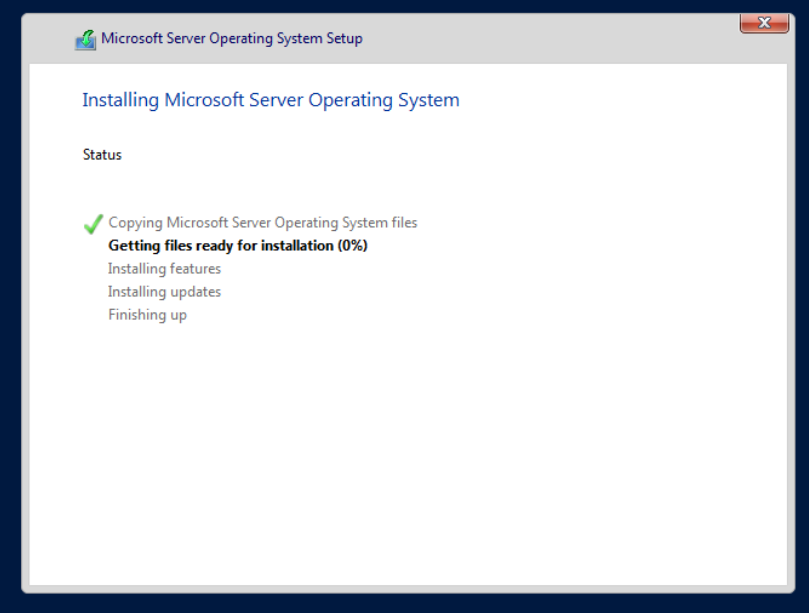
Finish the Installation
- Click Next and wait for the installation to finish.
- It will automatically reboot.
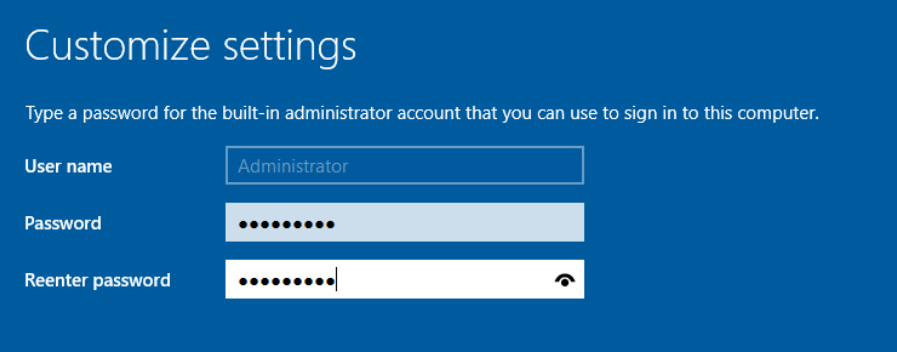
Create an Administrator Password
- Once the installation is finished, set the local administrator password and save it. You could put it in a password manager, or you can put it in the Notes field of the VM (that’s a cool feature of Proxmox)
- TCM Course: P@$$w0rd!
Configure the Network Interface
NOTE: We disabled the DHCP service on pfSense for the AD Lab LAN, because we want the domain controller to act as the DHCP server. Therefore, the domain controller will not be automatically configured and we will have to set it up manually.
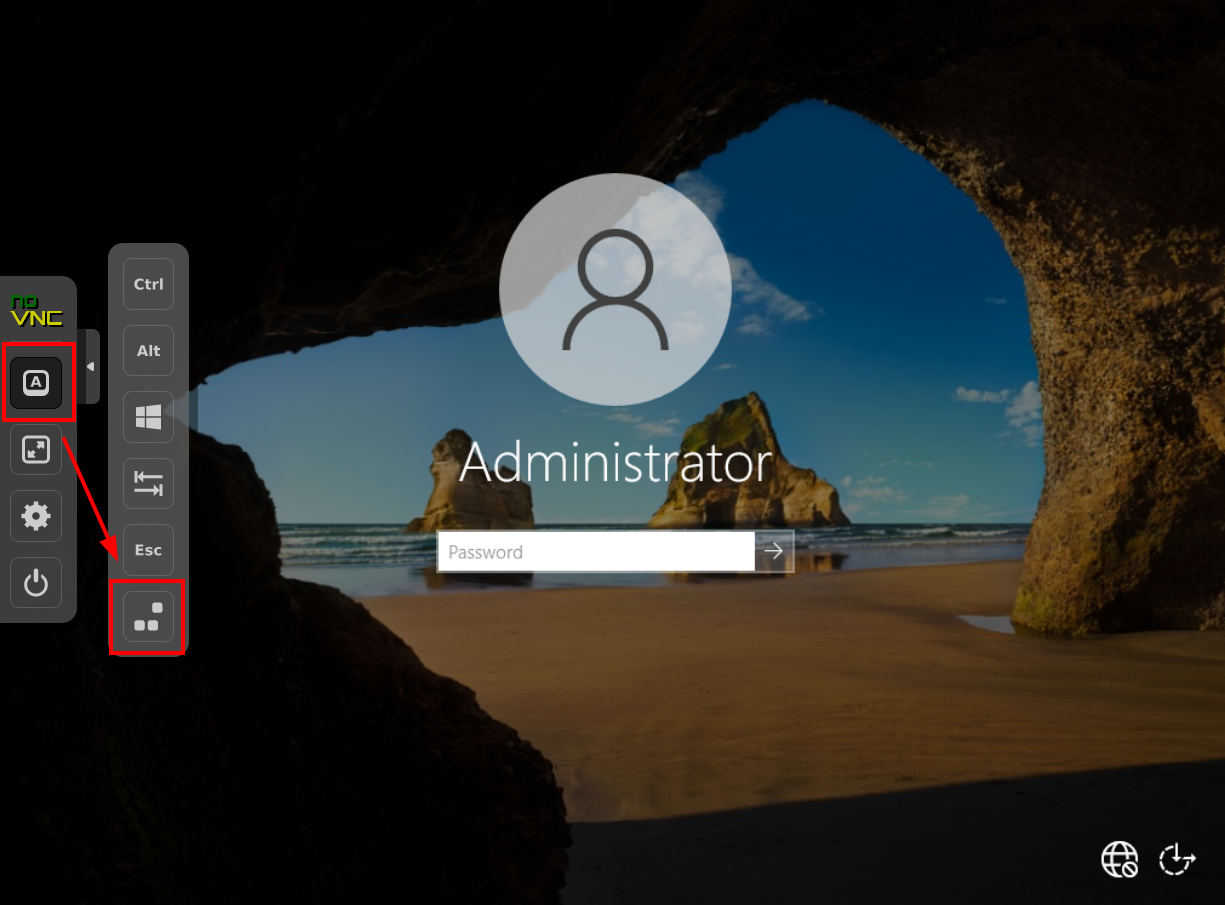
Login with your brand new Administrator account’s password.
-
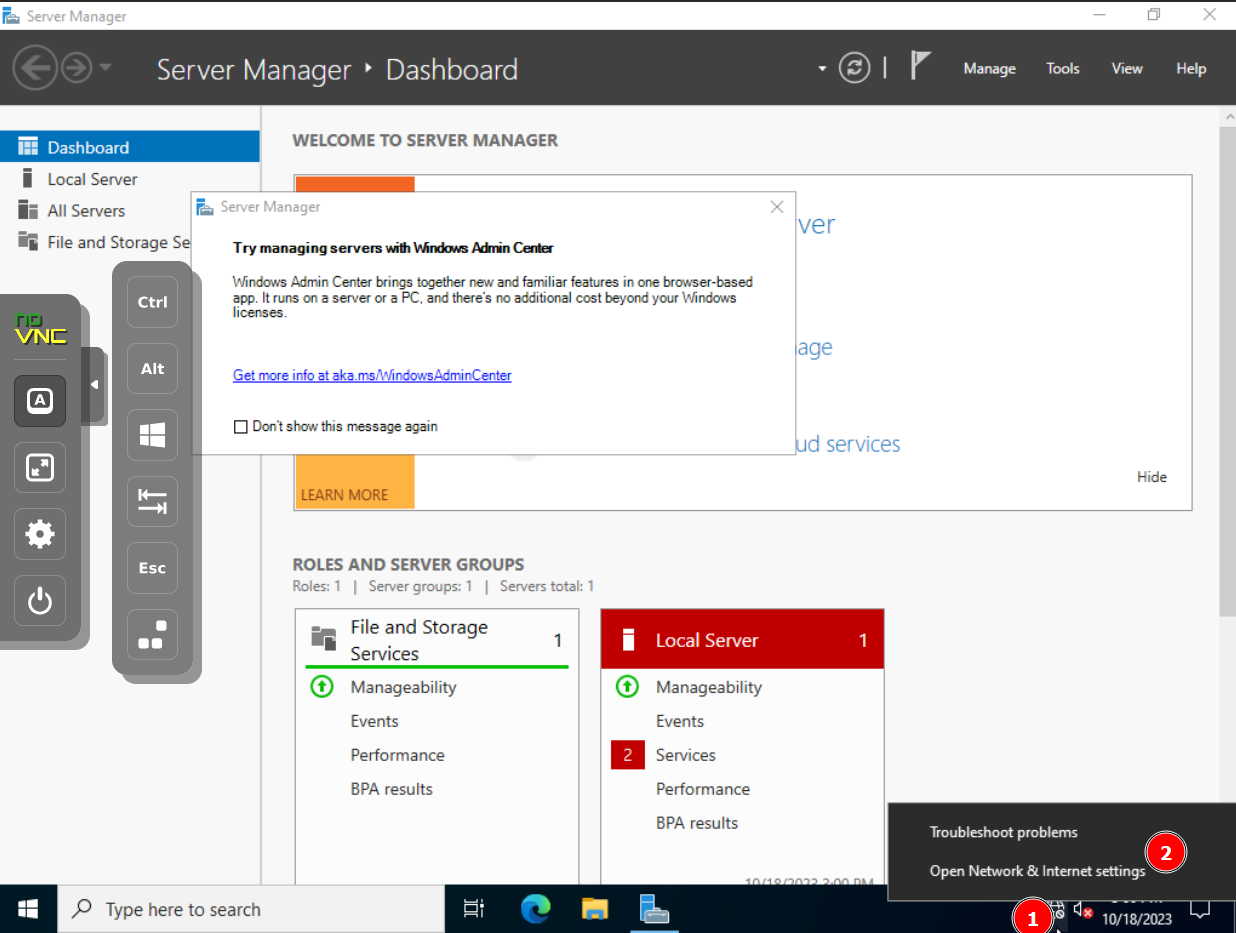
Right-click the network interface icon > Open Network & Internet Settings
-
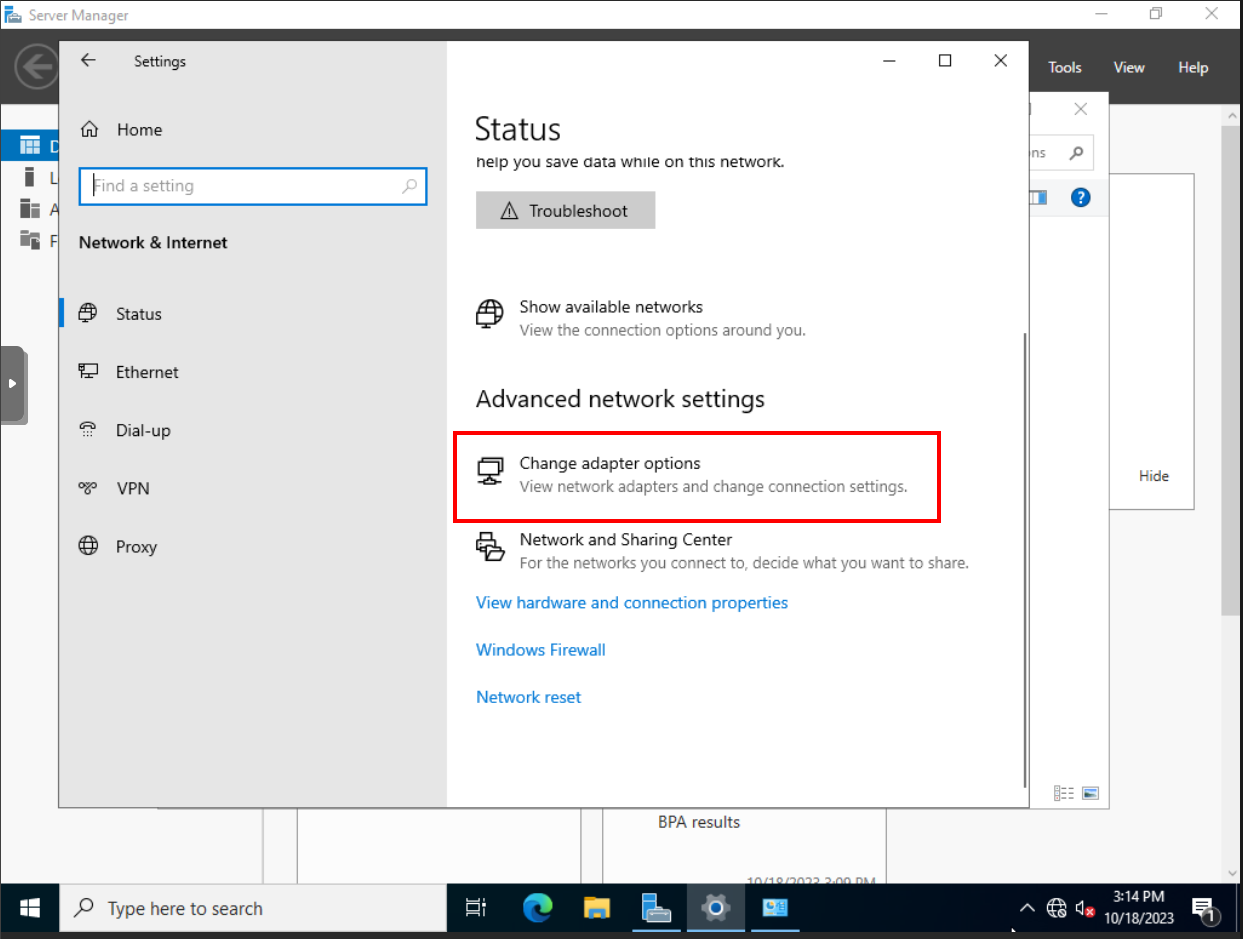
Scroll down and choose Change adapter options
-
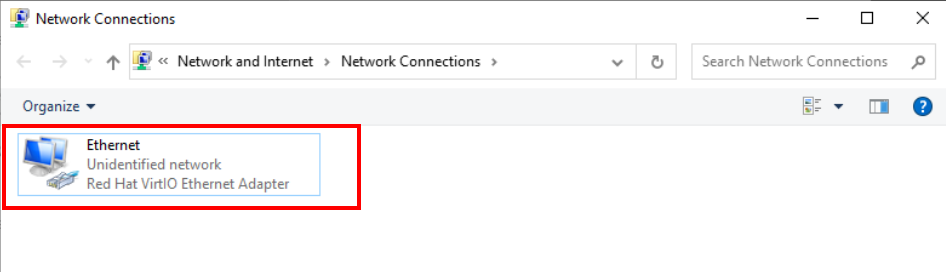
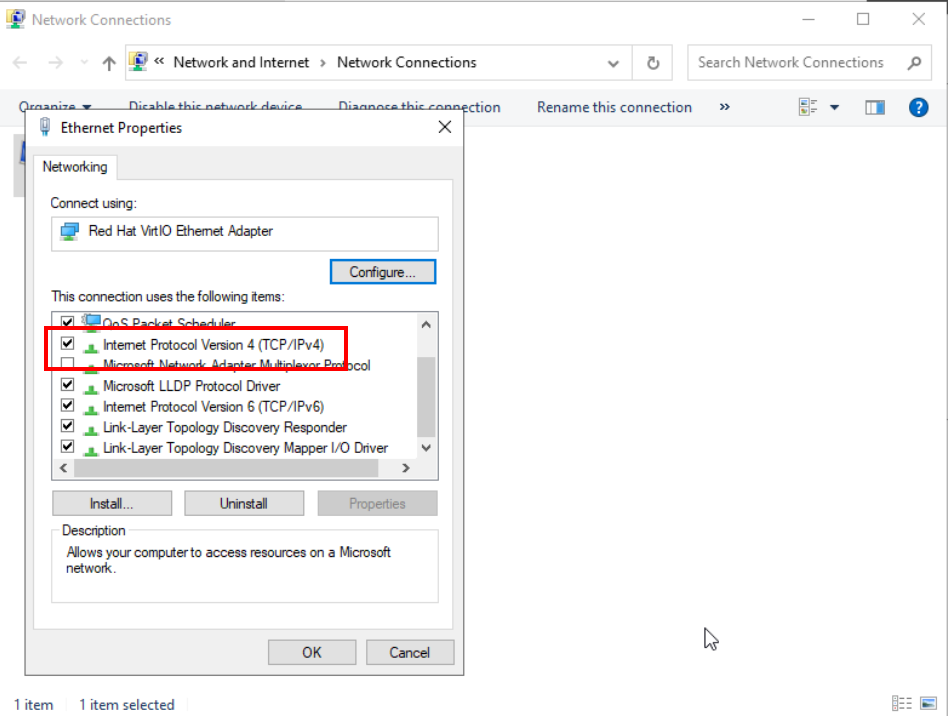
Right-click the adapter and choose Properties
-
Double-click Internet Protocol Version 4 (TCP/IPv4)
-
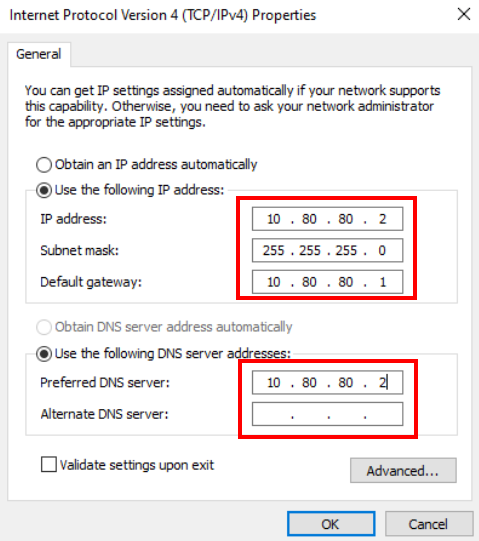
Configure your adapter as such:
Rename the Server
-
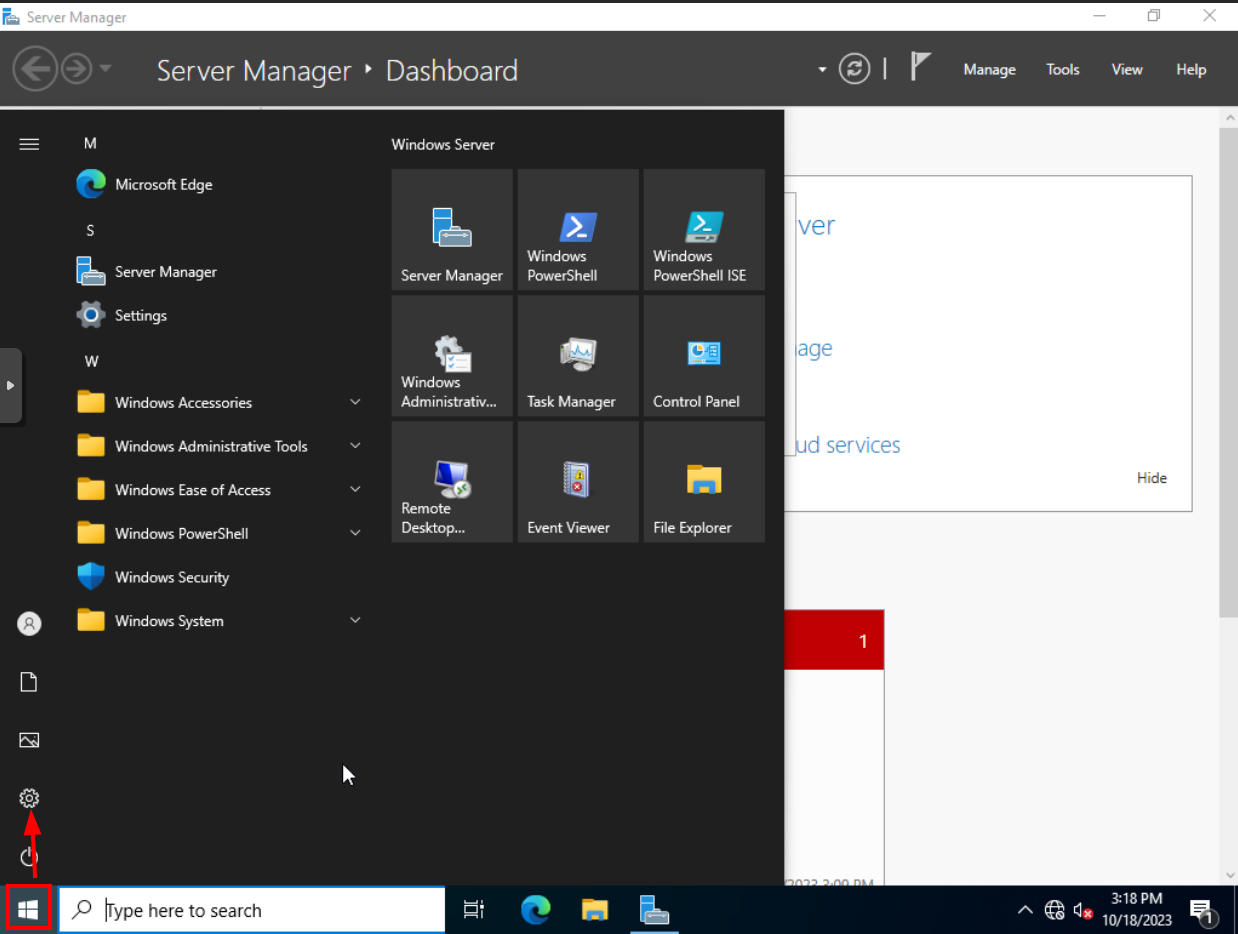
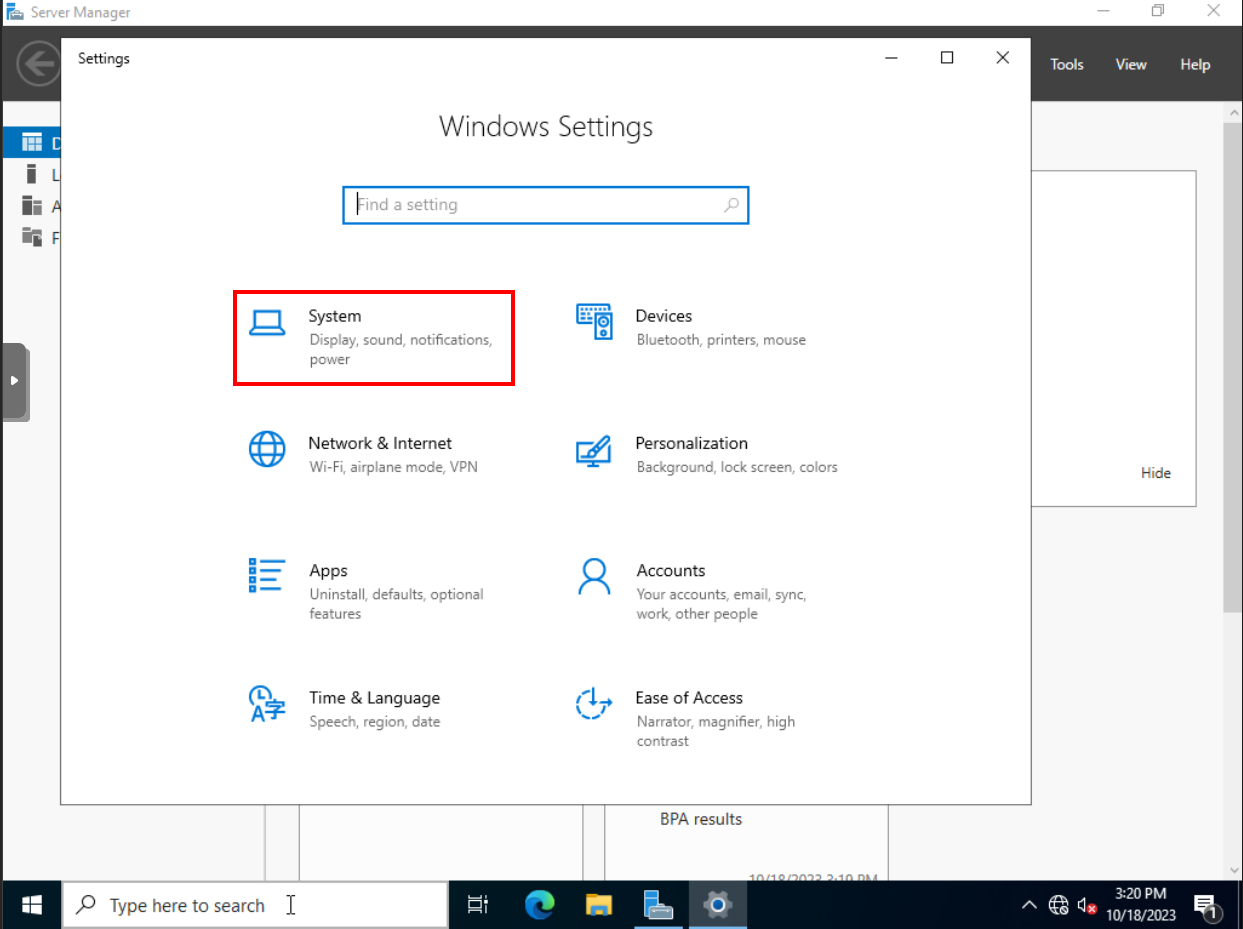
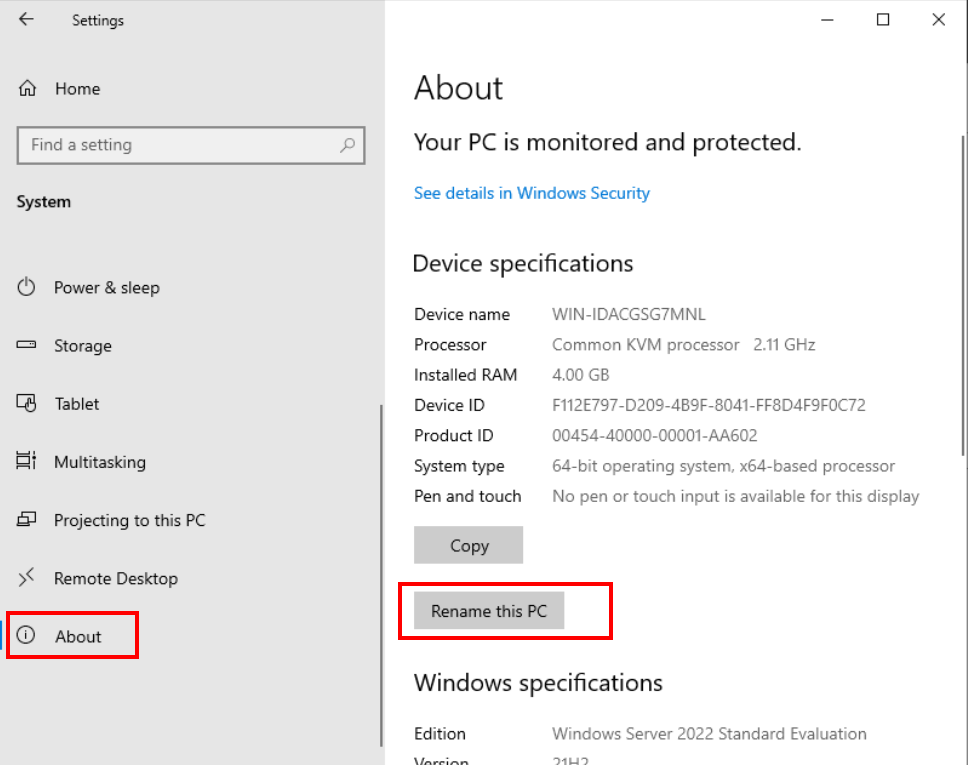
Open the Start Menu and click the Settings icon.
-
System > About > Rename this PC
-
Enter a name for your server
-
TCM will be building out the AD forest using a Marvel theme. Rename the DC to: HYDRA-DC

Choose Restart Now. Enter Other (planned) for the reason.
Take a Snapshot of the VM
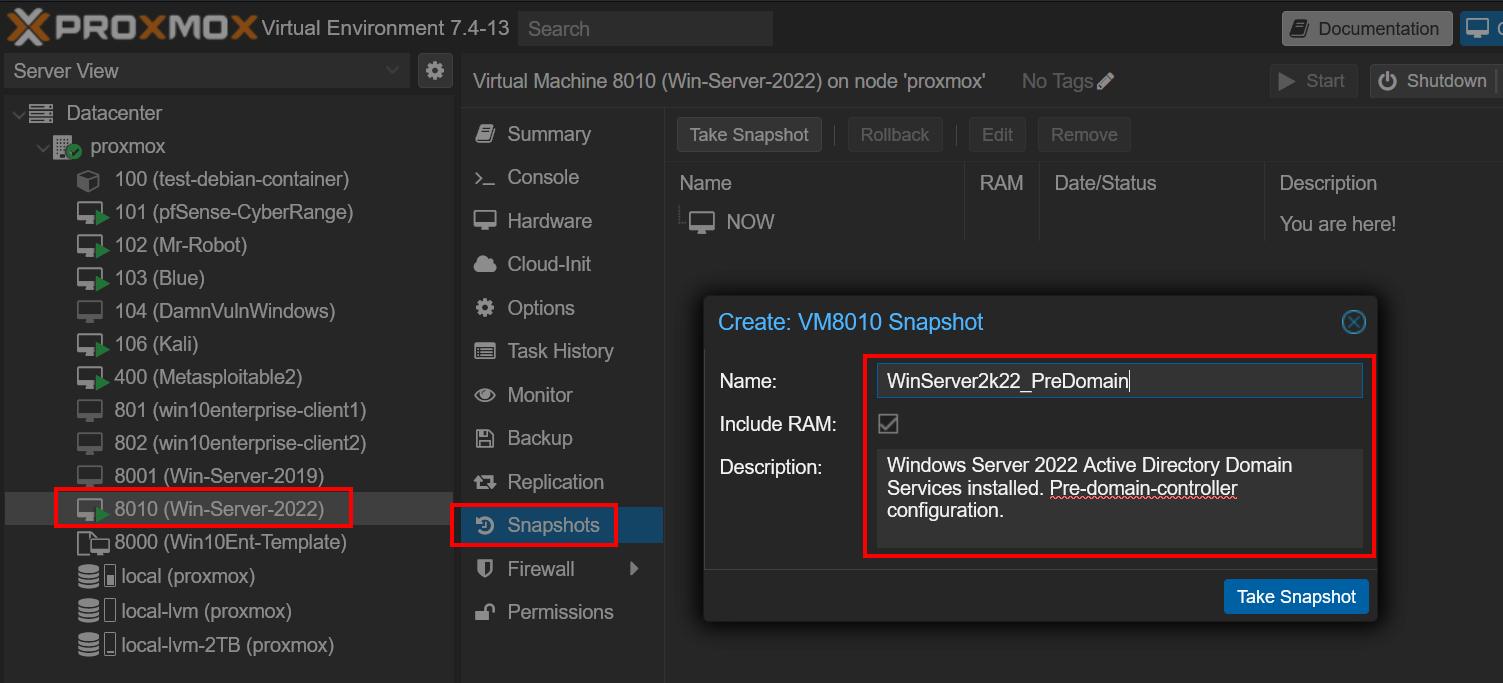
In Proxmox, click on your Windows Server 2022 VM and go to Snapshots. Click Take Snapshot. Set the following values:
- Name: WinServer2k22_PreDomain
- Include RAM: yes
- Description: Windows Server 2022 Active Directory Domain Services installed. Pre-domain-controller configuration.
Now, we can restore this snapshot any time if we want to roll back to a pre-domain install.
Configure Domain Services
Here comes the fun part - building out some of the Domain Services, including:
- Installing the Domain Controller
- Configure Active Directory Domain Services
- Configure DNS Forwarders
- Add and Configure a DHCP Server
Installing the Domain Controller
-
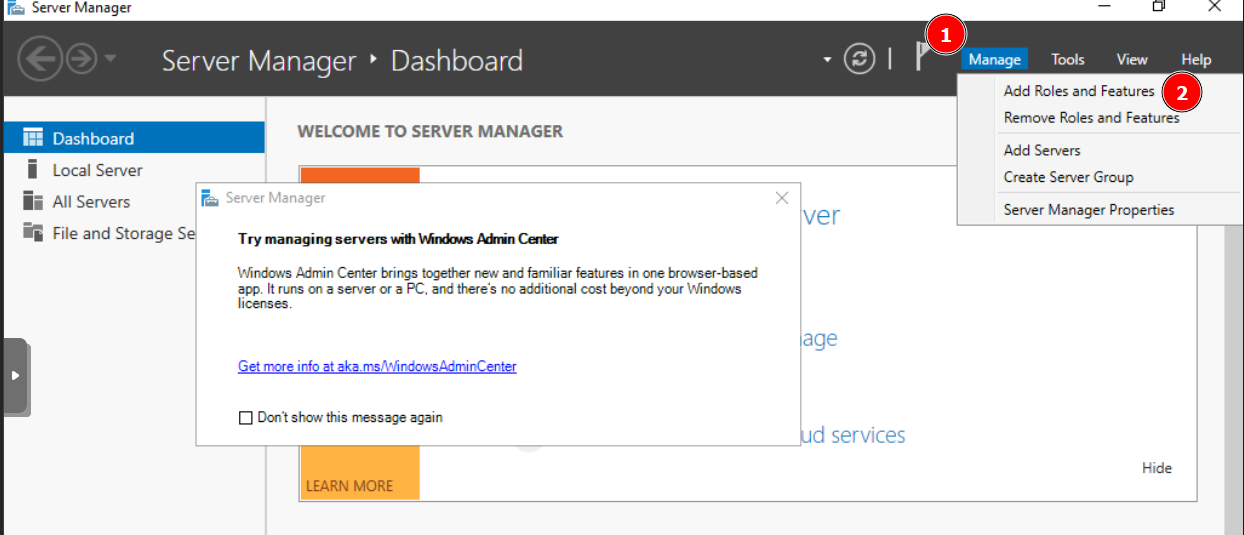
Click Manage > Add Roles and Features
-
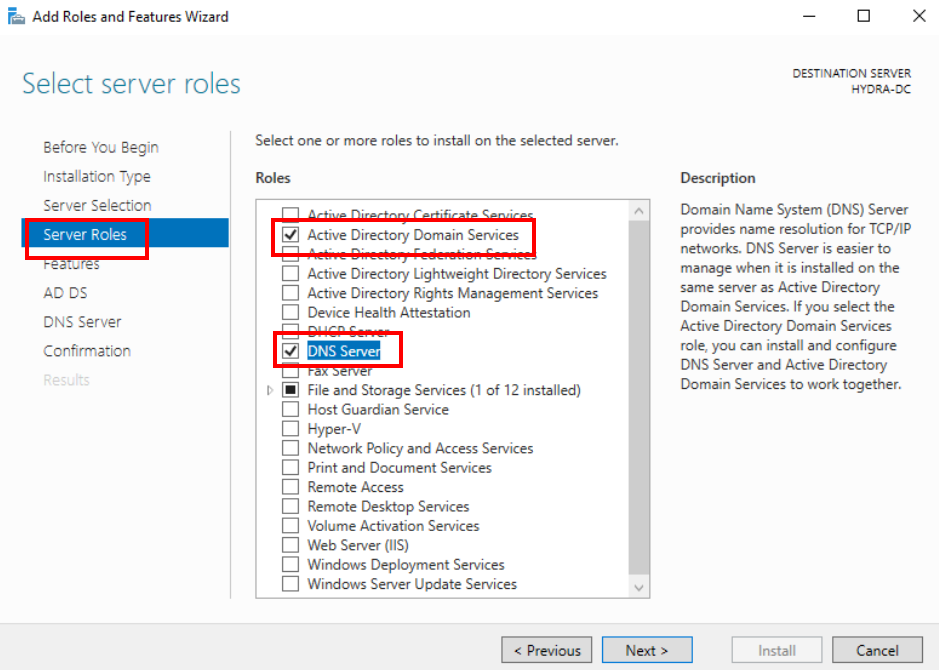
Click Next > Next > Next until you reach Server Roles.
-
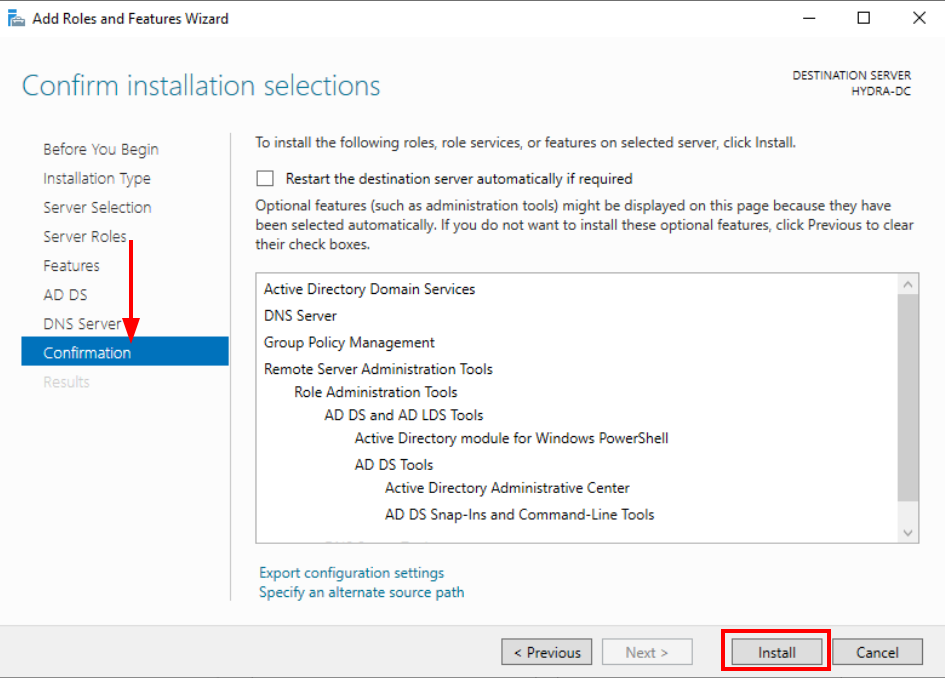
Enable the following Server Roles (Click Add Features for each new Role):
- Active Directory Domain Services
- DNS Server (so we can resolve the domain controller by DNS name)
-
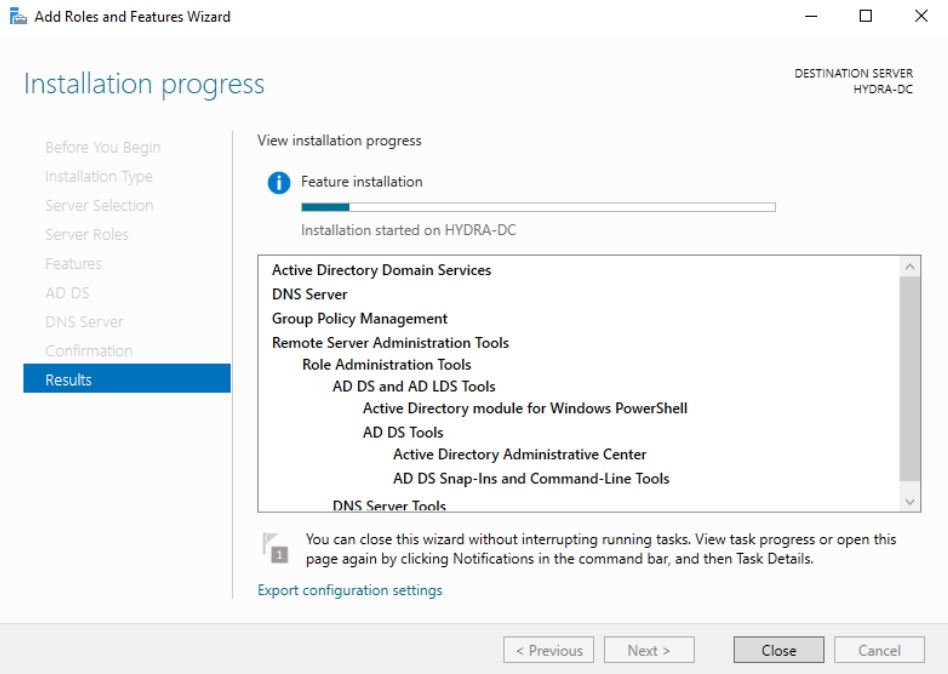
Click Next > Next > Next > Next > Install. Wait for the install to finish and click Close.
Configure Active Directory Domain Services
-
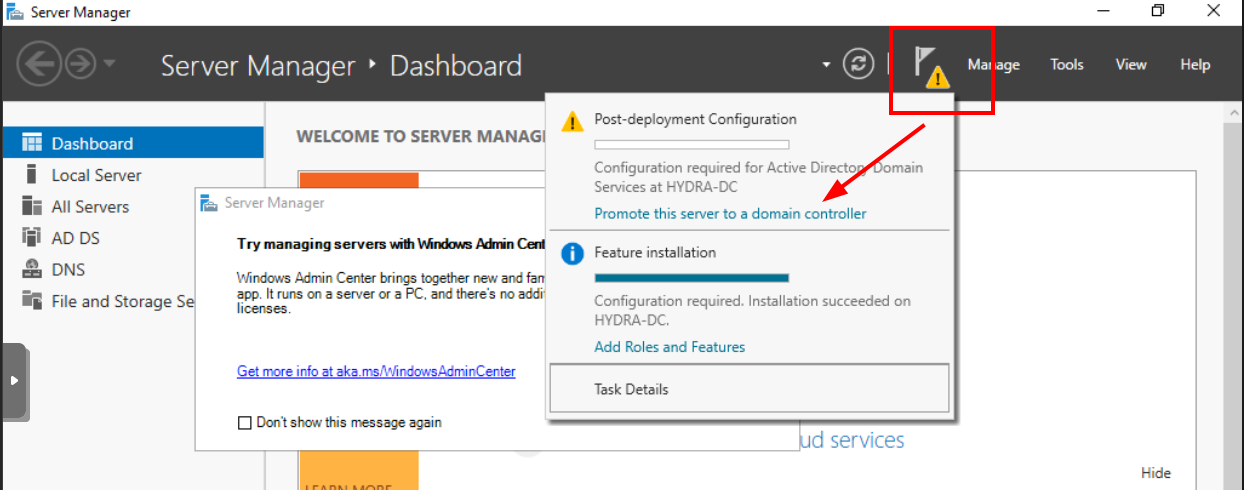
You might have automatically rebooted (did not happen to me in Server 2022) - if so log back into the domain controller as the local administrator and wait for the Server Manager app to load.
-
Click on the Post-Deployment Configuration warning, and promote this server to a Domain Controller
-
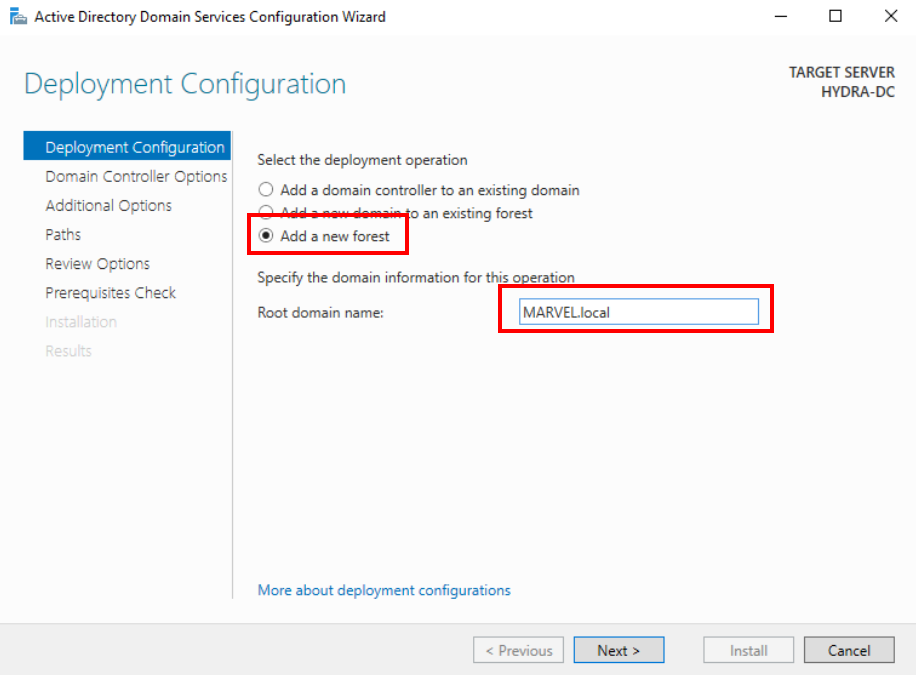
Add a new forest > specify a root domain name: MARVEL.local (TCM lab)
-
TLDs such as .com, .org, .net will work as a local domain.
-
Note: Ben Heater recommends not using .local, because of potential interference with multicast traffic. His forest used “ad.lab”.
-
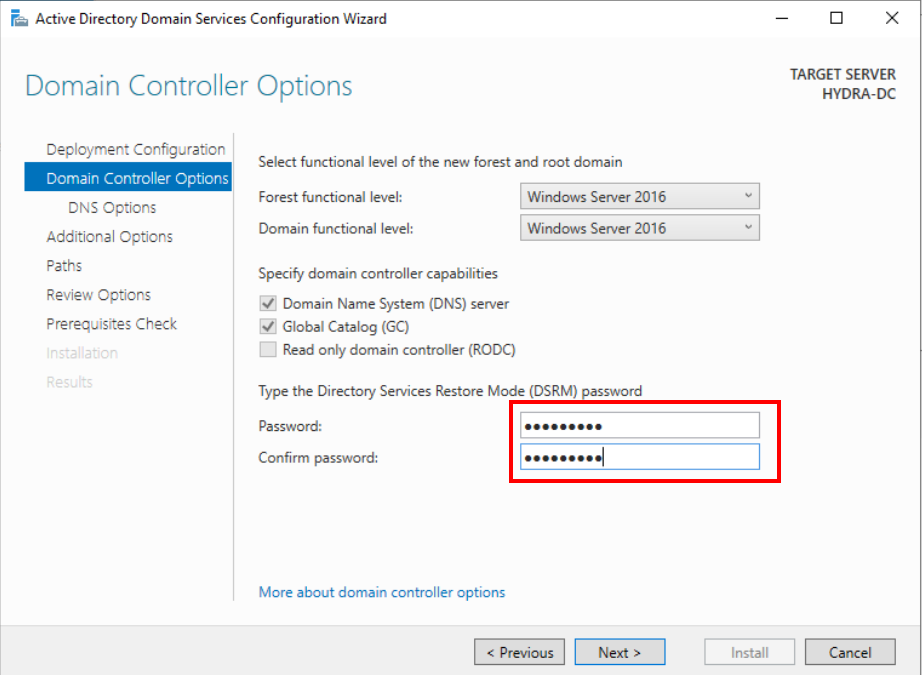
Click Next. The default options are fine. Specify a restore password. You can use the same password as the local admin or something different. It doesn’t matter. Click Next.
-
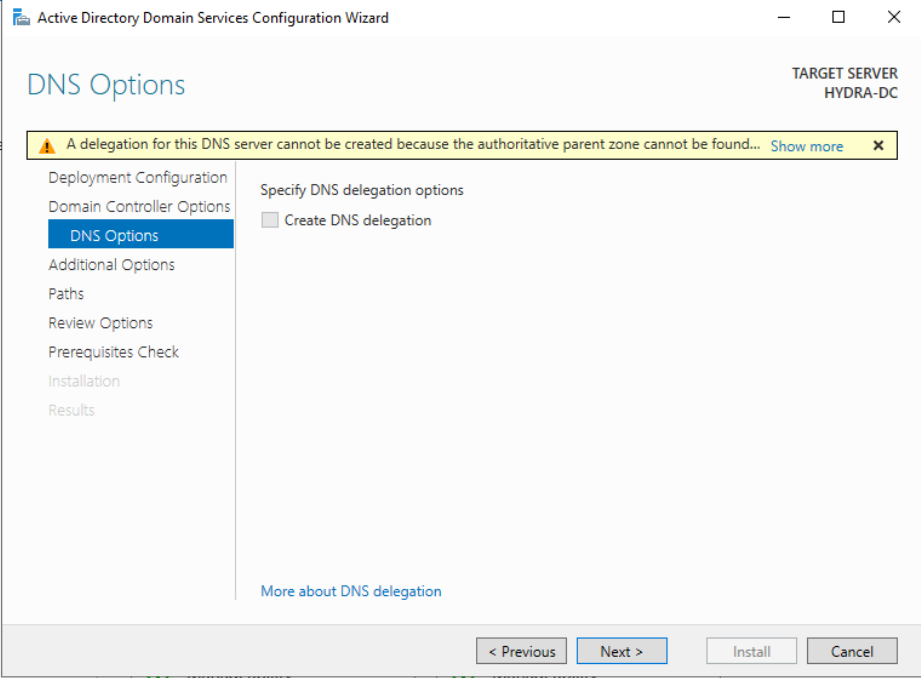
Ignore this message
-
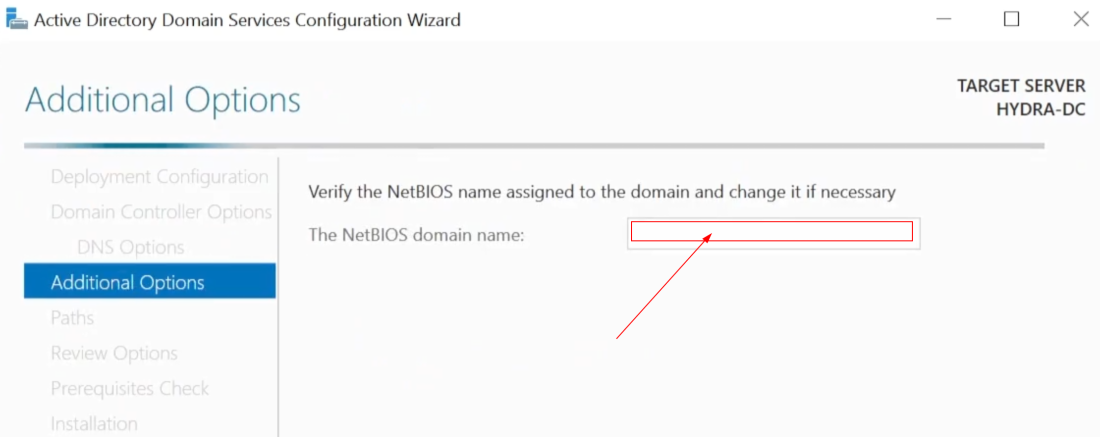
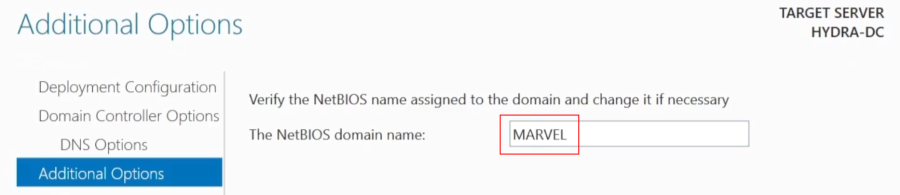
When you reach this stage, it will take a few moments for the box to auto-populate with your domain name ie. MARVEL
-
Click Next and continue with the defaults.
-
You should now see “All prerequisite checks passed successfully”.
-
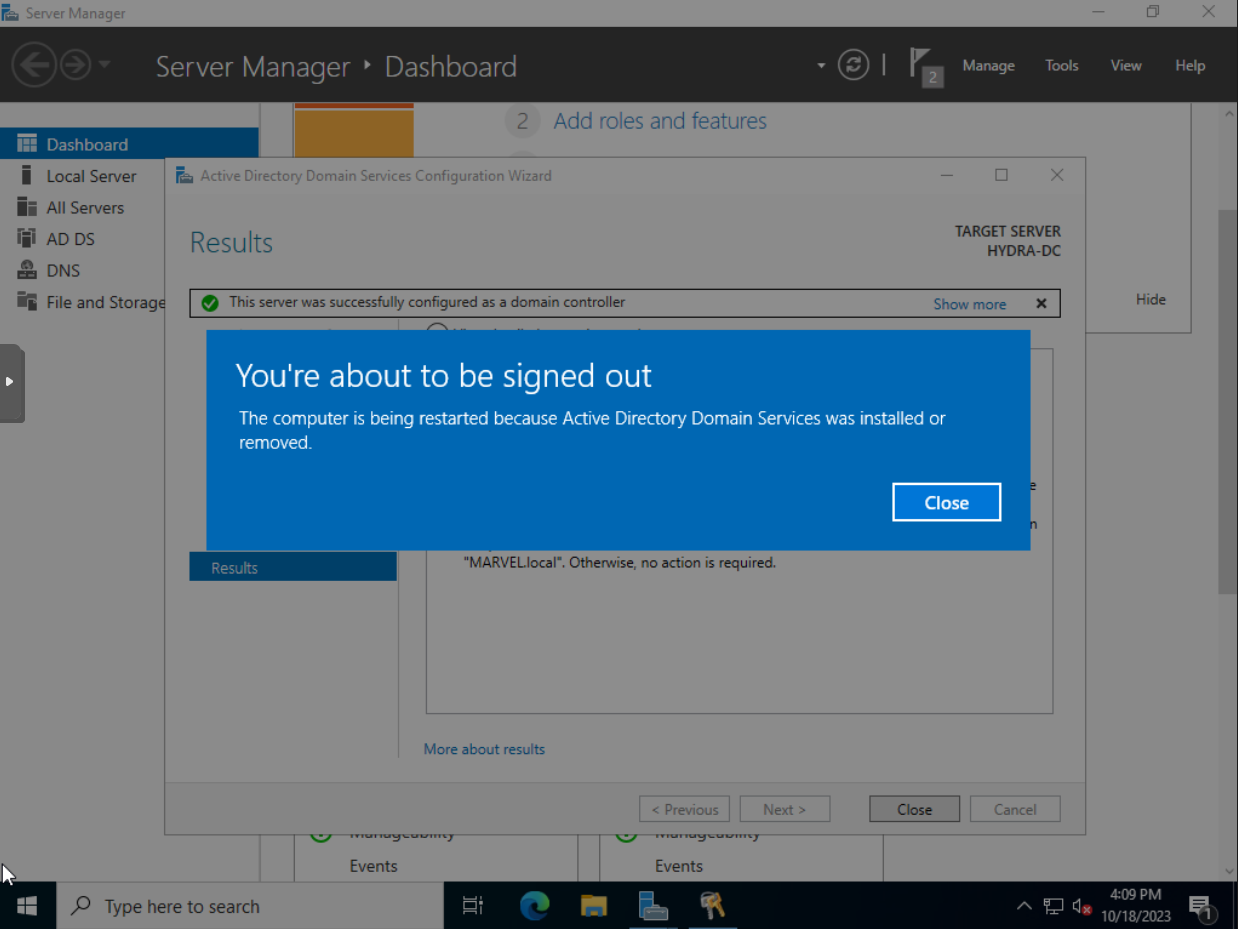
Click Install and wait for it to complete.
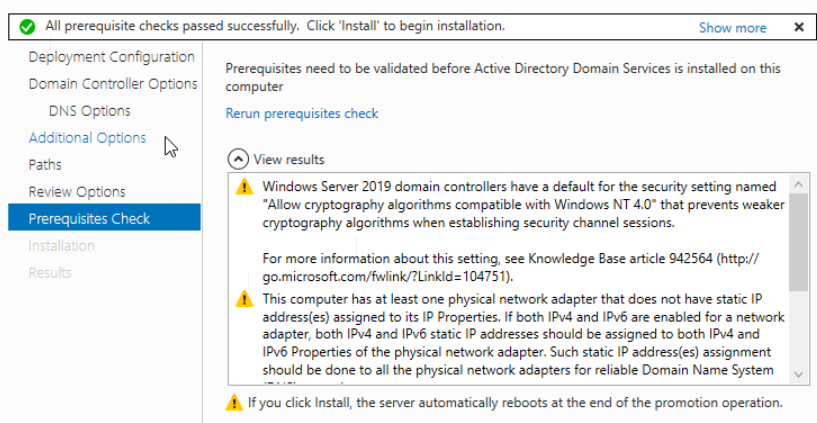
-
The server will automatically reboot.
-
This process will take a while. Be patient.
Configure DNS Forwarders
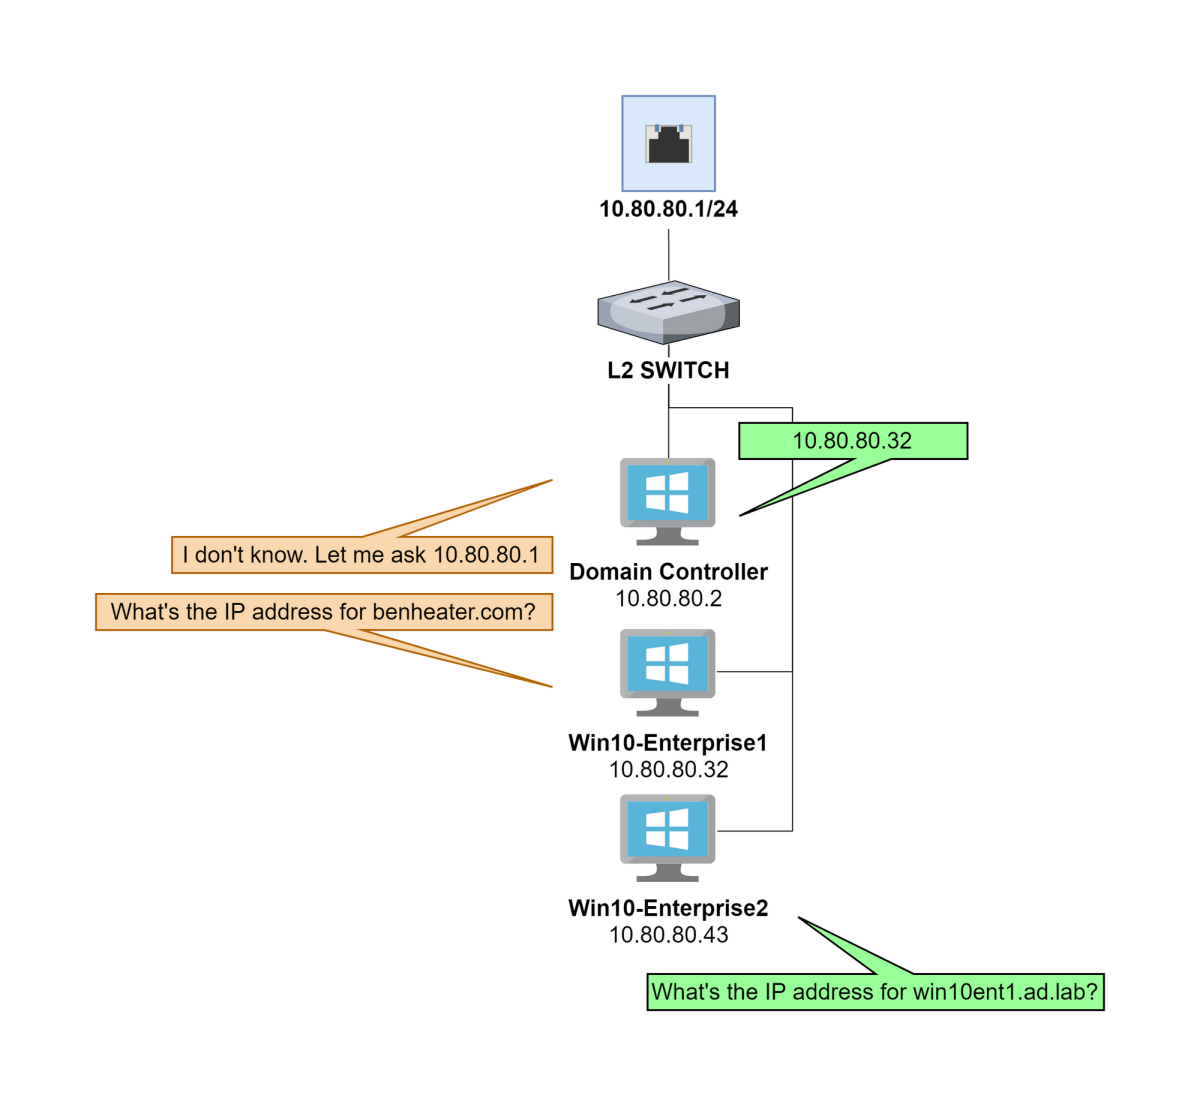
The DNS server running on the domain controller will act as a resolver for the MARVEL.local domain (or whichever local domain you chose). We need a forwarder for any DNS query for which the DNS server does not know the answer.
We can use the pfSense default gateway as a downstream DNS server that the domain controller can pass queries to for any unknown hostnames.
Clients within the AD LAB subnet will resolve URLs by this process:
- First, check with the DNS server running on the domain controller (we will install this a bit later)
- If the DNS server doesn’t know the answer, it will forward the DNS query to the default gateway and pfSense will resolve it
Image from benheater.com:
Log back into the DC. Notice the login screen is now consistent with a Domain ie. you are logging in as MARVEL\Administrator, not a local Administrator.
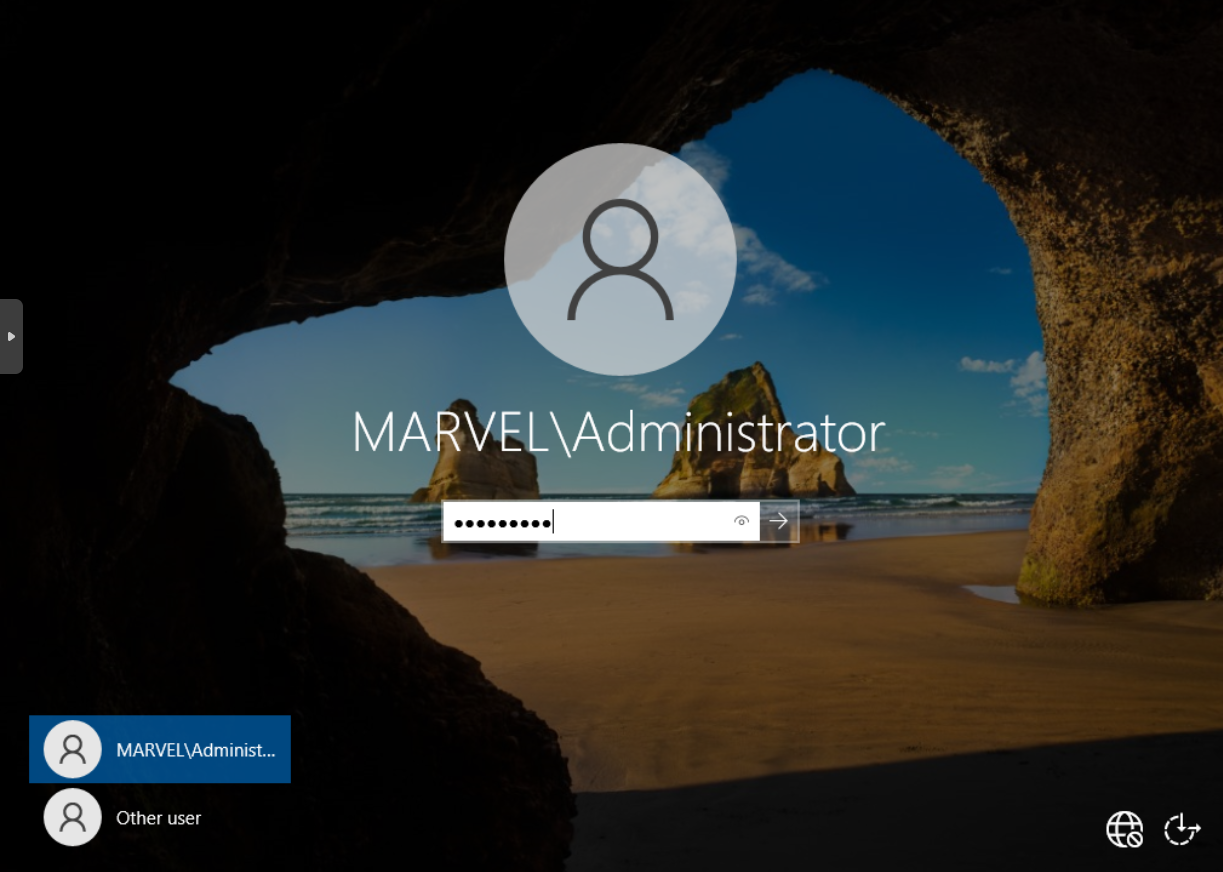
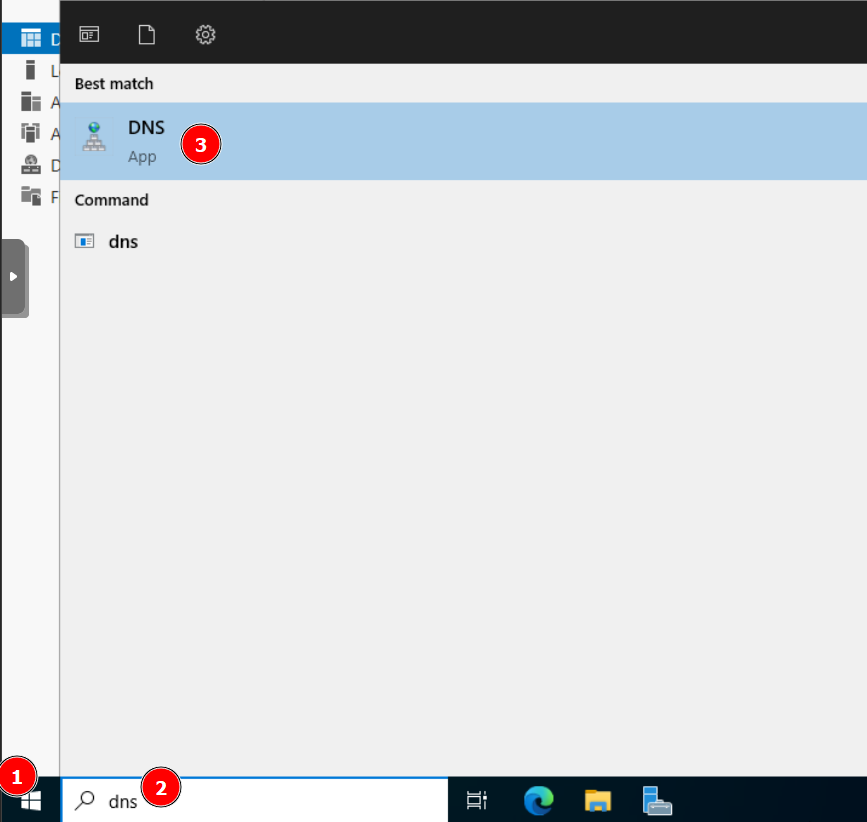
Open up the Start Menu and search for DNS.
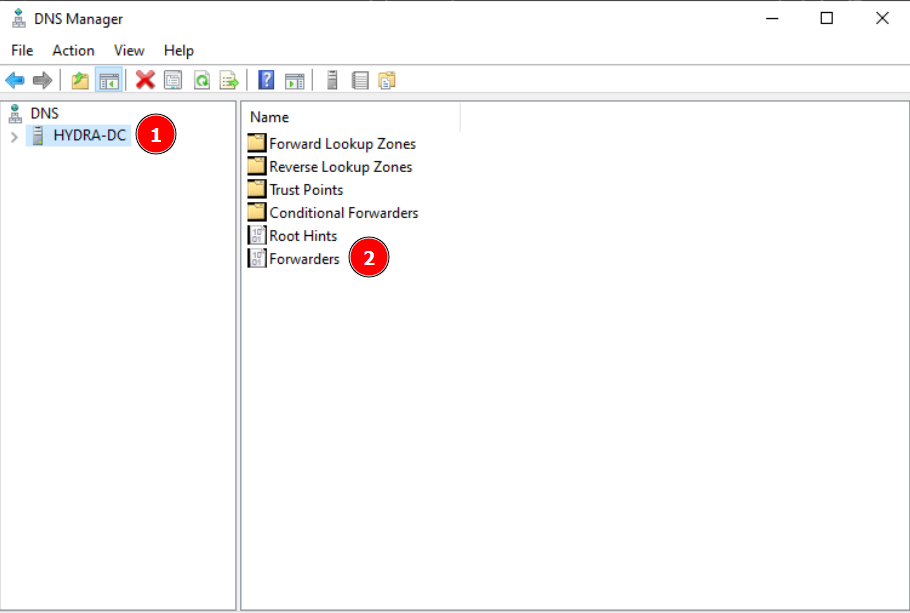
Expand DNS > HYDRA-DC and double-click Forwarders.
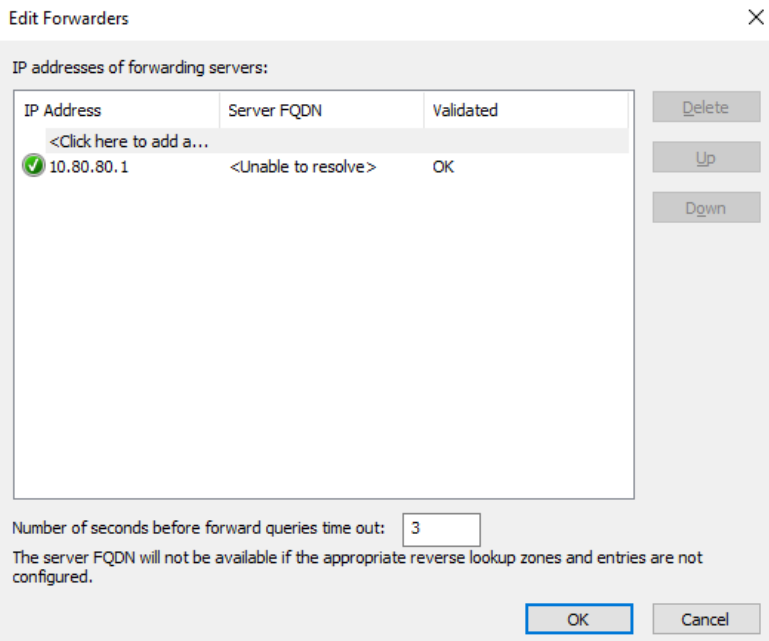
Click Edit and add the IP address of the default gateway. Click OK.

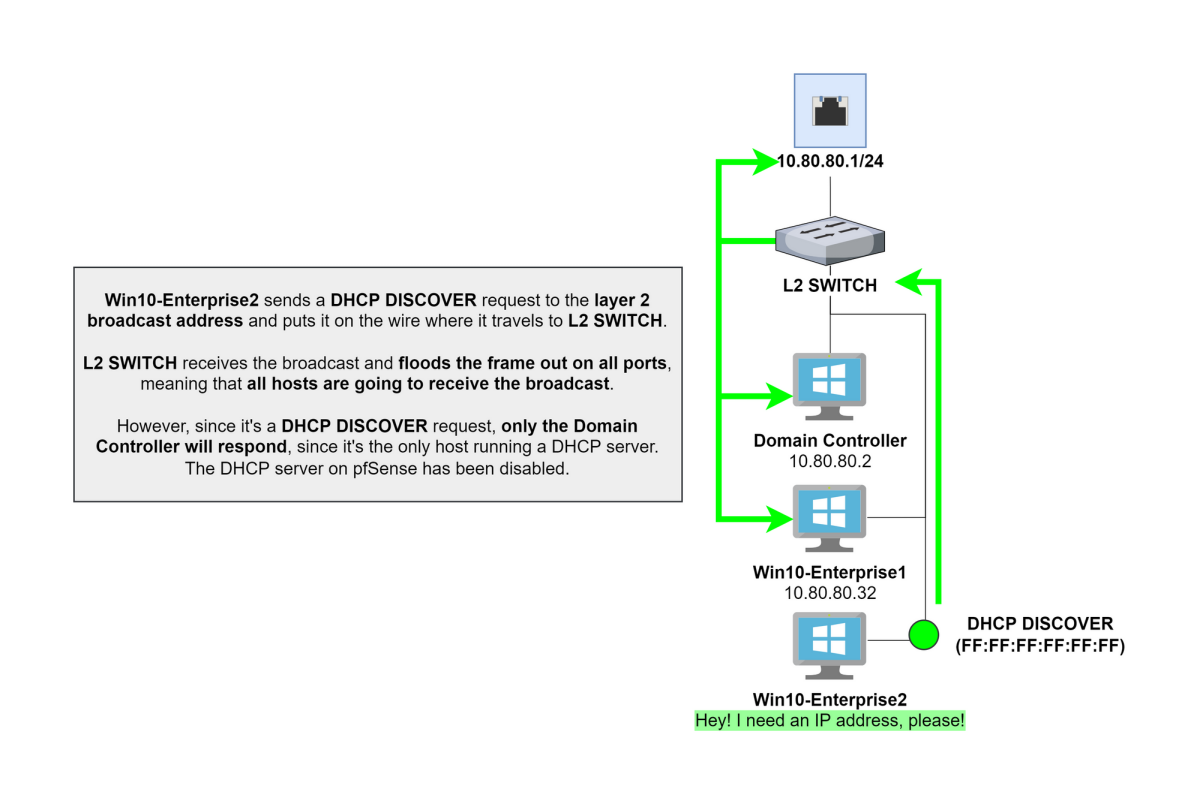
Add and Configure a DHCP Server
This is an excellent diagram, from benheater.com:
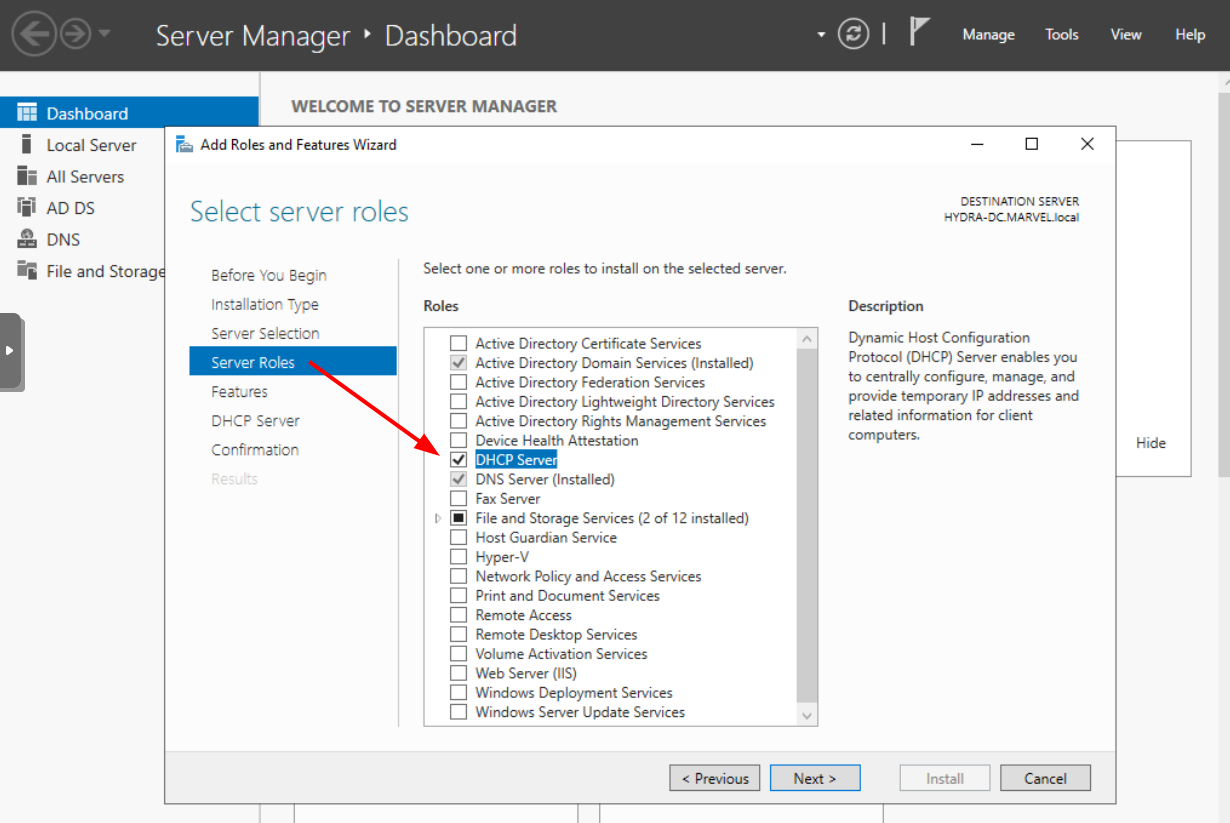
Open Server Manager and go to Manage > Add Roles and Features
-
Click Next > Next > Next
-
Enable DHCP Server
-
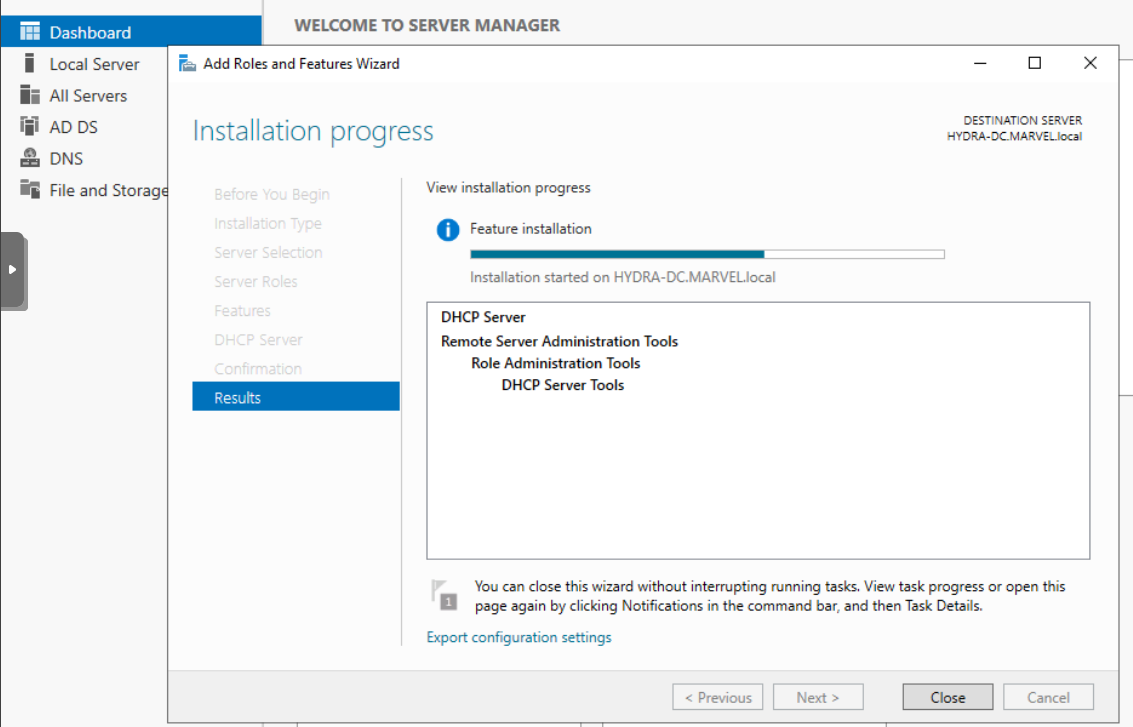
Click Add Features and click Next > Next > Next > Install
-
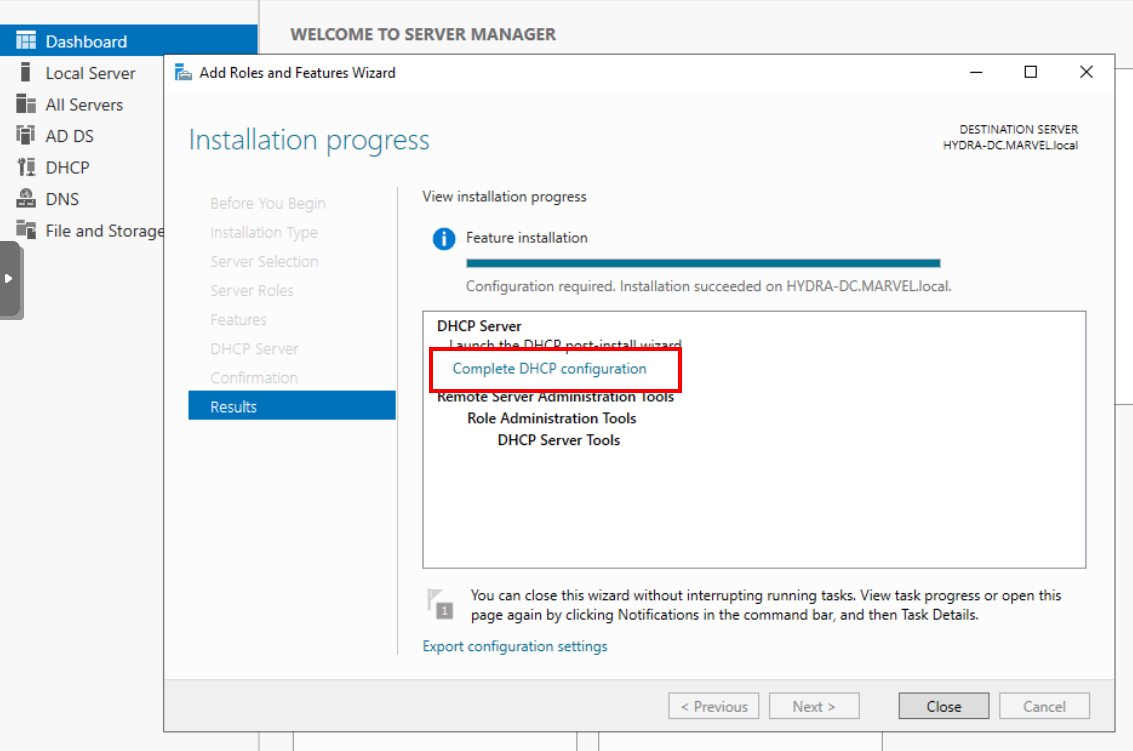
Once the installation is complete, click on Complete DHCP Configuration
-
Click Next > Commit > Close > Close
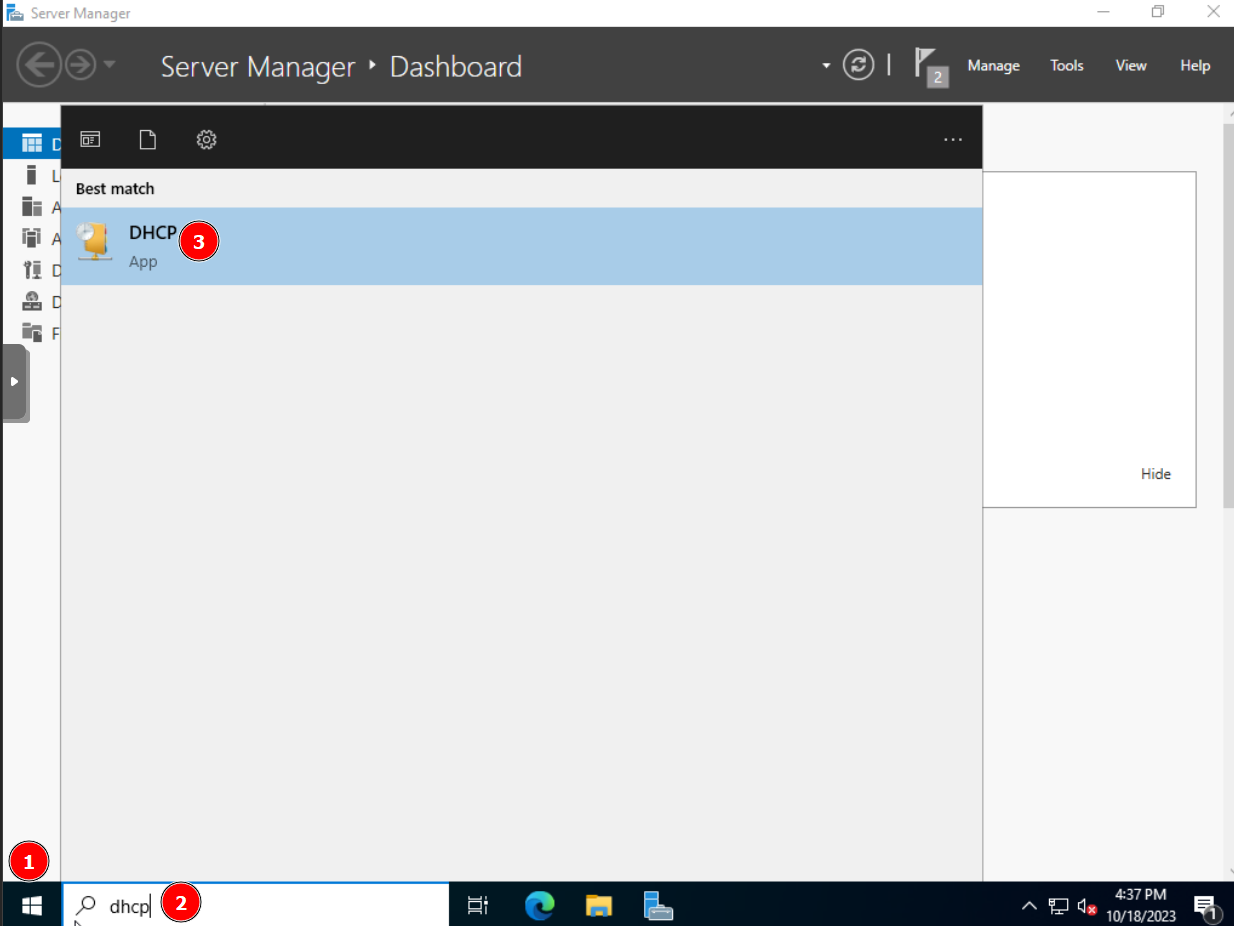
Go to the Start Menu and search DHCP
-
Expand the DHCP server tree and right-click IPv4 and choose New Scope
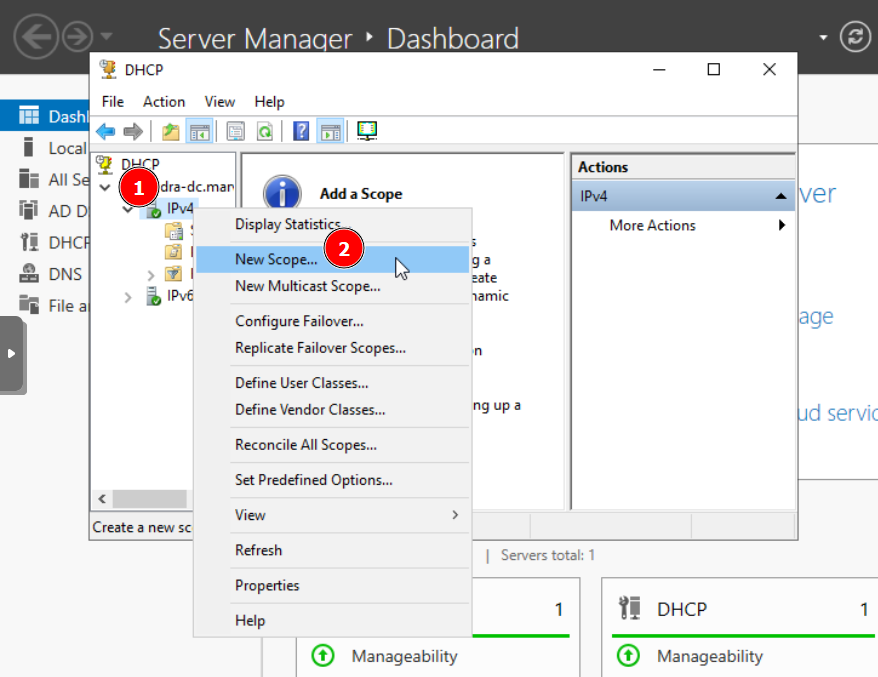
-
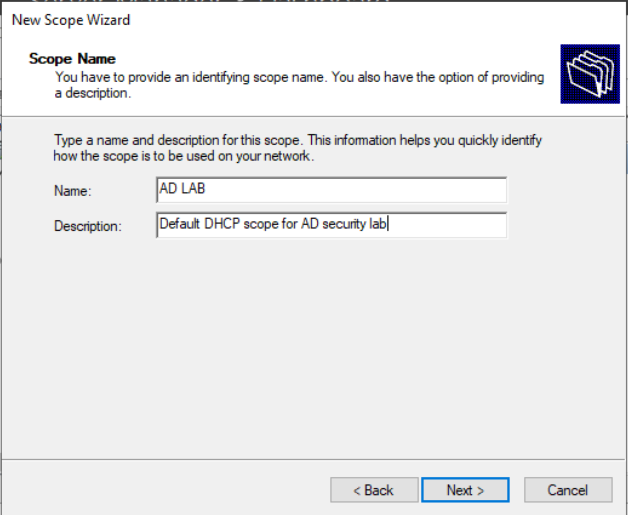
Click Next and give your DHCP configuration a name and description. Then, click Next.
-
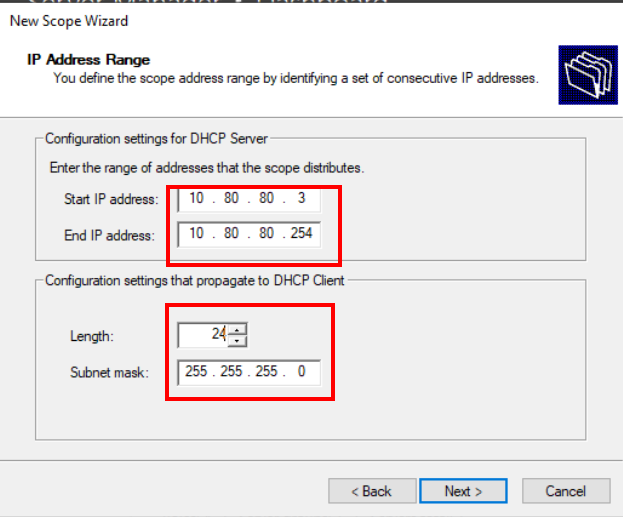
Configure the DHCP address space and subnet mask. Then, click Next.
-
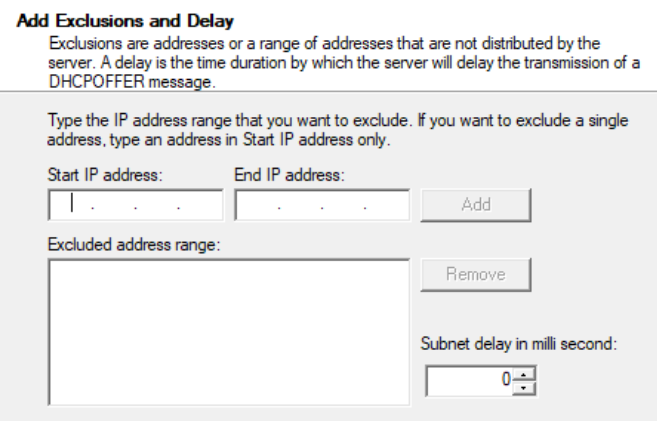
We’re not configuring any DHCP exclusions (reservations), so click Next.
-
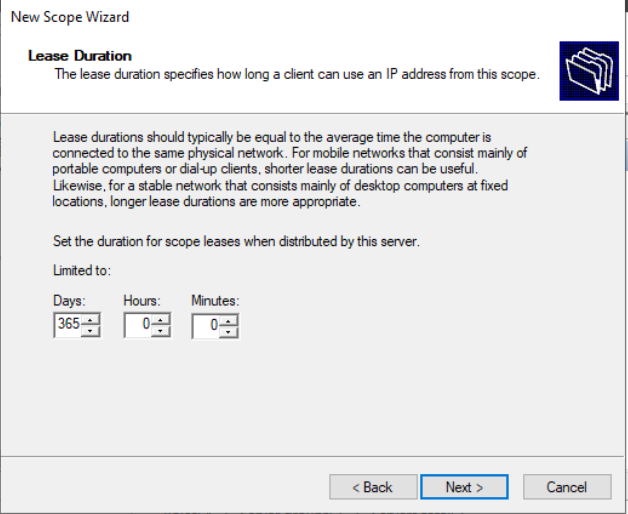
We’ll make it so clients' leases are good for one year. Click Next.
-
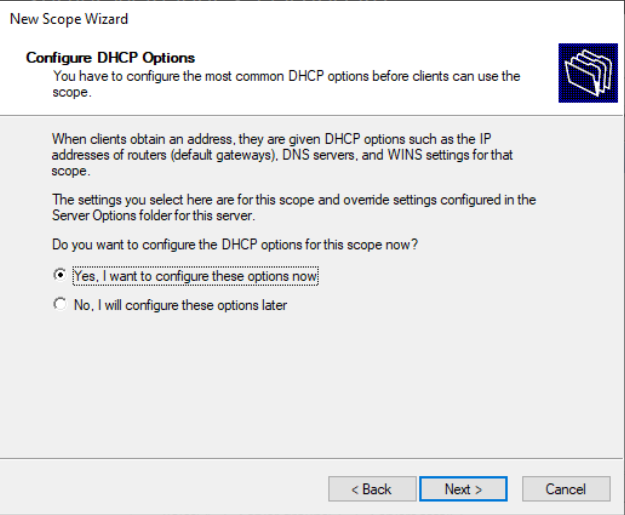
Click Next to configure it now.
-
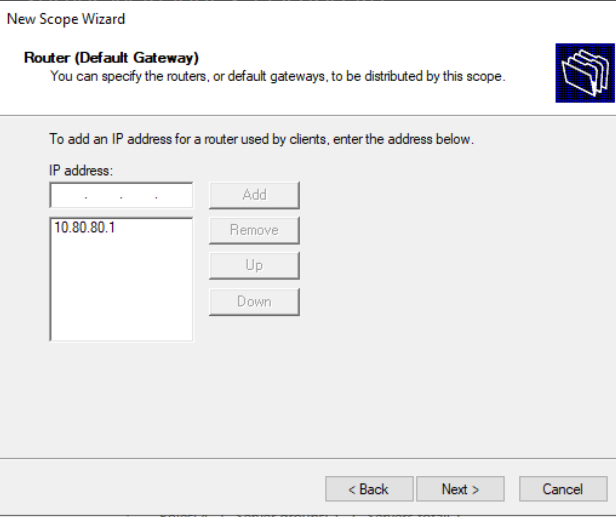
Enter the address of the default gateway and click Add.
-
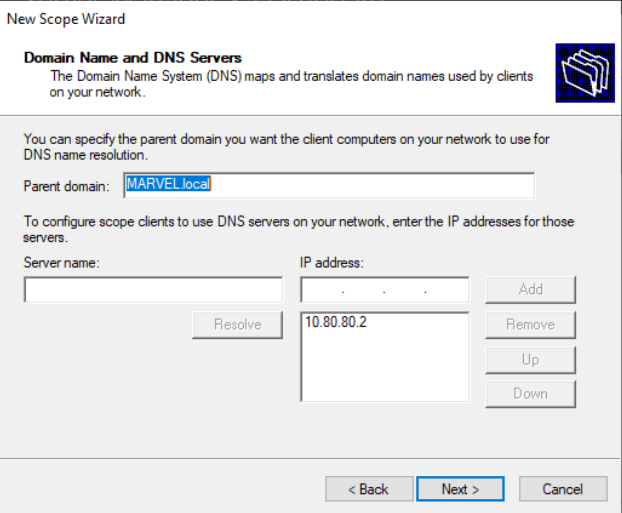
The default DNS configuration for DHCP clients is good here. Click Next.
-
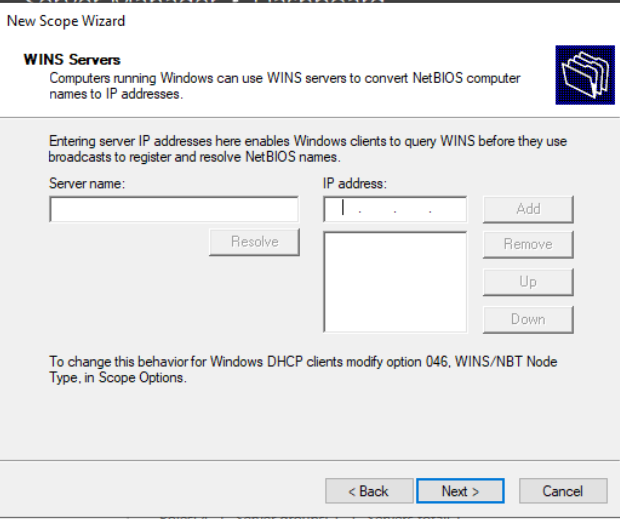
We don’t have a WINS server in our lab environment. Click Next.
-
Click Next to activate the DHCP scope and click Finish.

Install Certification Services
Hang in there - you are almost done. We need to set up Certificate Services in order to run some attacks later on. They are used to verify identifies on a domain controller using LDAP-S (lightweight directory access protocol - secure), a more secure version of LDAP, which you can think of as your phonebook for the domain. This is standard for an Active Directory build; but this feature can be abused in Relay attacks.
-
Manage > Add Roles and Features
-
Next > Next (Role Based Features) > Next
-
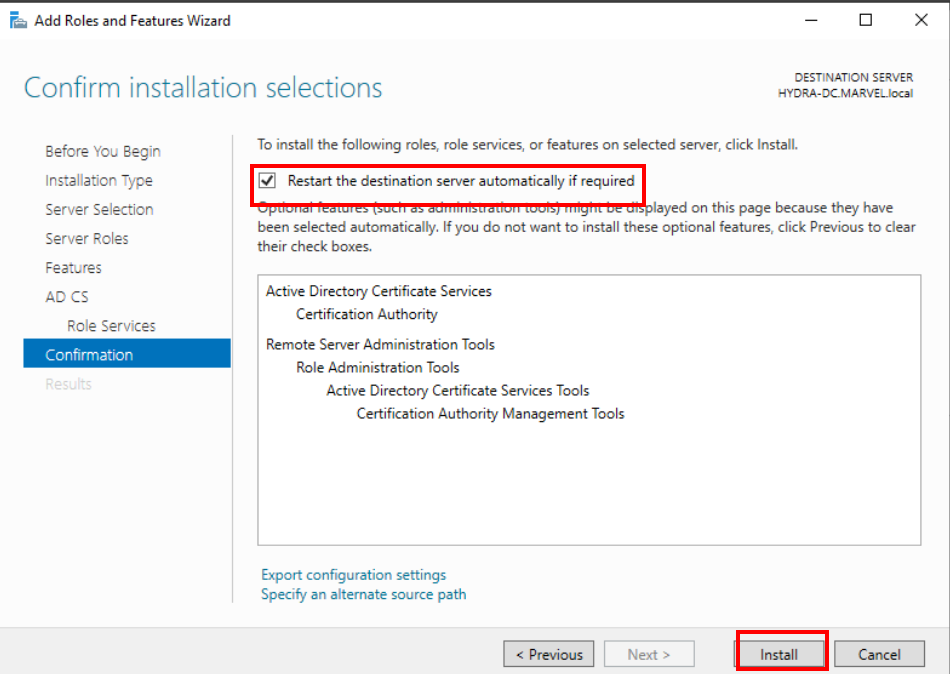
Enable: Active Directory Certificate Services
-
Add Features > Next > Next > Next > Next (Certification Authority) > Enable “Restart the destination server automatically if required” > Install
-
Now click “Configure Active Directory Certificate Services on the destination server”
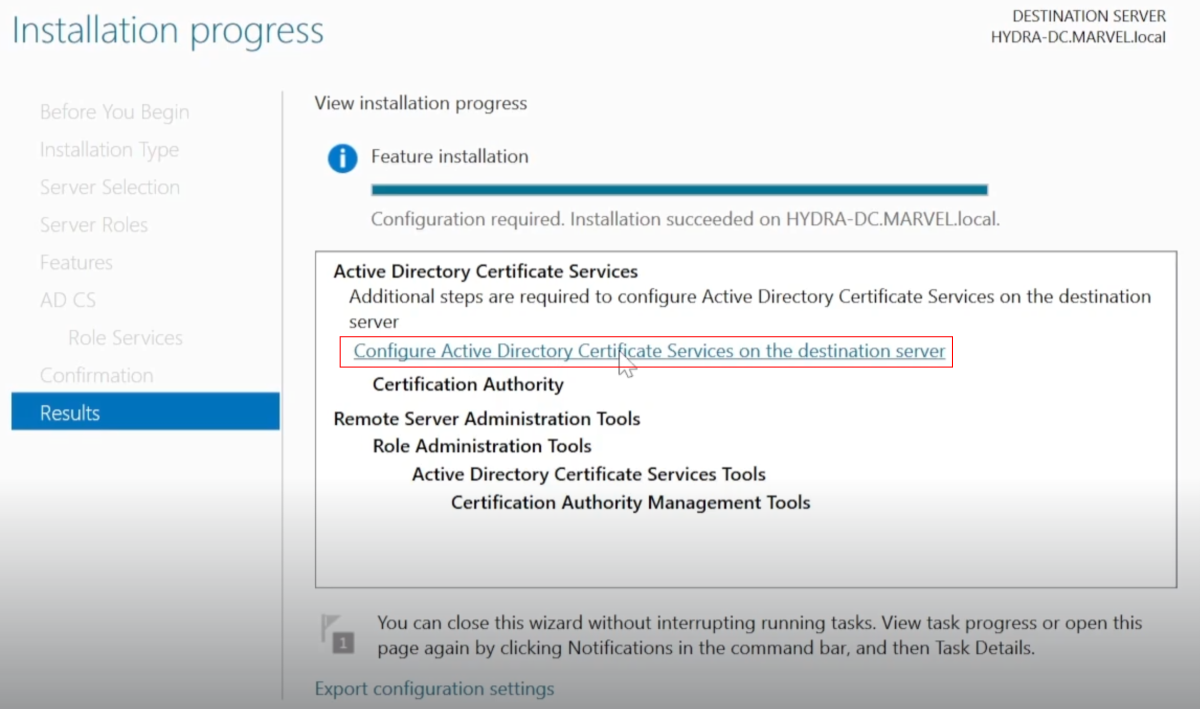
-
Next > Enable: Certification Authority | Next > Next > Next > Next (new private key) > Next > Next > Next (** Choose 99 years**) > Next > Configure
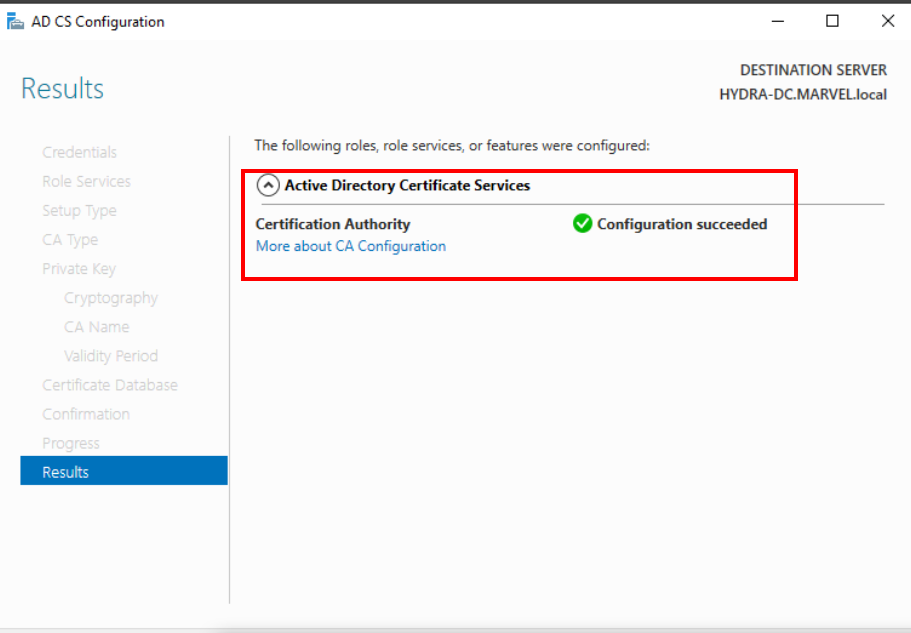
Reboot the Server