Install and Configure Windows 10 Enterprise Clients
This is a summary of the steps involved:
- Preparing a Template VM
- Installation, Load Drivers
- Sysprep the Template
- Convert the VM to a Template
- Create the User Machines
Preparing a Template VM
A Proxmox template is a preconfigured virtual machine image that can be used to create new virtual machines. The template is essentially a snapshot of a virtual machine that has been configured with a specific operating system, applications, settings, and any other necessary configurations, allowing you to deploy new virtual machines quickly to save time and effort.
We will begin by creating a new VM with the following attributes:
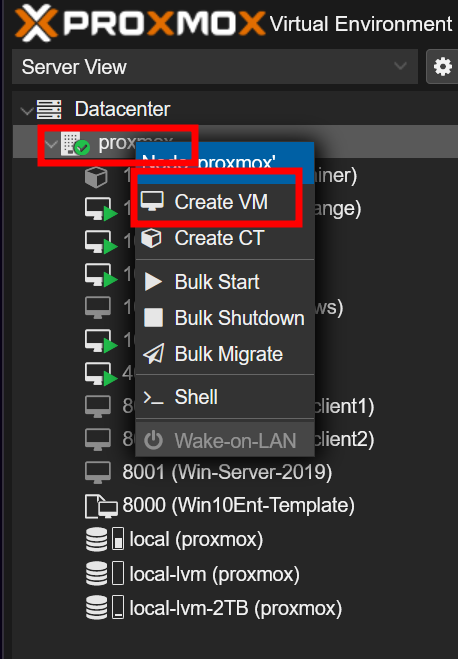
Right-Click proxmox > Create VM
General
- Your VM number can be constomized to your local environment

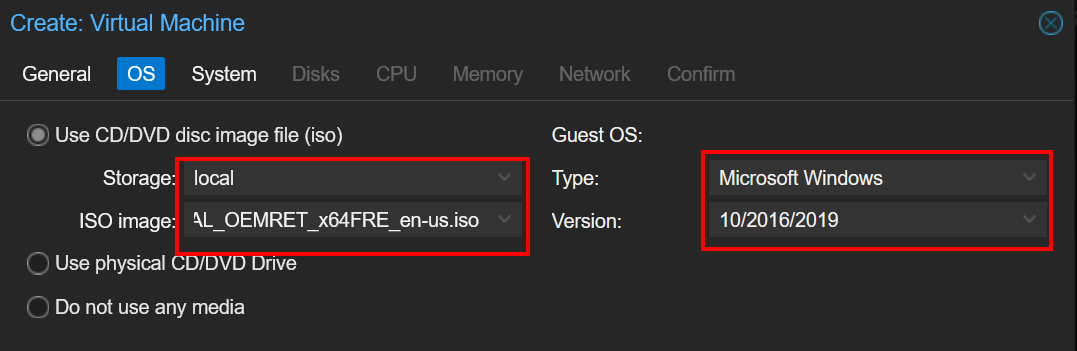
OS
- Choose your Windows 10 Enterprise ISO
- The name of the Win10ENT ISO was truncated in the image
- My ISOs are stored in local, yours might be ISO or whatever you named it
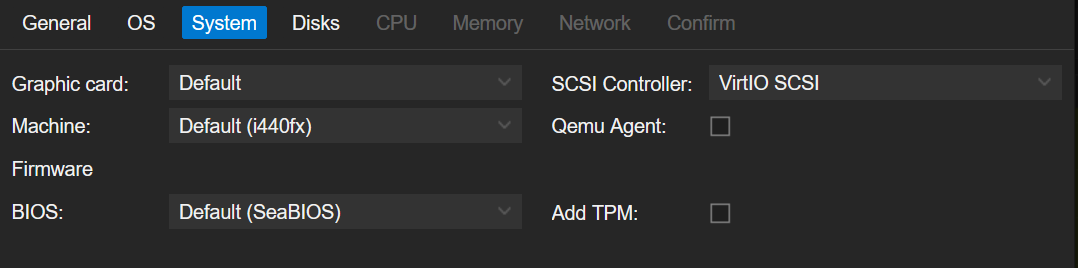
System
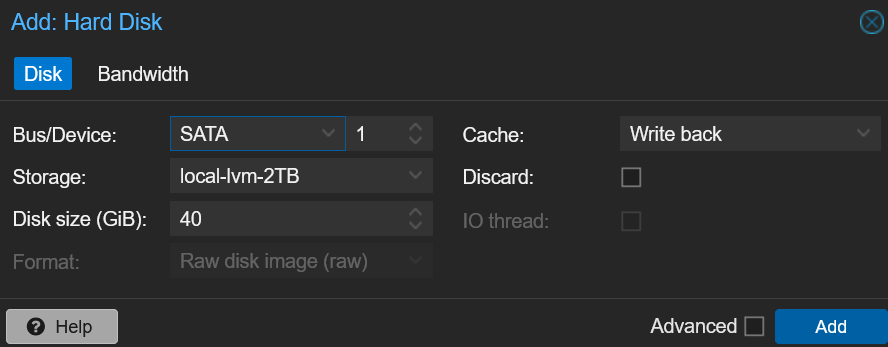
Disks
- My Virtual Machines are stored on local-lvm-2TB, your location may differ
CPU

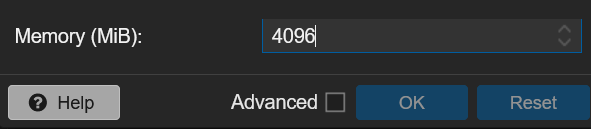
Memory
- Let’s start with 4 gigs (4096 MB), we can always increase the RAM if the clients are acting sluggish
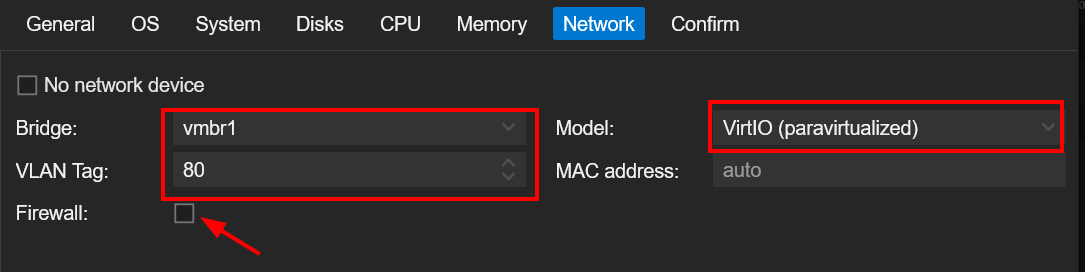
Network
- vmbr1 is the pfSense bridge/switch
- Our VLAN Tag is 80
- Firewall: Unchecked (we will be using pfSense for our firewall)
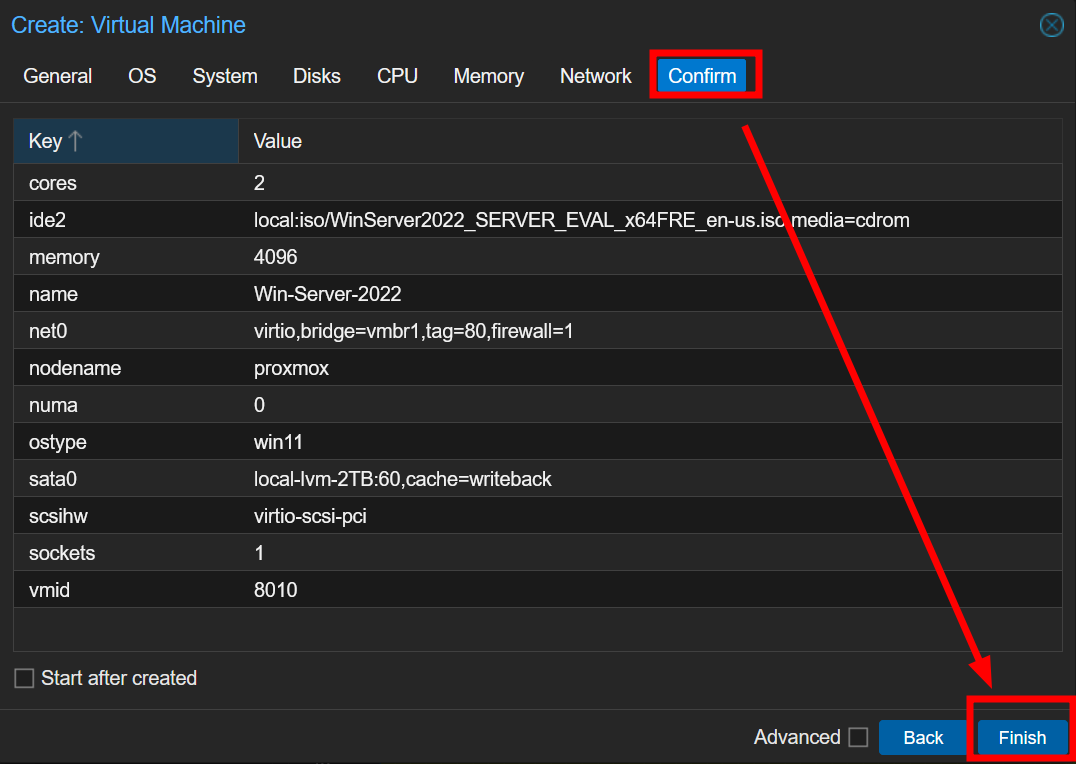
Confirm > Finish
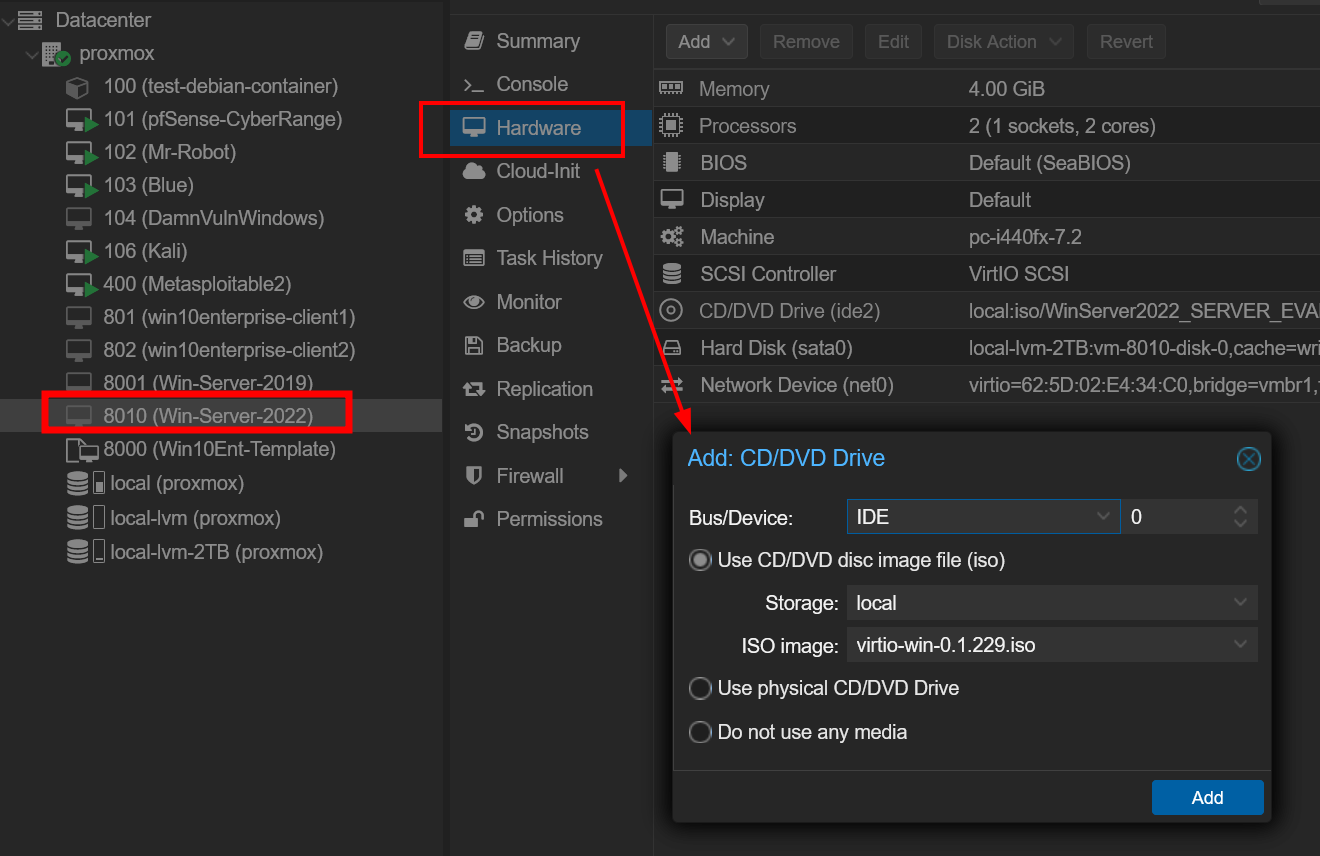
Drivers Disc
- Add another CD/DVD drive to your VM and load the VirtIO drivers disc
- In my case, my ISOs are stoed in my local storage
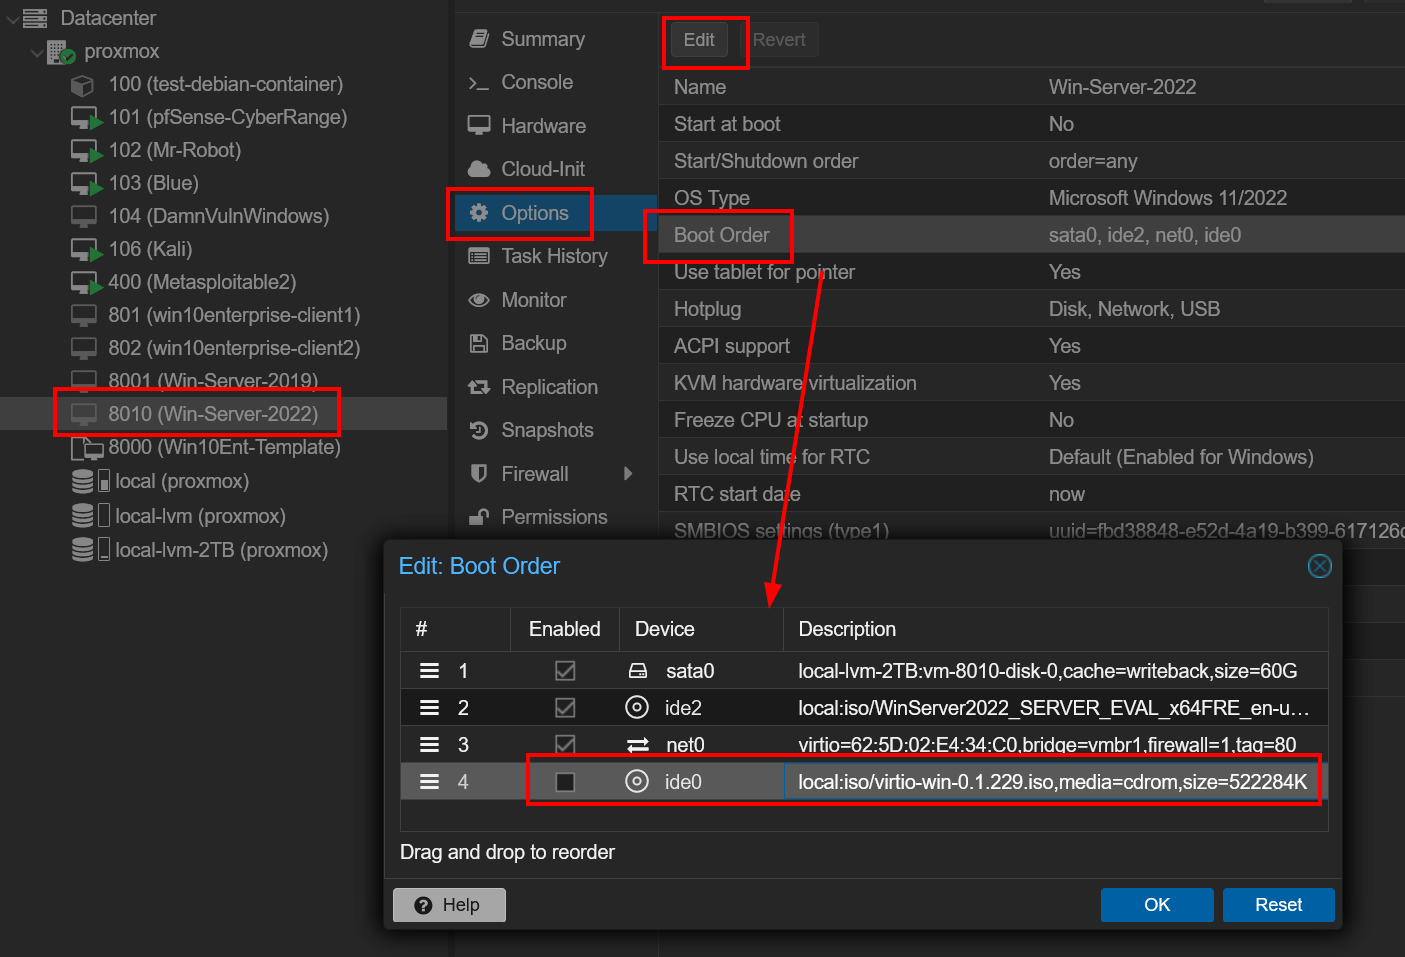
Don’t Start the VM Yet - Verify the Boot Order
- Ensure the VirtIO drivers disc is unchecked
- Note: if in VMware or VirtualBox, make sure the floppy drive is disabled before booting
- Win-Server-2022 > Options > Boot Order > Edit
Installing Windows 10 Enterprise and Drivers
- Start the VM and go to the Console

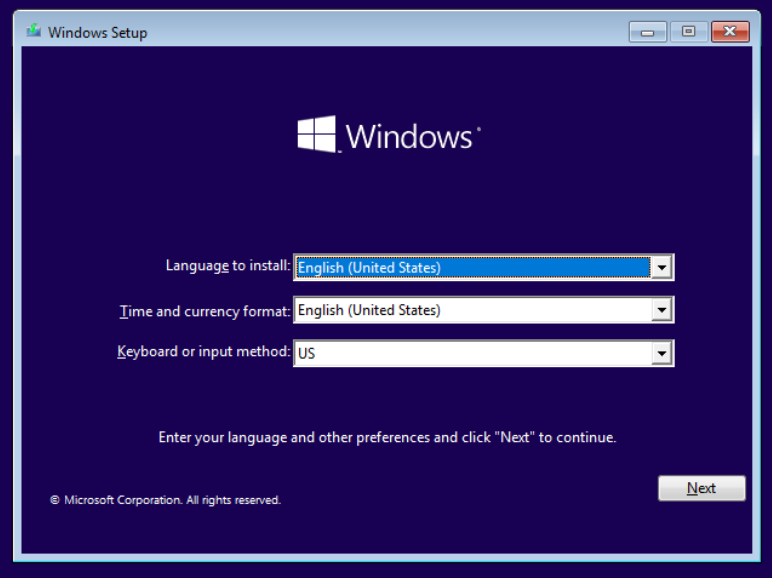
Choose your language and click Next
Accept the terms and conditions. Click Next.
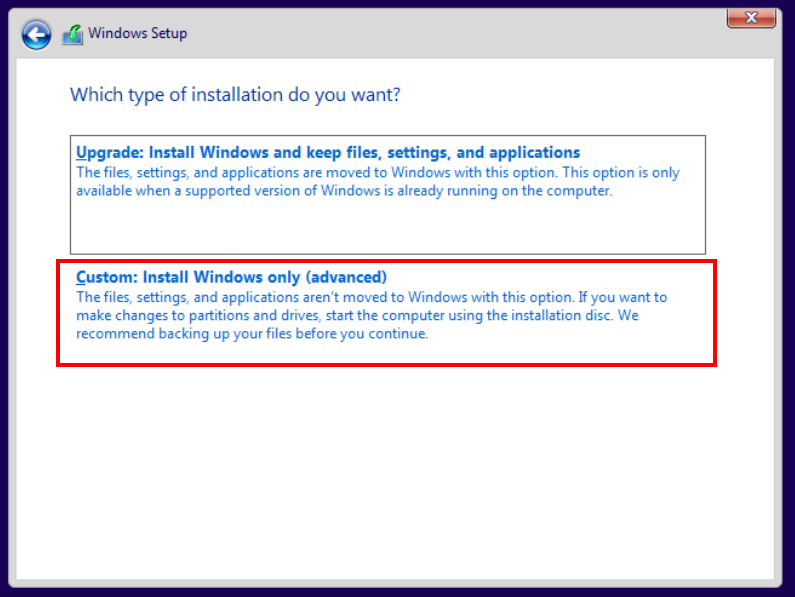
Choose Custom: Install Windows only (advanced)
- The screenshot below is from my Windows Server post, but is similar to what you should see.
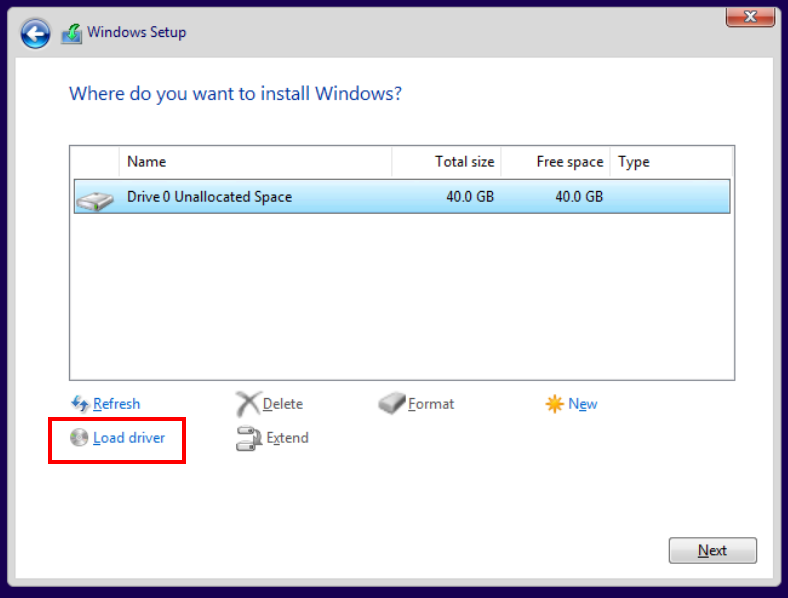
Load the SCSI Driver
-
Choose Load Driver
-
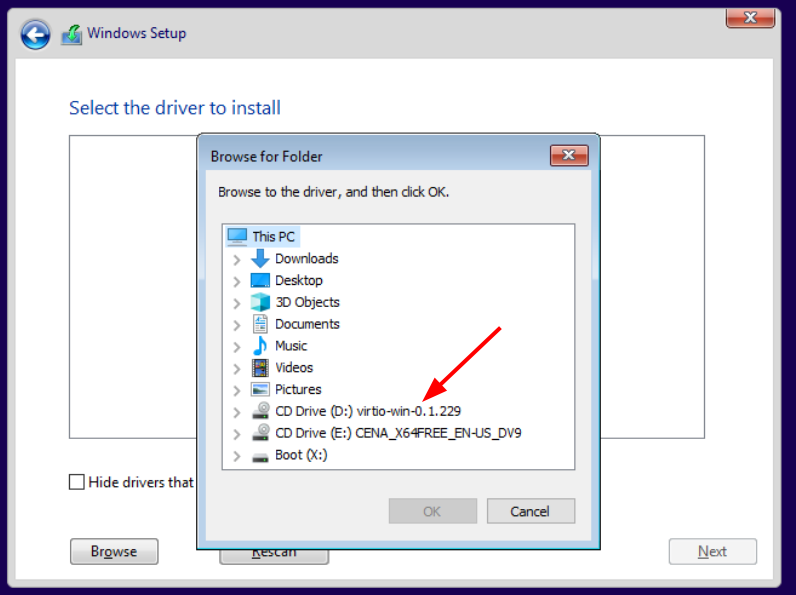
Click Browse, expand the virtio-win driver ISO
-
Navigate to vioscsi > w10 > amd64
-
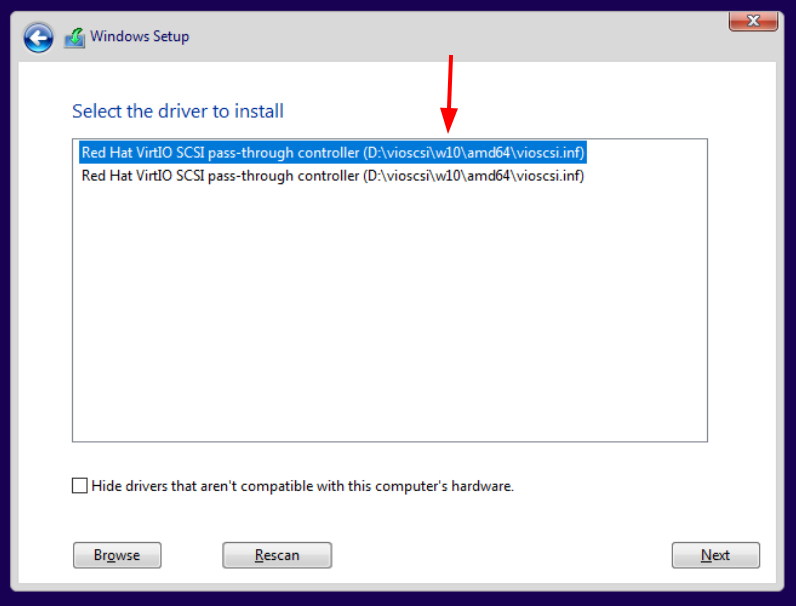
Uncheck Hide drivers that aren’t compatible with this computer’s hardware otherwise you won’t see the RedHat drivers
-
Choose this driver (I see two copies of the same driver)
-
Click Next and wait for it to finish loading.
Load the Network Driver
- Choose Load Driver
- Click Browse, expand the virtio-win driver ISO
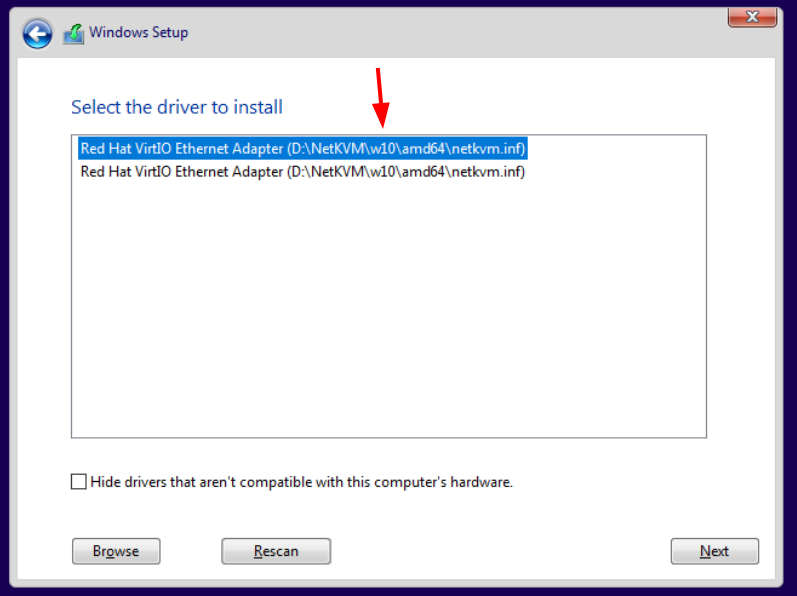
- Navigate to NetKVM > w10 > amd64
- Uncheck Hide drivers that aren’t compatible with this computer’s hardware otherwise you won’t see the RedHat drivers
- Choose this driver (I see two copies of the same driver)
- Click Next and wait for it to finish loading.
Finish the Installation
- Click Next and wait for the installation to finish. It may take a few minutes.
- It will automatically reboot. Possibly a couple of times (or more)

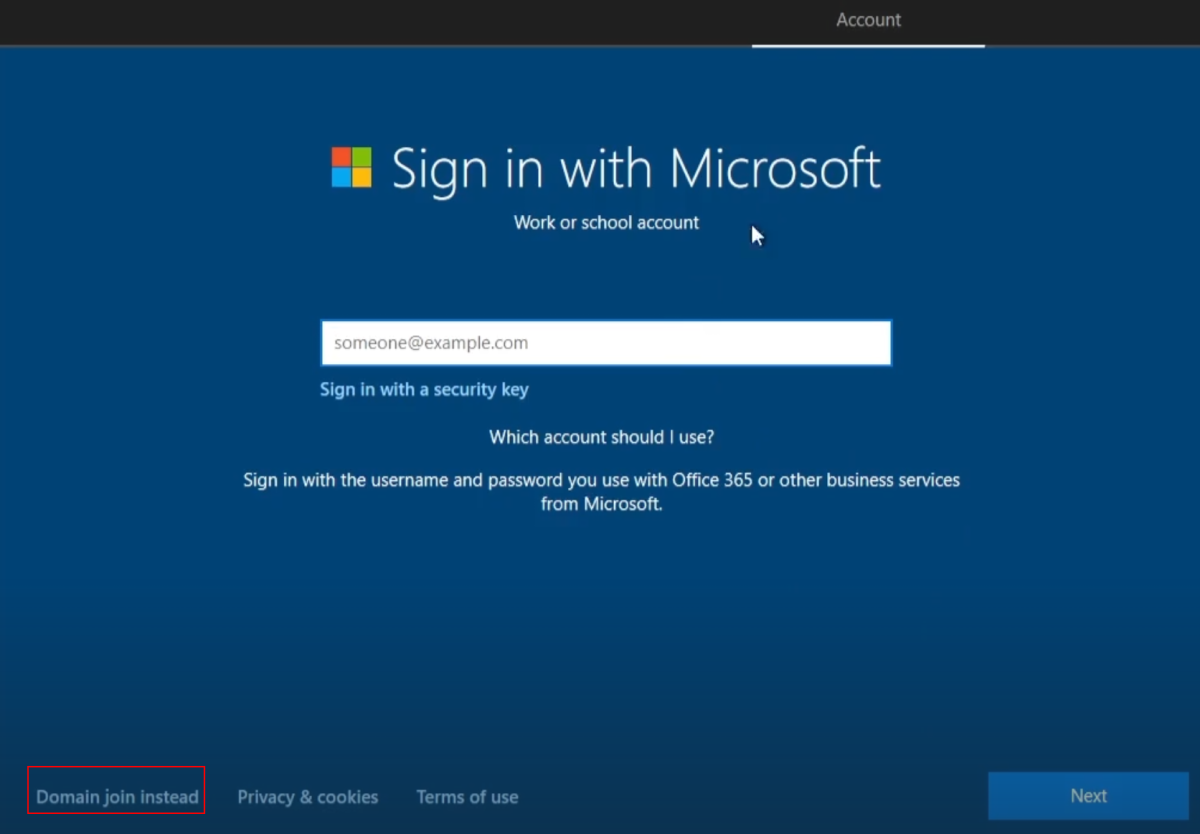
Select your region and keyboard.
- Then, choose Domain join instead. This will allow us to create a local account, rather than an online account.
- Click Next.
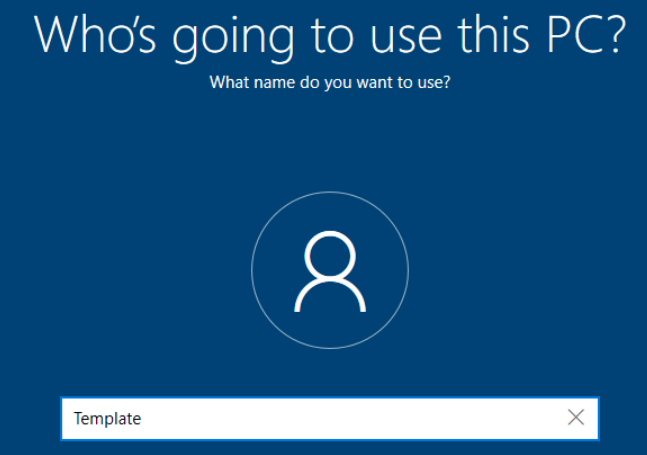
Enter Template and click Next.
Enter a password and set security questions.
- Save the password :) You could put it in a password manager, or you can put it in the Notes field of the VM (that’s a cool feature of Proxmox)
- Template Password: Password1
- Security Questions: Bob
- Note: this “Template" account will be used (cloned) to set up the clients.
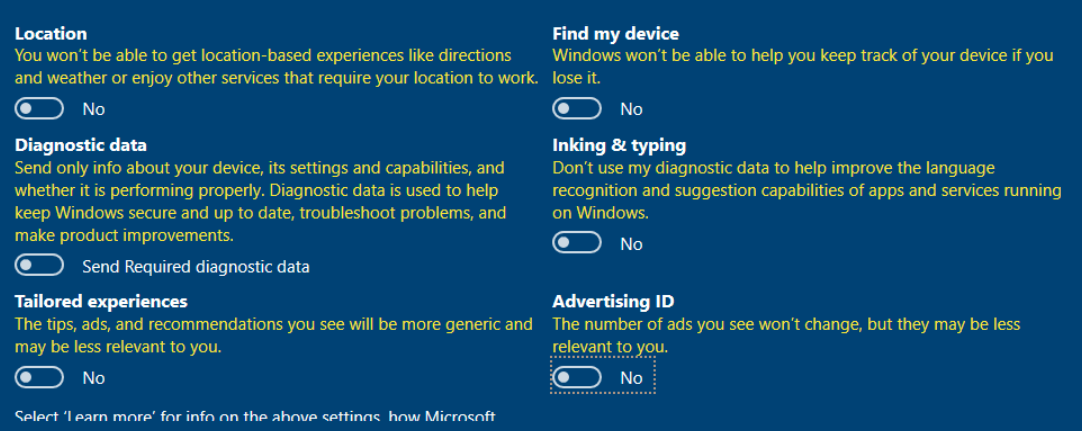
Turn off all the services.
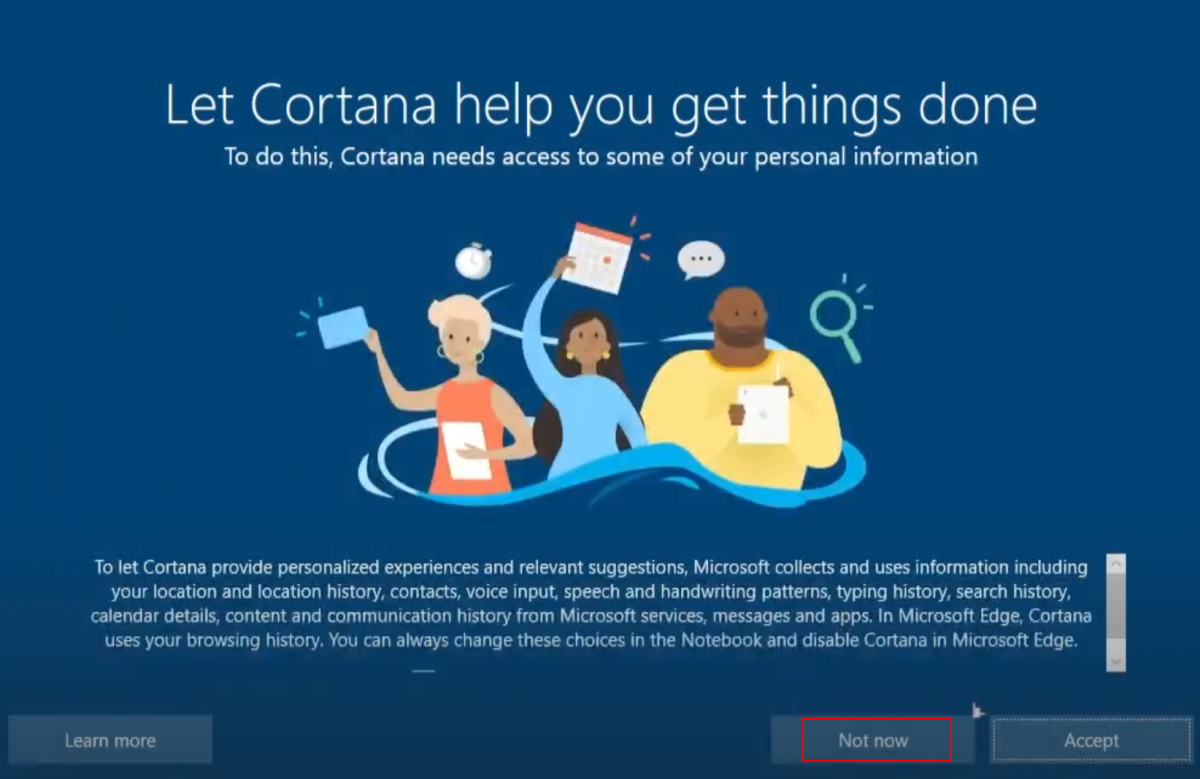
Choose Not now for Cortana
Windows will now complete the installation process. This may take a few minutes.
Sysprep the Template
Sysprep (System Preparation) prepares a Windows client or Windows Server installation for imaging. Sysprep can remove PC-specific information from a Windows installation (generalizing) so it can be installed on different PCs. When you run Sysprep you can configure whether the PC will boot to audit mode or to the Out-of-Box Experience (OOBE).
Log into the system using the template credentials and open a PowerShell terminal as administrator.
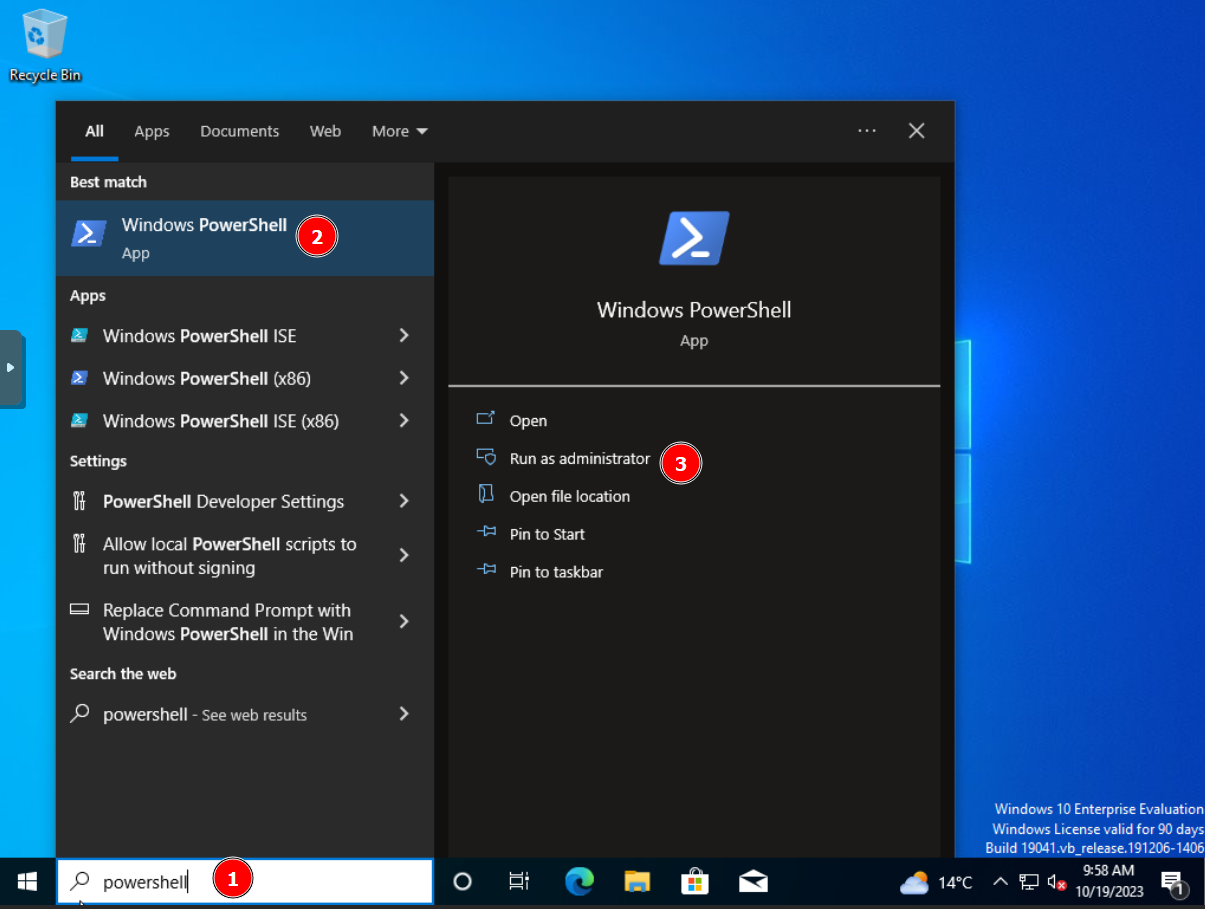
- Run the command:
C:\Windows\System32\Sysprep\sysprep.exe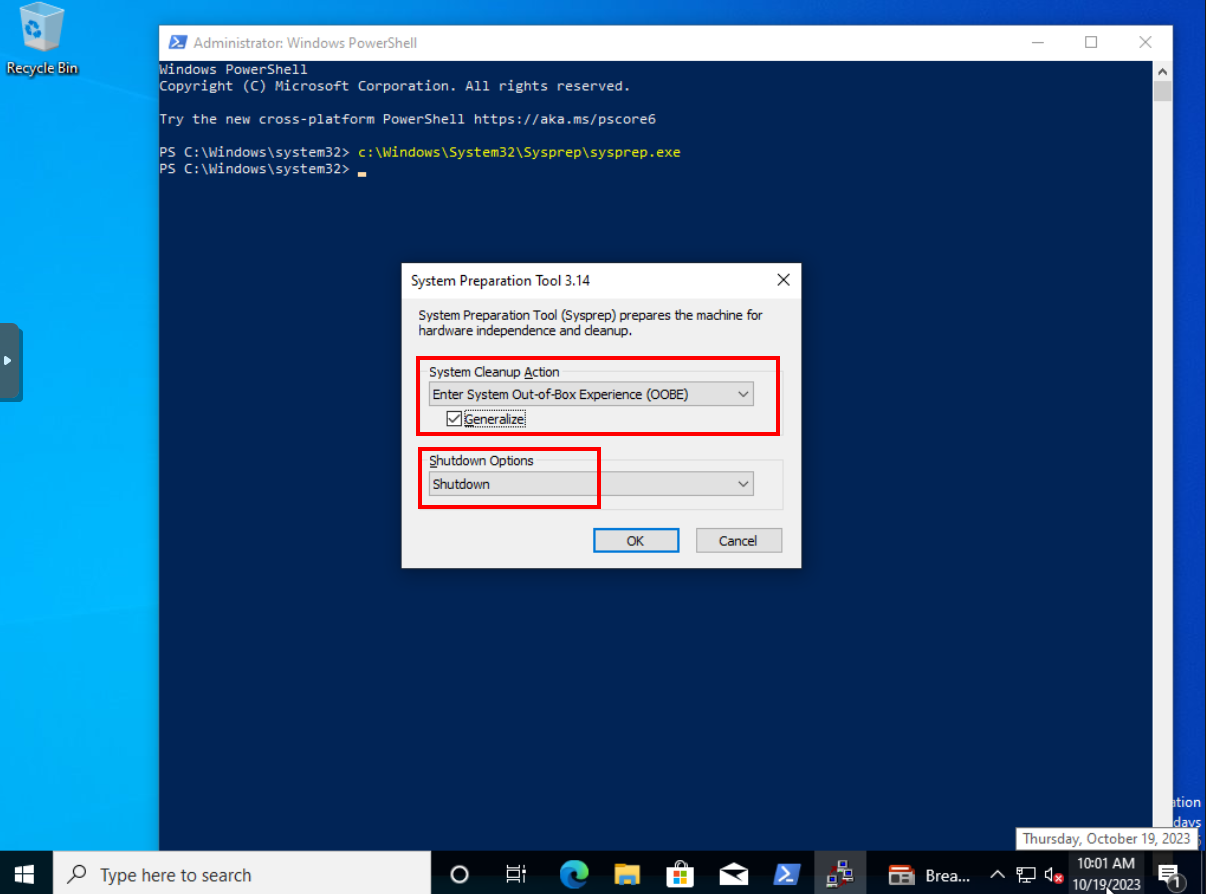
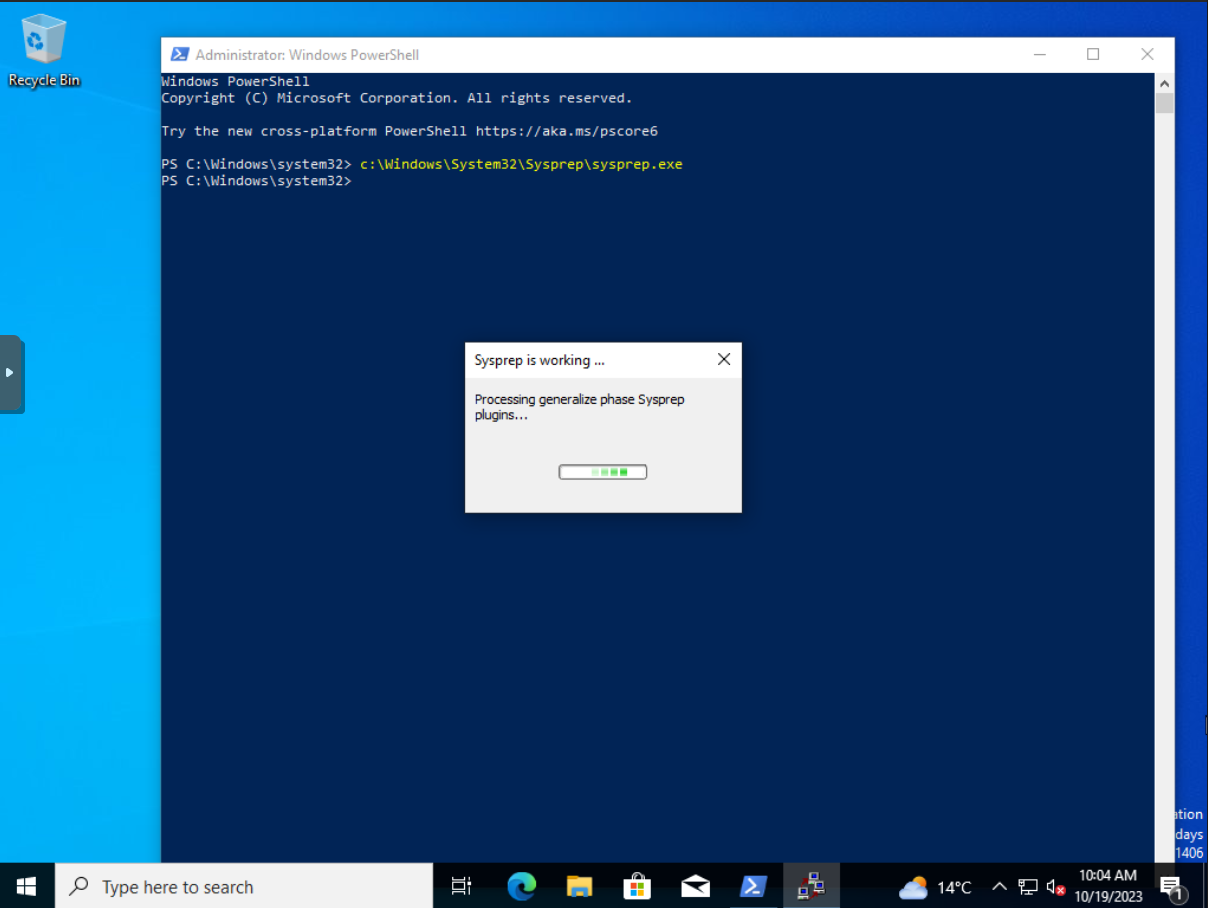
Click OK. Let the sysprep process run to completion. The VM should shutdown.
Convert the VM to a Template
- Go to Proxmox and right-click the Windows 10 Enterprise VM.
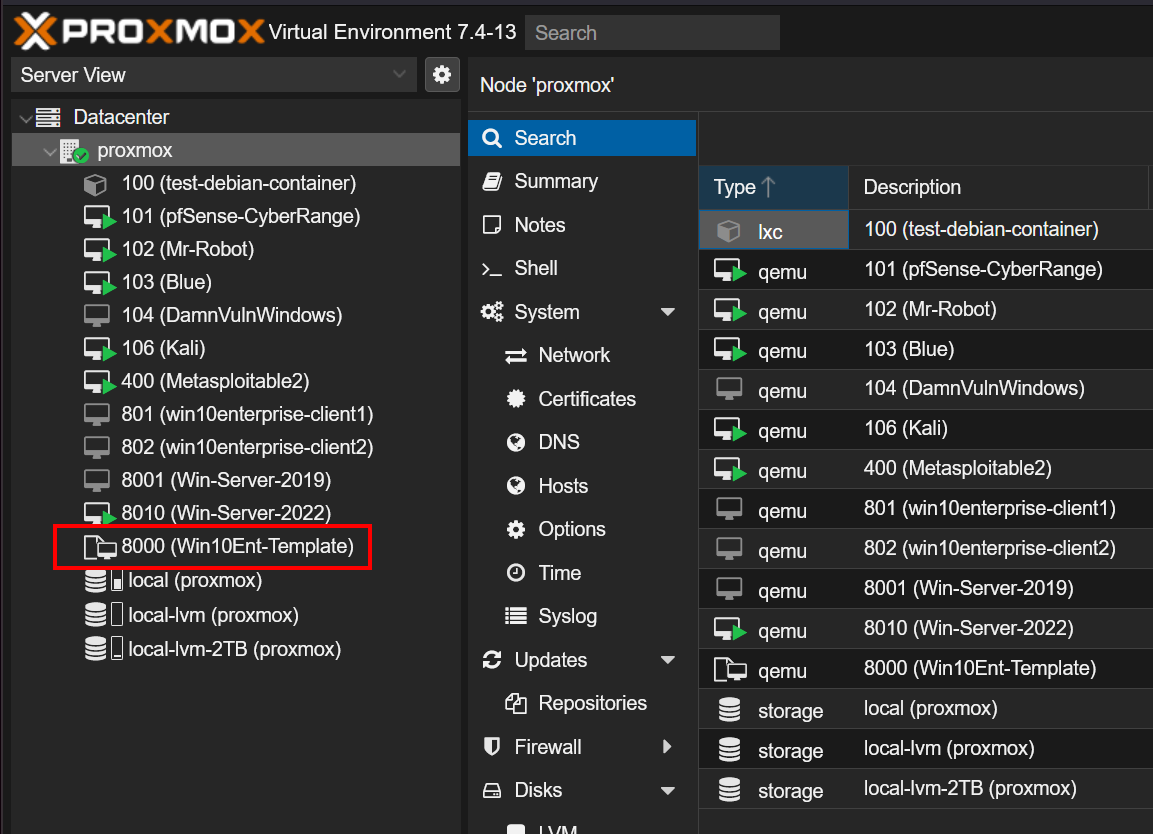
- Choose Convert to template.
- We will use this template any time we want to create (clone) a new Windows 10 Enterprise VM, rather than go through this build process every time.
- You can identify a template by its special icon:
Create the User Machines
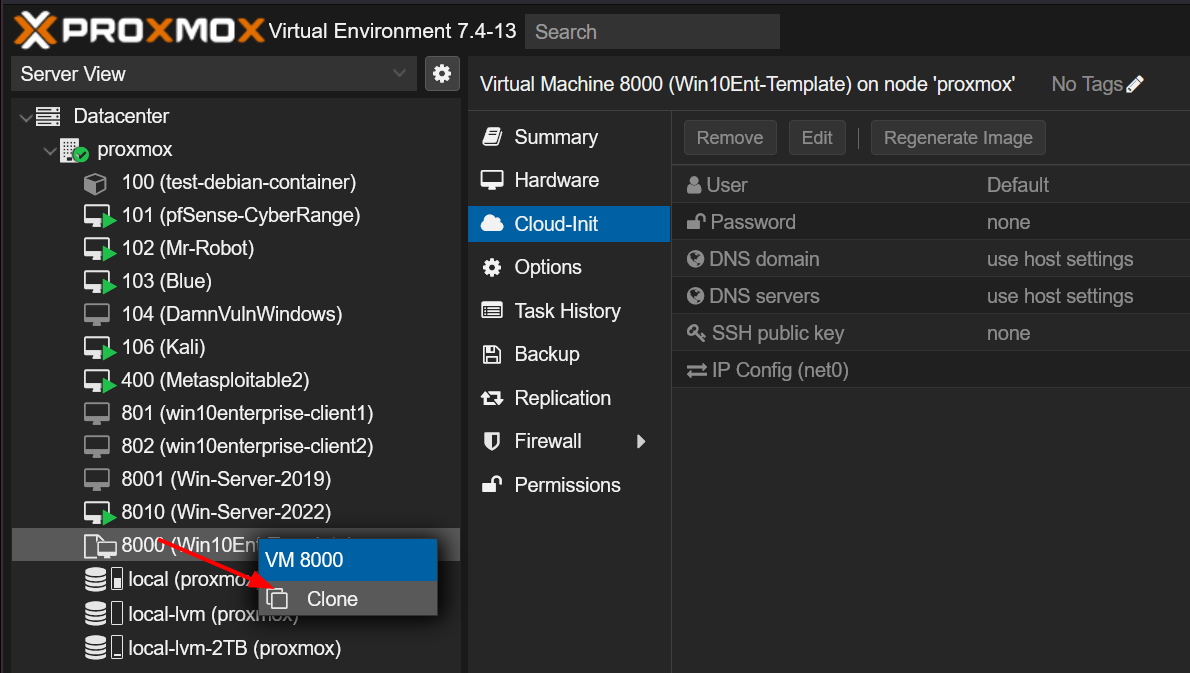
Let’s clone our template.
- Right-click the template and choose clone
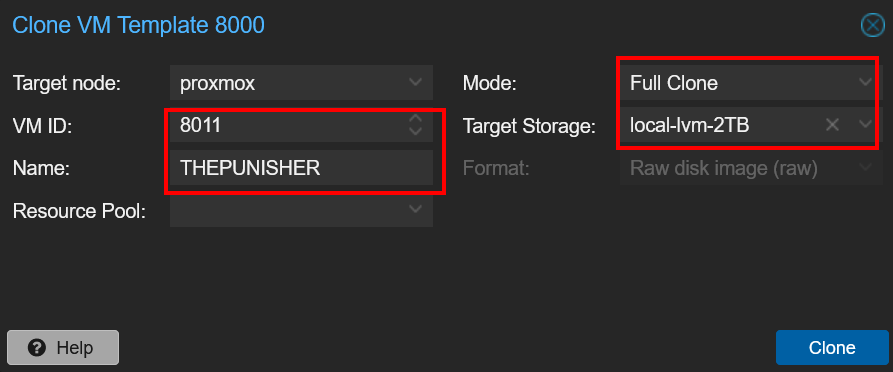
- Name: THEPUNISHER Note: This only names the VM in Proxmox, not the Windows OS
- Mode: Full Clone
- Target Storage: Your VM storage device may be called something different
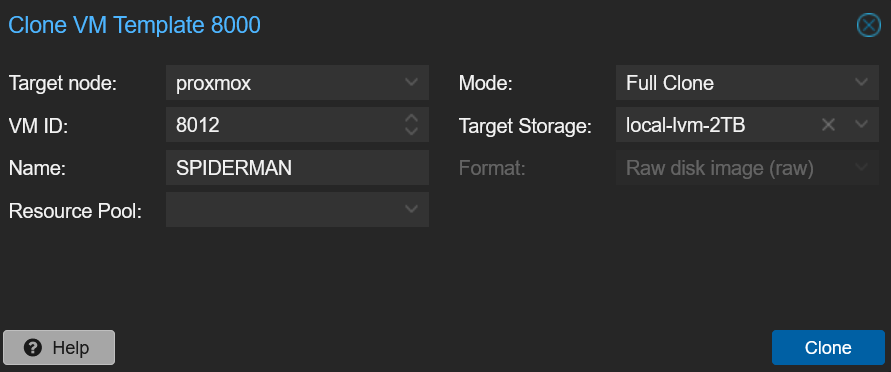
Create a second clone
- Right-click the template and choose clone
- Name: SPIDERMAN Note: This only names the VM in Proxmox, not the Windows OS
- Mode: Full Clone
- Target Storage: Your VM storage device may be called something different
Create Local User Accounts
Start up each machine.
- This initial boot up may take a few minutes, and will repeat the previous installation steps, including:
- Region
- Keyboard
- Windows 10 License Agreement
- Sign in with Microsoft > Domain join instead
- Username:Password
- Security Questions: Bob
- Privacy Settings: Turn them all off
- Cortana: Not now
Local user account for THEPUNISHER:
- frankcastle:Password1
Local user account for SPIDERMAN:
- peterparker:Password1
Rename each machine to THEPUNISHER & SPIDERMAN
- Open the Start Menu and click the Settings icon.
- System > About > Rename this PC
- You can reboot and check it has been renamed properly
Shutdown both Windows 10 clients.