0xBEN’s Building the Active Directory (AD) Lab Guide
This section is based on 0xBEN’s Building the Active Directory Lab.
Similar to previous sections, please review and follow 0xBEN’s guide.
Reconfigure an Existing AD Lab
In my example, I will use an existing Active Directory (AD) Lab, from The Cyber Mentor’s Practical Ethical Hacking Course. In that course, Heath Adams carefully walks you through the process of downloading, installing and configuring an AD Lab, consisting of a Windows Server 2019 Domain Controller, and two Windows 10 client machines.
My goal is to transfer my existing AD Lab to the new subnet: VMnet4
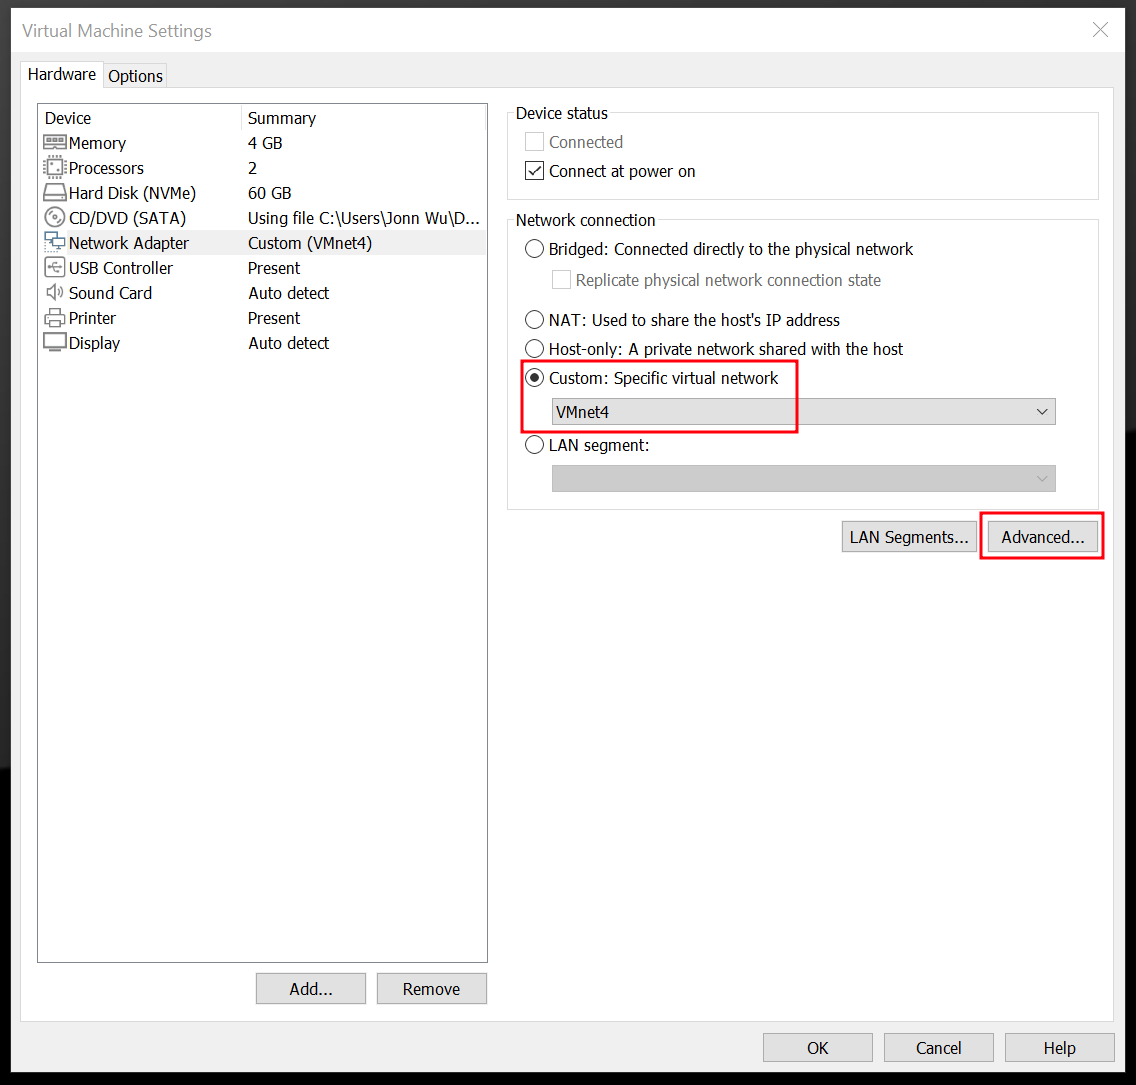
Assign a Static IP to the Domain Controller (DC)
In VMware, open the Network Adapter settings:
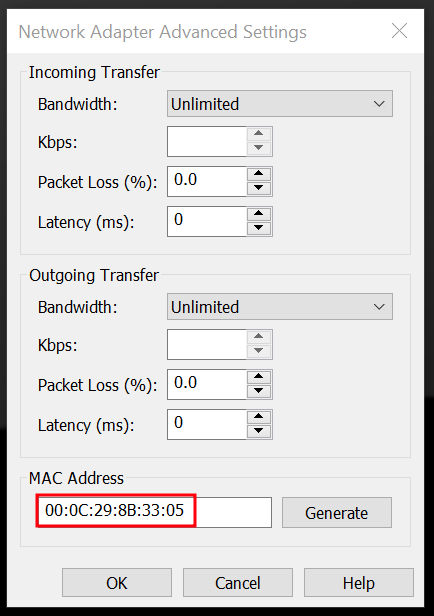
- go to Advanced, and copy the MAC address - you will need this later in pfSense
- Change the Network connection from NAT to Custom: Specific virtual network: VMnet4
Login to pfSense, and go to Services > DHCP Server
- Choose AD_LAB and scroll down to the bottom. Click Add
- Fill out the details with your AD’s MAC address from above
- Enter 10.80.80.2 as the IP address
- Click Save and Apply Changes
Configure DHCP Settings on AD_LAB
Login to pfSense, and go to Services > DHCP Server
- Choose AD_LAB and fill out the fields as shown below:

Check the Domain Name and Domain Search List entries.
If starting an AD Lab from scratch, yours could look like this (or whatever you choose):
ad.lab ad.lab;cyber.range
I am using an existing AD Lab from TCM’s PEH course, so mine looks like:
MARVEL.local
MARVEL.local;cyber.range

Click Save and Apply Changes.
Install the Operating Systems etc
In my pre-existing AD Lab, I changed the Network Adapter’s “Connections” for the two Windows 10 clients to VMnet4.
Test Pings Between 3 VMs and Internet
Success?
Kali, AD Attacks, and Subnets
Note: Some attacks require Kali to be on the same LAN as the targets. To change Kali’s network configurations, do the following:
- Stop the VM
- Go to VMware’s settings for Kali VM
- Change the network adapter to be on the AD_LAB LAN
- Start Kali again
** LLMNR Poisoning and SMB Relay attacks work with Attacker/Kali machine on a different subnet ** IPv6 (mitm6) attack requires Attacker/Kali machine on the same subnet
Let me know what you experience too - send me a tweet (below). I’m interested to see how this affects other attacks too.
Congratulations - You now have a subnetted AD_LAB - Happy Hacking!
ip3c4c